No MoreApp account yet? Sign up here.
This feature is available in the Branch, Tree and Forest plan. Visit our Pricing page.
1. Customise the PDF with HTML
Once you have logged into the MoreApp Platform, click on Edit form. When you have finished the form, you can turn on the option Customise the PDF with HTML in the Email tab.
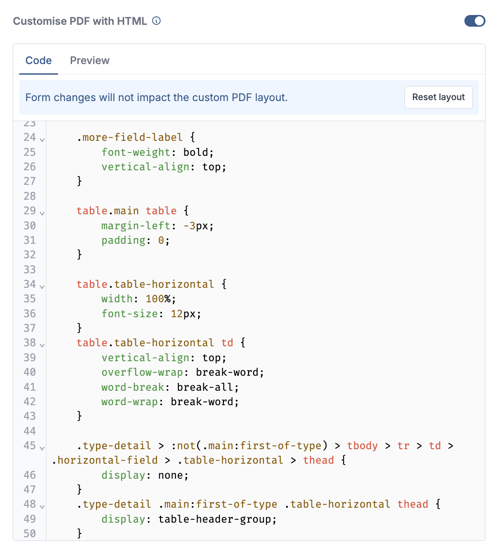
After you activate the option to edit the report via HTML, modifications in your form are not updated automatically in the PDF report. When you add a new field to your form, manually add the field in the PDF report using HTML code or click on Reset layout. MoreApp will update the new fields in the order of their place in your form.
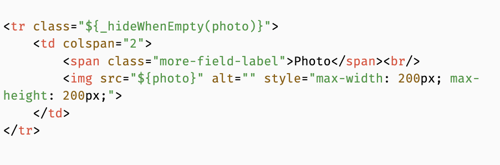
2. Adjust the photo size
Firstly, search in the HTML code (ctrl + f for Windows / cmd + f for Mac) for the Data name of the Photo field. The 200px by 200px represents the current photo width and photo height of the standard generated PDF file. You can adjust the photo size to a size of your liking, for example, 100px by 100px or 400px by 400px.
3. Test the form
Test the new PDF settings by refreshing the App in the folder overview and filling in a form. You can repeat the process until you have found a photo size that fits your personal needs and wants!
Want to stay up to date with our latest tutorials? Go to YouTube and hit the Subscribe button!