How to track Time with the Time-Difference-widget | MoreApp
Track hours effortlessly with the Time-Difference-widget. Easily calculate time differences between start and end times.
No MoreApp account yet? Sign up here.
1. Adjust the form
Once you have logged into the MoreApp Platform, you can select your time tracking form and click on Edit Form.
In order for the Time-Difference-widget to work successfully, you will need to insert 2 Time-widgets in the form. Name each of the Time-widgets with "Start" and "Finish", you can also use whatever name suits your situation.
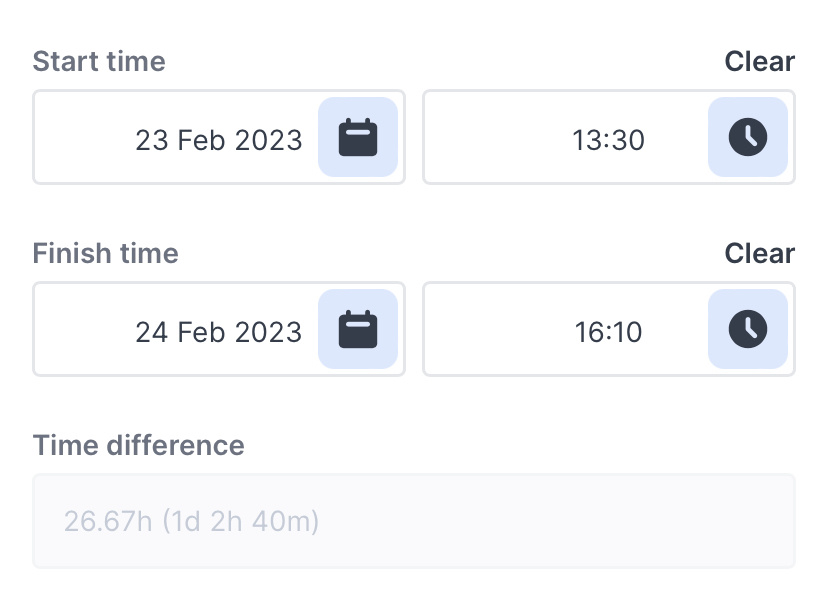
Note: Are your hours spread over two days? Then calculate the hours worked with Date Time-widgets.
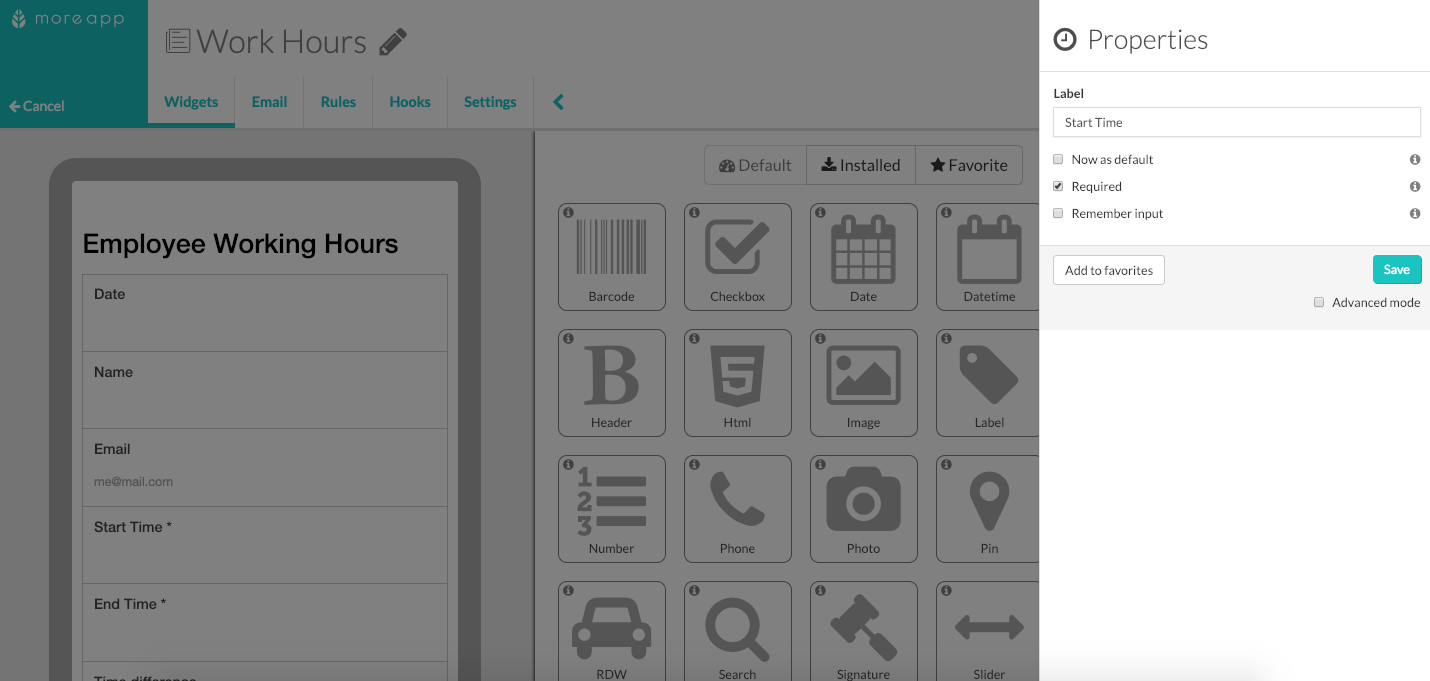
After the 2 Time-widgets are in your form, you are ready to install the Time-Difference-widget.
2. Use the widget
Go to Pro widgets in the Widgets tab and double click on the Time-Difference-widget to add it to your form. Now edit the Time-Difference-widget by clicking on the pencil. Here you can click on Start time and End time to select the Time-widgets you inserted at the beginning.
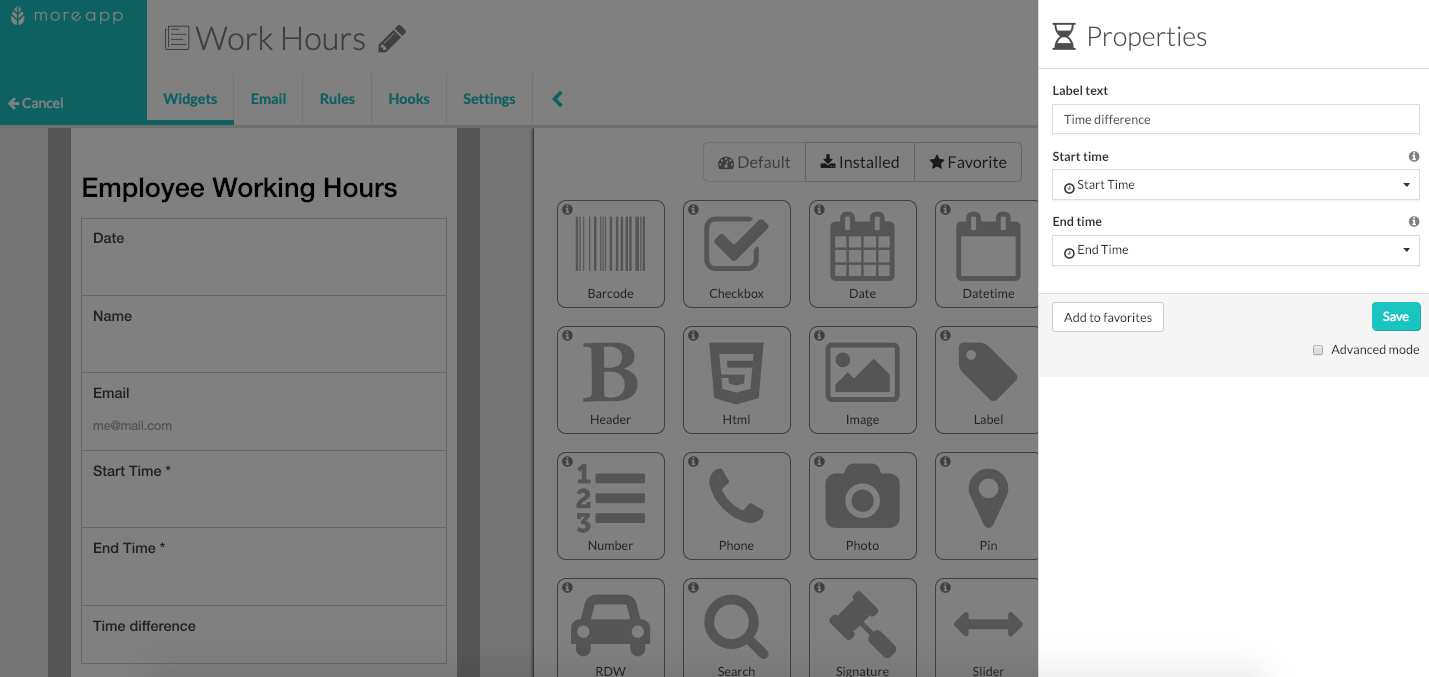
2.1. Add Break time
If you want to add a break between the hours, you can add another widget to the form such as the Number, Slider or Radio-widget. In this example, we will add a Radio-widget.
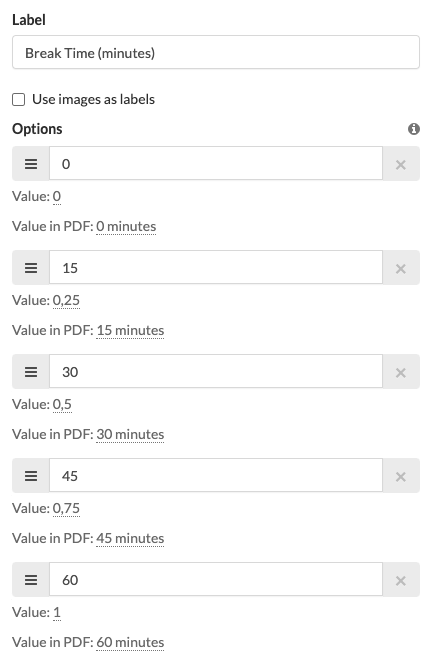
Click on the pencil to edit the widget and add the different break times to the Options. Then, click on the Advanced mode in the lower right corner. The labels ‘Value’ and ‘Value in PDF’ are now visible. In the Value field, you will place a number in a way that MoreApp can calculate.
For example, 0 minutes of break equals 0 in the Value field and 60 minutes of break equals 1 in the Value field. To calculate the correct numbers, for anything between 0 and 60, divide the number of minutes of the break by 60. Example: 15 : 60 = 0,25. Once it is configured, click Save.
After that, you will need to add a Calculation-widget to obtain the final hours worked. Click on the pencil to edit the widget and fill in as Label ‘Total worked hours’. In this case, the Operator is the minus sign, and the Calculation Terms are the Hours worked and the Break time (minutes). Once done, click on Save.
3. How it looks in the App
Date-widgets:
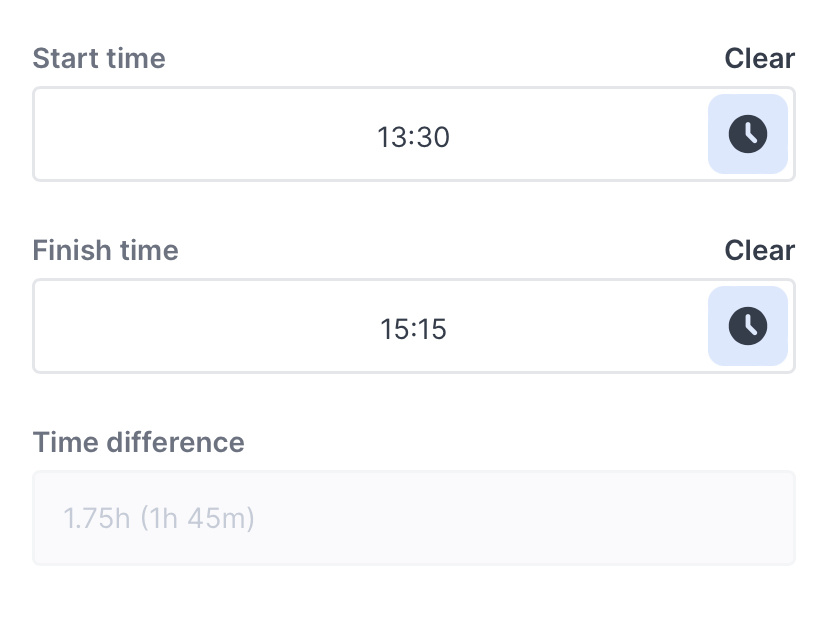
Date Time-widgets:
4. Congratulations!
You have successfully installed the Time-Difference-widget and you're ready to use it in your forms!
Want to stay up to date with our latest tutorials? Go to YouTube and hit the Subscribe button!