No MoreApp account yet? Sign up here.
This feature is available in the Tree and Forest plan. Visit our Pricing page.
1. Create a new role
Go to the User management page in the MoreApp Platform and click on Roles.
Click on + Create role. Give the role a Name, add a description and choose the Role scope. Roles can be created at Account level or at Folders or Forms level. Once this is decided, click on Next.
Then, select the different permissions you want to include for that role. Click on Create to save the configuration.

After the role is created, you will be redirected to the Roles overview page.
If you click on the three dots on the right side of the role, you can choose:
- View: To view the permissions of a custom role
- Edit: To change the permissions of a custom role
- Delete: To delete an existing custom role
2. Permissions
|
Permission Forms |
Explanation |
|---|---|
|
Create forms |
Create a form within a folder you have access to |
|
Edit form |
Edit and publish form |
|
Restore form |
Restore archived forms |
|
Preview form |
Preview the form in the editor |
|
Delete form |
Delete form and related data |
|
Permission Folders |
Explanation |
|---|---|
|
Create folders |
Create new folders |
|
Add form to folder |
Add/move to a folder you have access to |
|
Remove form from folder |
Remove from a folder you have access to |
|
Update folder |
Update name, description and icon |
|
Delete folder |
Delete folder |
|
Permission Submissions |
Explanation |
|---|---|
|
Submit forms |
Fill out forms in the App to create a new submission |
|
View submissions |
View submissions for a specific form |
|
Delete submissions |
Delete submissions for a specific form |
|
Update submissions |
Update submissions for a specific form |
|
Permission Tasks |
Explanation |
|---|---|
|
Create tasks |
Create tasks for a specific form |
|
View tasks |
View tasks for a specific form |
|
Update tasks |
Complete or revoke tasks for a specific form |
|
Delete tasks |
Delete tasks and related data |
|
Permission Administrative |
Explanation |
|---|---|
|
Manage all folders and forms |
Create, view and update all forms and folders |
|
Manage submissions |
View, delete and resend submissions for all forms |
|
Manage tasks |
Create, view and update tasks for all forms |
|
Manage users and groups |
Manage access for all users, invites and groups |
|
Manage data sources |
Create, view, update and delete all data sources |
|
Manage single sign-on |
Manage the configuration for SSO |
|
Manage email domain |
Manage the configuration for your custom email domain and domain verification |
|
Manage billing |
Manage billing information, subscription, and invoices |
|
Manage webhooks |
Create, view, update and delete all webhooks |
3. Example: Manage Tasks
In this example, we create a custom role, at Forms level, for a specific group or user to create, view, update and delete tasks.

After the role is created, go to a specific user or group. Open the Role & permissions tab and select the custom role from the dropdown.
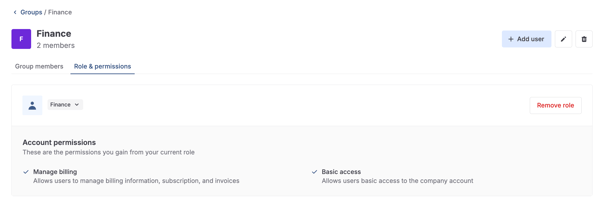
Want to stay up to date with our latest tutorials? Go to YouTube and hit the Subscribe button!