How to Work with the MongoDB Integration | MoreApp
Do you want to store your data in JSON documents using the MongoDB integration? Follow the steps in this Help Center post.
No MoreApp account yet? Sign up here.
This feature is available in the Branch, Tree and Forest plans. Check our plans.
1. Go to your form
Go to the MoreApp Platform and select your form. Click on Edit Form and go to the Integrations tab. Then, click on Add Integration.
 2. Add and configure the integration
Select the MongoDB integration and click on Add.

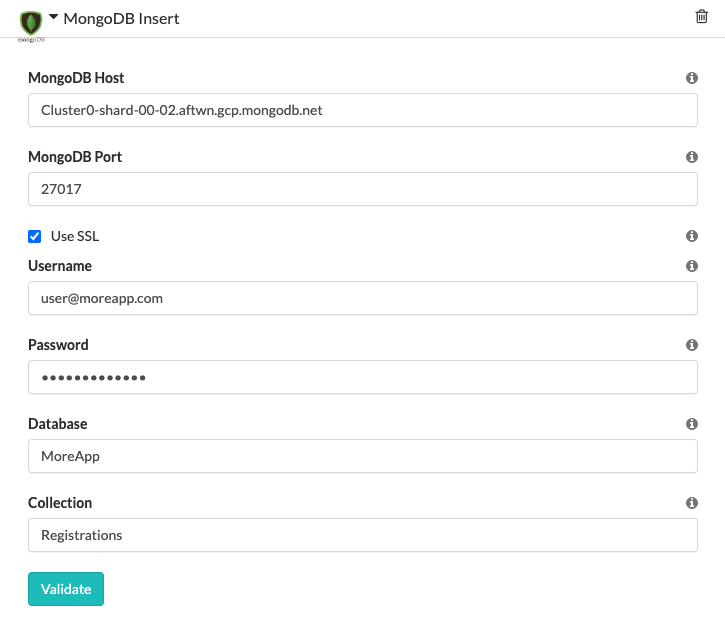
Fill in the following fields:
MongoDB host: Fill in the IP address of the MongoDB host.
MongoDB port: Fill in the port on which MongoDB is listing. Use a standard port (27017).
Use SSL: Check if you want to connect using SSL.
Username: The username of the Mongo user we should authenticate.
Password: The password of the Mongo user we should authenticate.
Database: The designated database for saving the submissions.
Collection: The collection in which you want to save the submissions.

Note: Make sure:
- The user has the privilege to 'read and write to any database'.
- You whitelist MoreApp's IP address: 35.204.176.215
Click on Validate to save your changes. Click on Save & Publish and start sending submissions!
Want to stay up to date with our latest tutorials? Go to YouTube and hit the Subscribe button!