No MoreApp account yet? Sign up here.
1. Add and configure the integration
Go to the MoreApp Platform and select your form. Click on Edit form and go to the Integrations tab. Click on Add integration. Select the WebDAV integration.
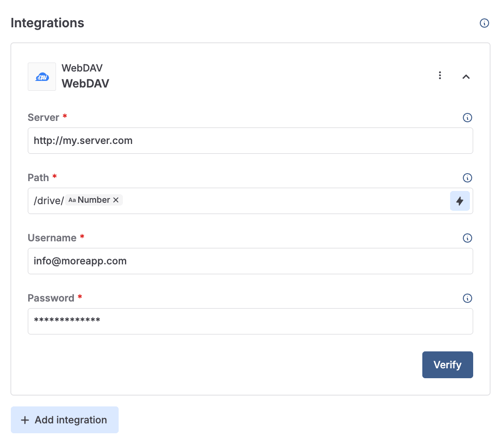
Fill in the following fields:
- Server: Add a URL to your server
- Path: Add the path where the PDF will be stored
- Username: add the username to use when authenticating to the WebDAV server
- Password: add the password to use when authenticating to the WebDAV server
Click on Verify to save your changes.
Note: If you have more than one PDF template configured in the Email tab, only the first one will be uploaded to WebDAV.
Click on Publish and start sending submissions!
Want to stay up to date with our latest tutorials? Go to YouTube and hit the Subscribe button!