No MoreApp account yet? Sign up here.
A task is a workflow between two users who fill in the same form. This function allows you to pre-fill some fields of a form in our Platform and assign it to another user to finish or validate the tasks.
1. Tasks
Log in to the MoreApp Platform and select the form you want to create the task for. Go to the Tasks tab and click on Create task.
Note: The Pin, Signature, Catalogue, Drawing and File fields are not supported.
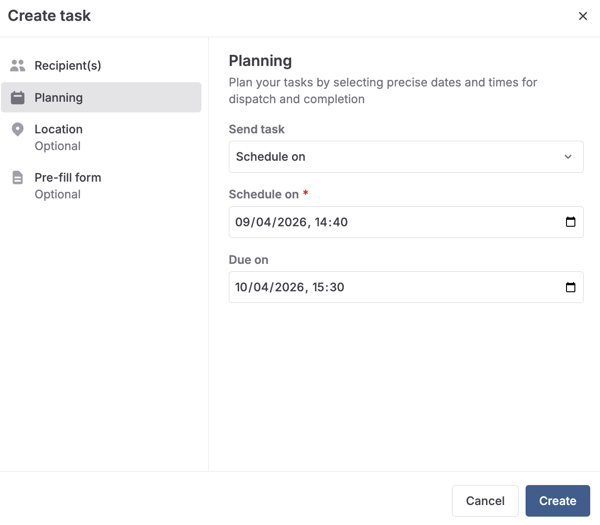
2. Configure the Task
In the Recipient(s) section, assign the task to one or more users. You can select users separately or you can select a group.
Note: The selected users or groups need to have access to the form first.
Add a message with a short explanation for the user who receives the task.
Then, go to Planning and choose when you want to send the task and select the due date for this task. If you select the option ‘Schedule on’, you will be able to select the date and time when the task is sent. For the due date, you can also specify the day and the hour.
If desired, you can go to Location and select a location for this task. This will help the users to know which tasks need to be performed at each location. Read this article for more details.
As the last step, you can pre-fill the form if needed.
Once everything is ready, click on Create.
Note: If the form is only used for tasks and you don't want the users to fill in this form without a task, you can Hide the folder in the App. This setting can be configured in the Platform.
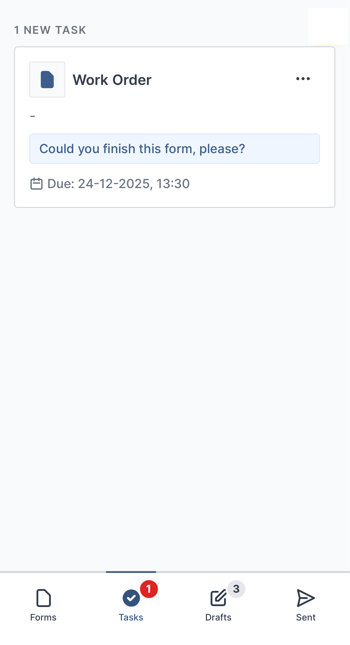
3. Receive a push notification
The assigned users receive a push notification on their phone or tablet. There is a Tasks section, in the App menu, where the tasks can be found.
The user can view the task's assignment date and its due date for task completion.
Note: Users will get the notification from the App, not in the email.
If you start filling in the task and you want to continue later, you can click on Save & Close. The saved tasks, that are in progress, will be stored on the Tasks tab.
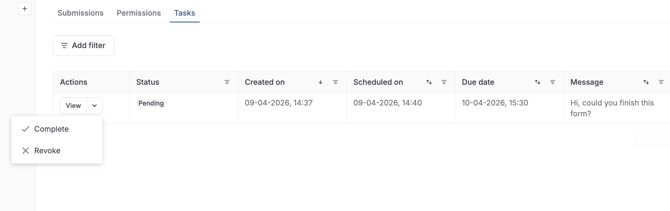
4. The status of the task
In the Tasks tab, you can also check the status of the task. Under the Status column, you can see if the task was completed or if it's still pending. This means the task still needs to be done.
By clicking on the arrow under the Actions column, 2 options will be displayed: Complete or Revoke. If you click one of these options, the task will be closed and removed from the App. This means that any outstanding submissions or drafts based on this task will be deleted.
The distinction between Complete and Revoke is simply useful for your business processes, allowing you to identify the status of the closed task.
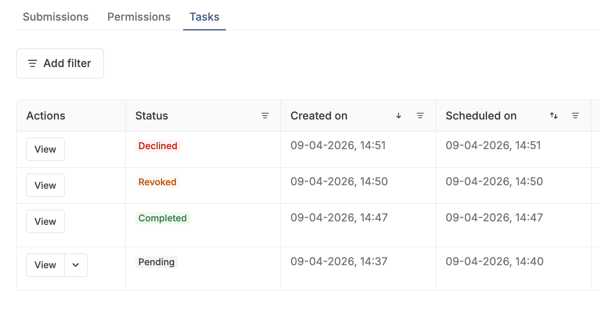
5. Status Colours
In the Tasks tab, it is possible to see the following Status colours:
Green = Completed
Grey = Pending
Red = Removed from the App
Orange = Revoked from the Platform
6. Congratulations!
You have successfully sent a task to one or more users! Use our free API to create an integration between MoreApp and the tools you use. Take a look at our Developer Docs for more information.
Note: Every API which is not documented in our API documentation can be changed at any moment.
Want to stay up to date with our latest tutorials? Go to YouTube and hit the Subscribe button!