How to Import Data using a URL | MoreApp
Import a JSON file with customer or product information to use in your forms.
No MoreApp account yet? Sign up here.
1. JSON file
In order to have your data imported to your work order, you need to have a JSON file in the correct format. You can export this type of file from another system or create it manually.
Pay attention:
- Every object needs an id in lowercase letters. These numbers need to be unique.
- You can add as many 'columns' as you like, by adding key-value pairs. Every column should have a unique name.
Take a look at the following example:
[ { "id": 1, "name": "Bob", "company" : "MoreApp" }, { "id": 2, "name": "Alice", "company" : "MoreApp" }]
To give you an idea, this is identical to the following Data Source in Google Sheets (or Excel):

Note: Do you want the data to be displayed in chronological order in your form? Start with number 111 in the id column of your data source.
2. Add a Data Source
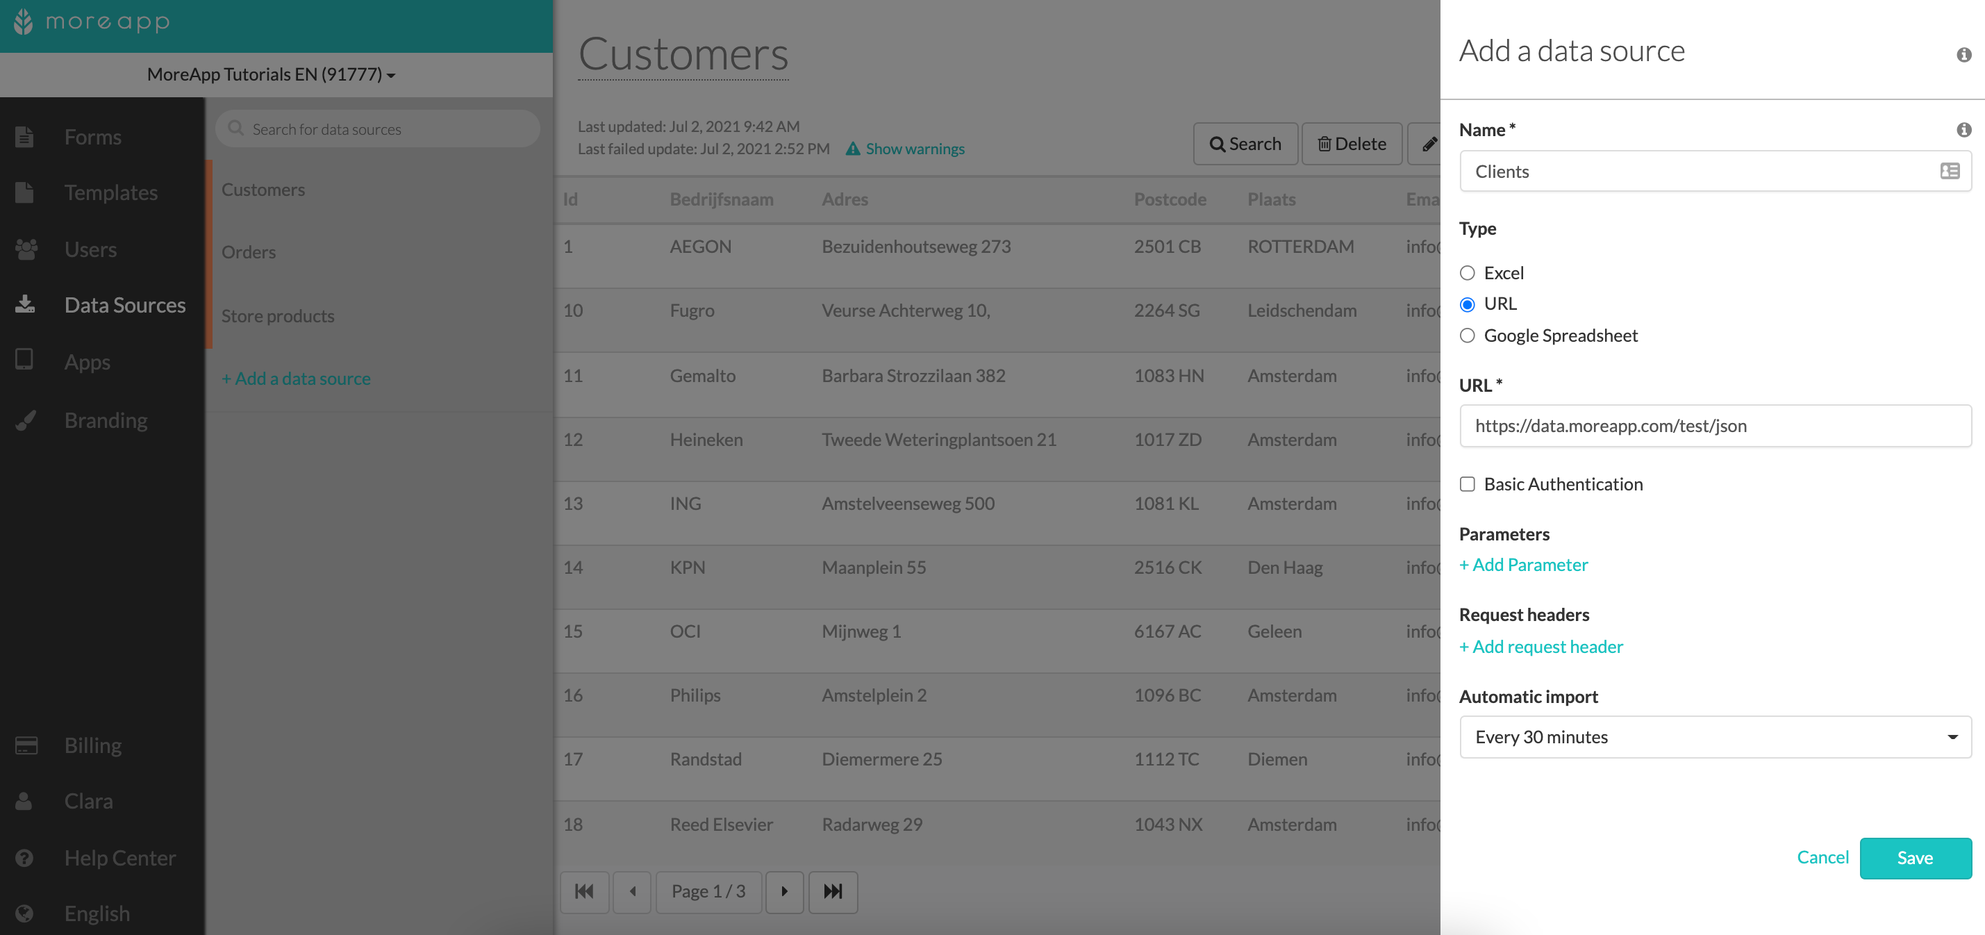
Once you have your URL ready, go to the MoreApp Platform. Open Data Sources and click on + Add a data source. Insert a name for your new data source. Select URL as Type and enter the URL.
Note: You need to add the URL to the actual JSON file. Make sure you do not use the link to an HTML page that shows a preview of the JSON file.
If the URL needs basic authentication you can fill in the username and password. Optionally, if your URL requires parameters or request headers you could add these as well. HTTP headers let the client and the server pass additional information with an HTTP request or response. An HTTP header consists of its case-insensitive name followed by a colon (:), then by its value. Whitespace before the value is ignored. (12 kB)
Select the desired Interval under Automatic import. It ranges from every 15 minutes to every week. Click on Save.

3. Import your data
After adding the data source, you'll need to import the data by clicking on Schedule import in the Data Sources tab. Now add it to your work order app, by selecting the form and clicking on Edit Form.
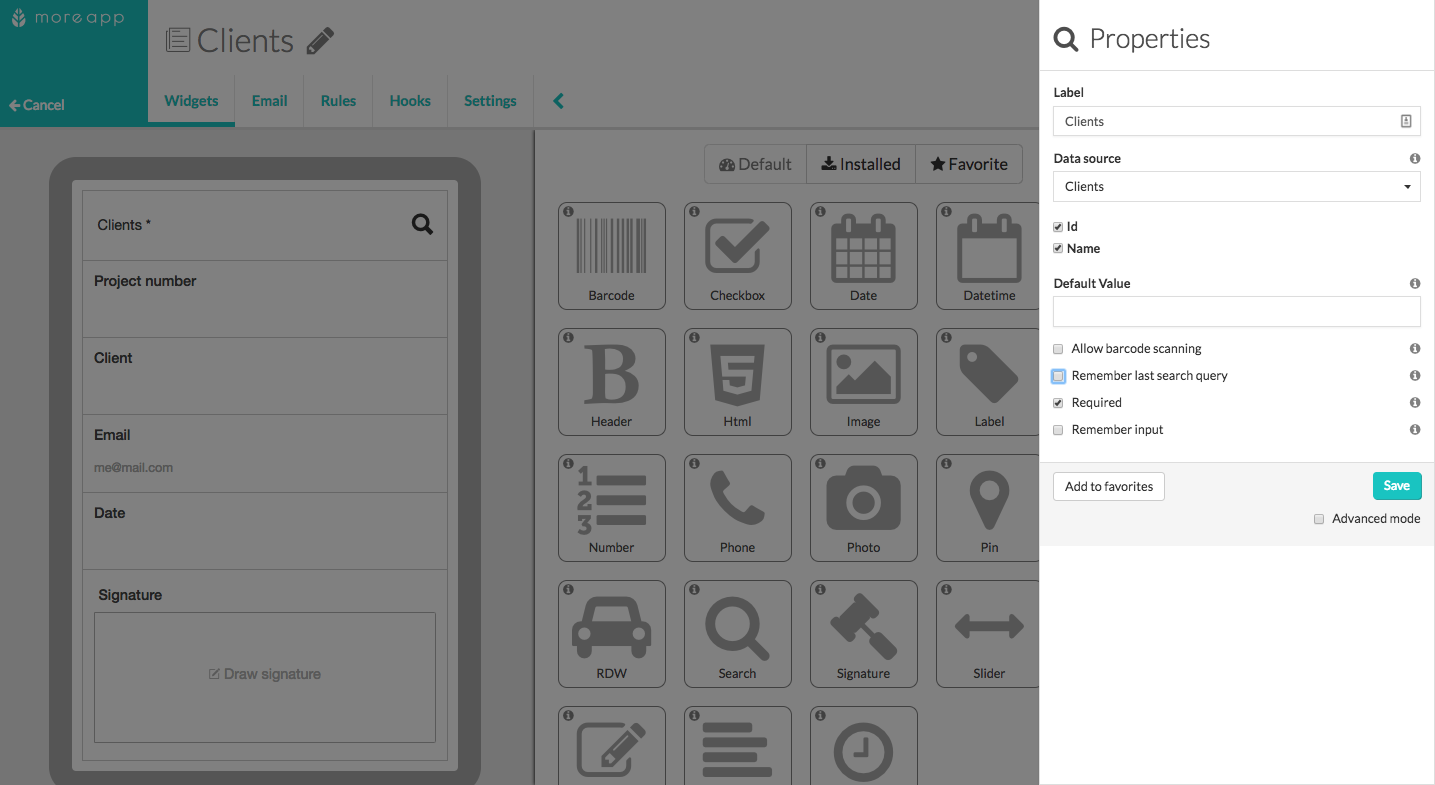
Go to the Pro widgets tab and add a Search-widget to your form, so the user can search through the data. Click on the pencil to edit the Search-widget. You can name the widget under Label. Select the data source you just created.
Once you select the data source, click Save and then lastly click on Save & Publish.

4. Congratulations!
You have successfully imported data from a URL. The data is now automatically updated and available in your form!
Want to stay up to date with our latest tutorials? Go to YouTube and hit the Subscribe button!