No MoreApp account yet? Sign up here.
1. Import data
First, import a data source. There are 3 ways to import data and use it in your digital form:
2. Settings of the Search field
Go to the form and hit Edit Form. Go to the Fields menu and add the Search field to your form. Click to edit the field.
There are a few settings available in the properties of the Search field:
-
Label: Here you fill in the name of the field.
-
Default search query: Here you can add a value that is already set when you start searching.
-
Filter: Filter the results using the value of other fields in your form, so that only the imported data that meets the filter is visible.
-
Query colours: Apply colours to data source entries that match the configured queries. We explain this functionality in step 4.
-
Required: If activated, this field must be filled in to be able to send the form.
-
Remember input: Activate this to remember the last input of the user on that device for the next registration. If you set a default search query as well, remember input will not function.
-
Allow barcode scanning: Selecting this allow you to scan a barcode so a product will show up. We explain this functionality in step 5.
-
Remember last search query: Check to remember your last search query. The search query will be executed automatically.
3. Filter the data
You can filter the data in your Search field to avoid showing unnecessary information to your users. When filling in the form, you will only see the selected item, including its details.
3.1. Filter on Username
The Username is the email address of the user who has access to this specific form. Filtering on Username will allow you to only show relevant information for this user.
Therefore, your imported data source needs to include a column with the email addresses of your users who have access to this form.
3.2. Filter on other Search fields
With this option, you can filter on a value from a different Search field.
Example: You can add a list of workers and their respective companies to the first Search field, and use the company name as a filter for the second one. The company name should be included in both data sources.
Note: For the filter to work the item must be included in the imported data source.
3.3. Filter on other Fields
Use any other field of the form to filter the Search field data.
Example: Add a Text field for a client name, you can filter in your Search field on the client name. Keep in mind, your data source needs to include a column with client names.
This way, you can also find the details of a client by using the receipt number of the order for example.
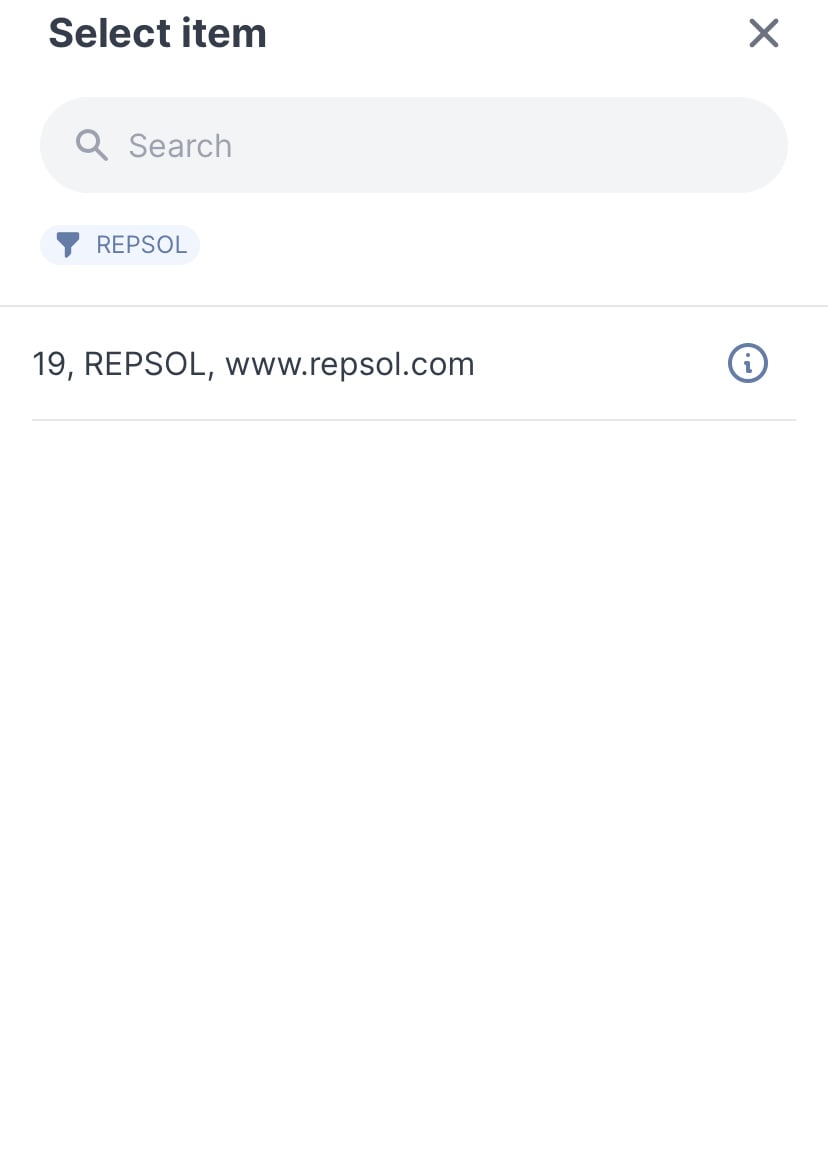
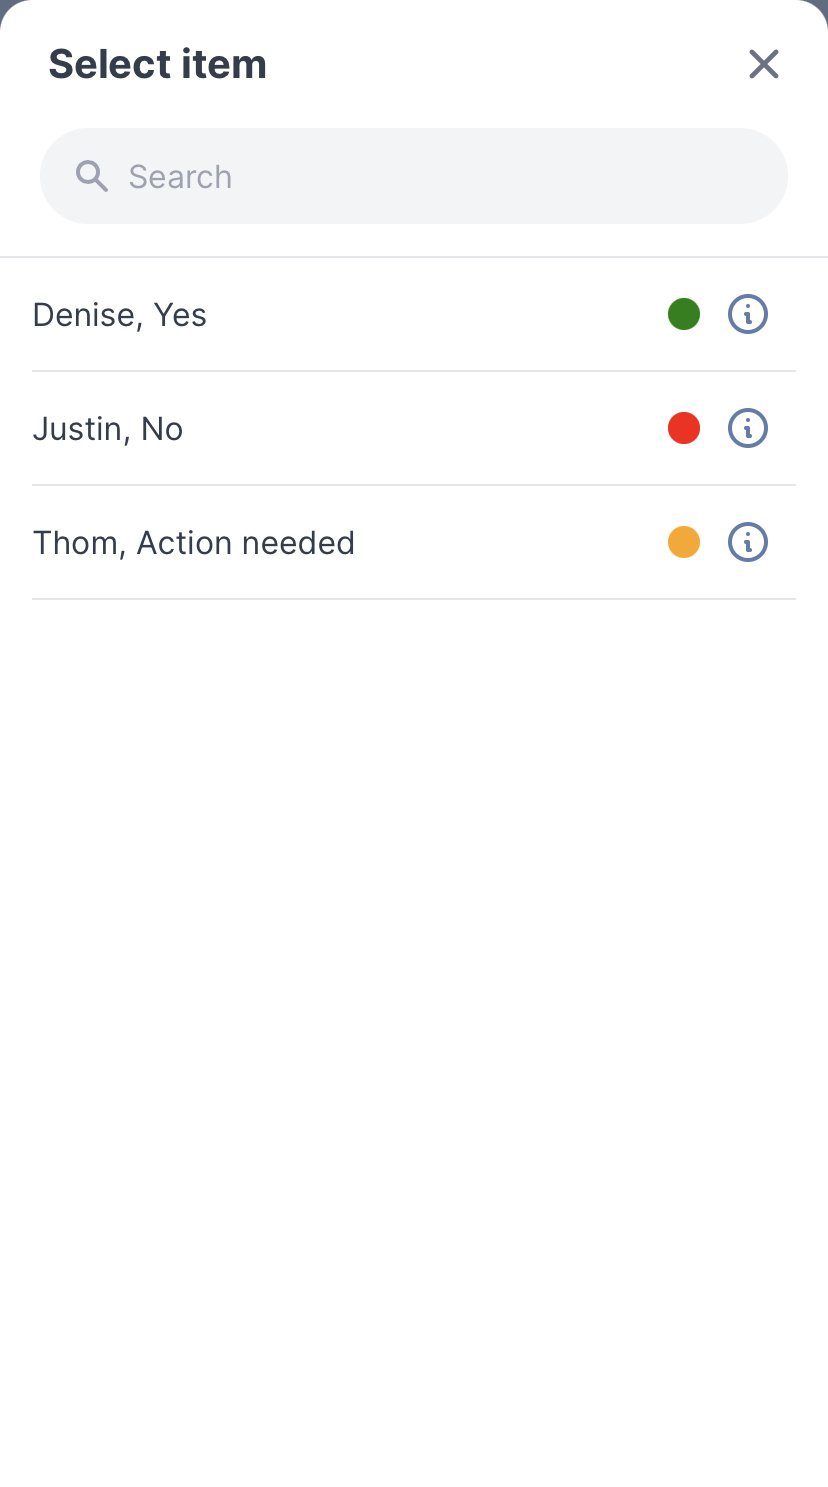
4. Add colours to the database
You have the option to assign colours to the imported data in order to speed up the searching process on the Search field. In the settings of the field, you will find a section named Query colours. Now, click on Add query colour.
Select the colour you would like to show and write the query you want to give this colour. You can also type the HEX code of the colour to find the exact colour you need.
Make sure you write the query exactly as in the database, or no colour assignment will be assigned.

You can add a maximum of 20 colours. To do so, click on Add query colour and, by default, a colour will appear every time you click. You can change that colour and choose the one you prefer.

Now, when you fill in the form and click on the Search field, the database will appear with the assigned colours.
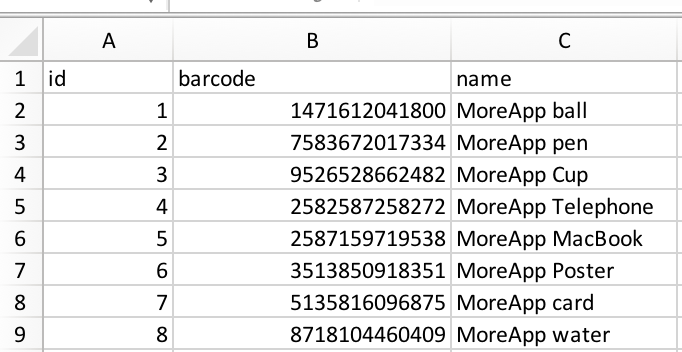
5. Add barcodes of a product
Optionally, you can also scan a barcode so a product will show up.
In the Excel, Google sheets or URL you can insert the barcode of different products. For example:
Select Allow barcode scanning in the Search field.
When you click on the barcode in the Search field in the App it will look like this:

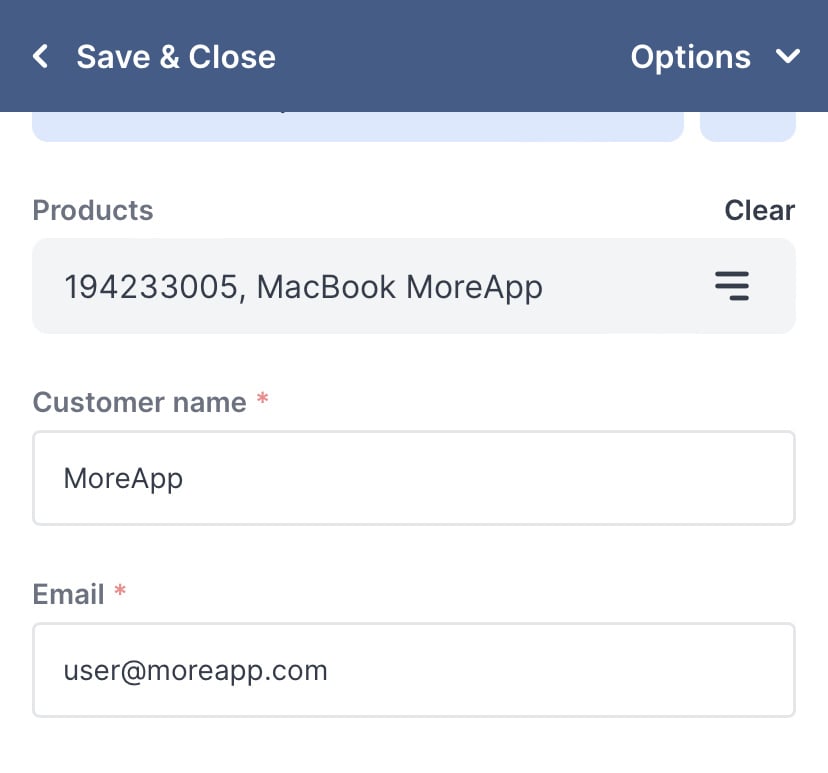
After you scan the barcode, it will look like this:
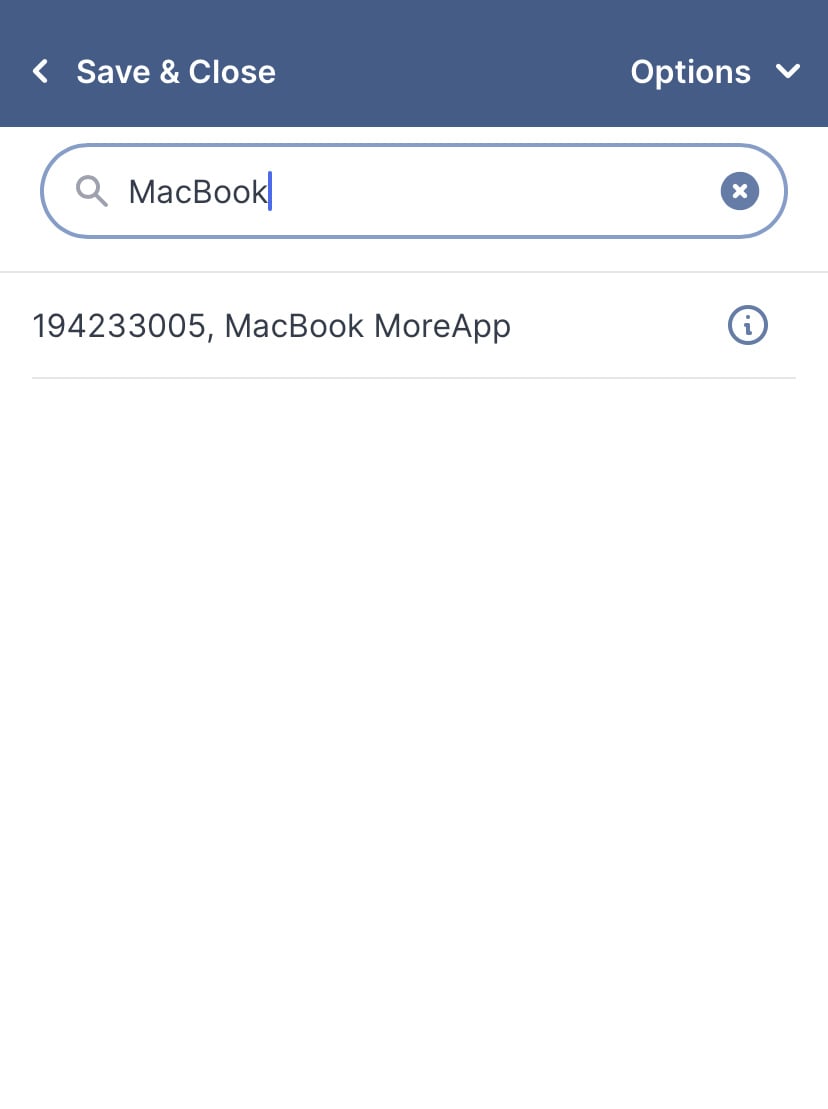
You can also click on the Search field and fill in the name or the barcode of the item you are looking for:
6. Searching in the database
Once you open the form in the App, you will be able to search for the items in the database to easily fill in the form.
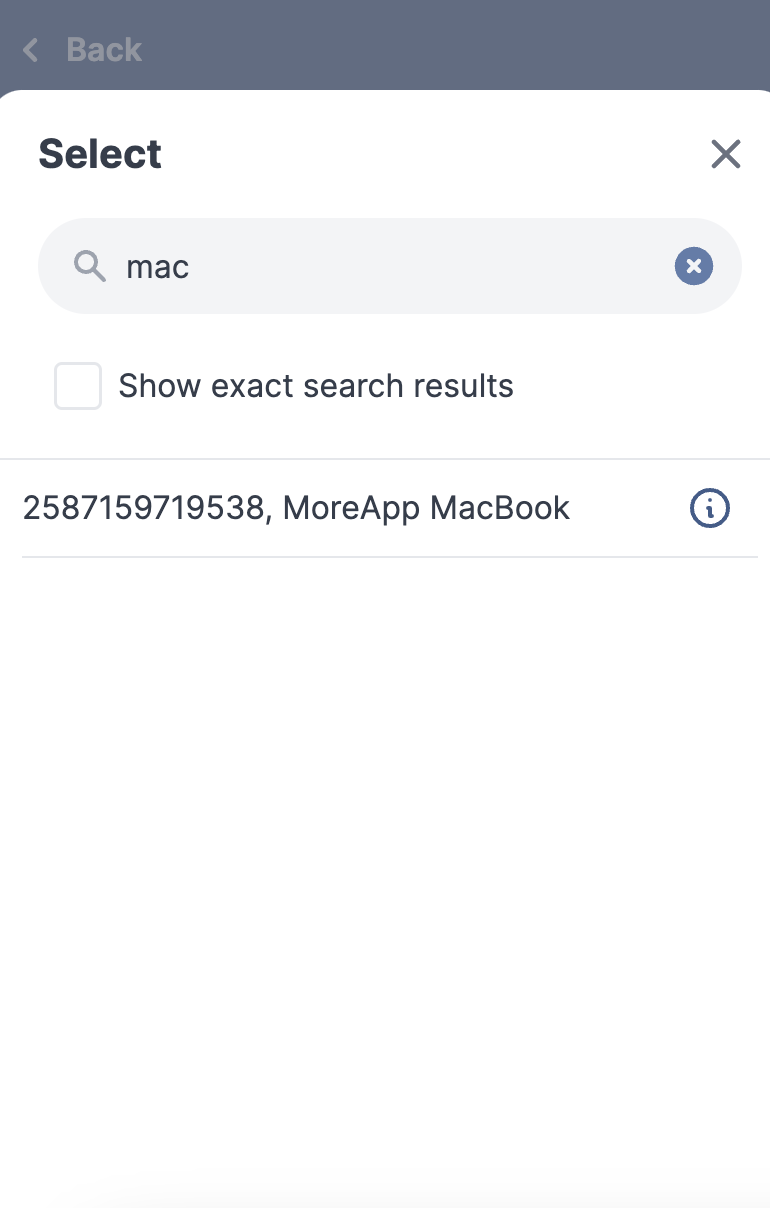
You can type the name of the item you are searching for. If you want to see only the results that match with this exact term, you will need to click on the option Show exact search results. If this option is not checked, the field will show results that might match your search keyword.
7. Edit the Search data in the PDF or Word integration
If you want to add specific fields from your Search field to your report, you can adjust the configuration in the PDF or Word integration.
Note: This feature is available in the Branch, Tree and Forest plans. Check our plans.
7.1. PDF
By default, the PDF generator adds all the columns of your database to the report. If you want to delete some of these details, you can remove the code.
Open the code view of the PDF and delete the sections of the Search field you do not want to include. Check how to delete a line from the PDF for more information.

7.2. Word
When using the Word integration, you will configure the report using placeholders. To add the data of a Search field you will need to choose the appropriate placeholder.
To find these placeholders, go to the Data name of the Search field. The data name plus the name of the column with the information you want to obtain will create your placeholder. Here is an example: If the Search field is called “Company” and you want to get the name of the company, the placeholder will be ${company.name}.
For more details about the Word configuration click here.
Want to stay up to date with our latest tutorials? Go to YouTube and hit the Subscribe button!