No MoreApp account yet? Sign up here.
1. Create the database
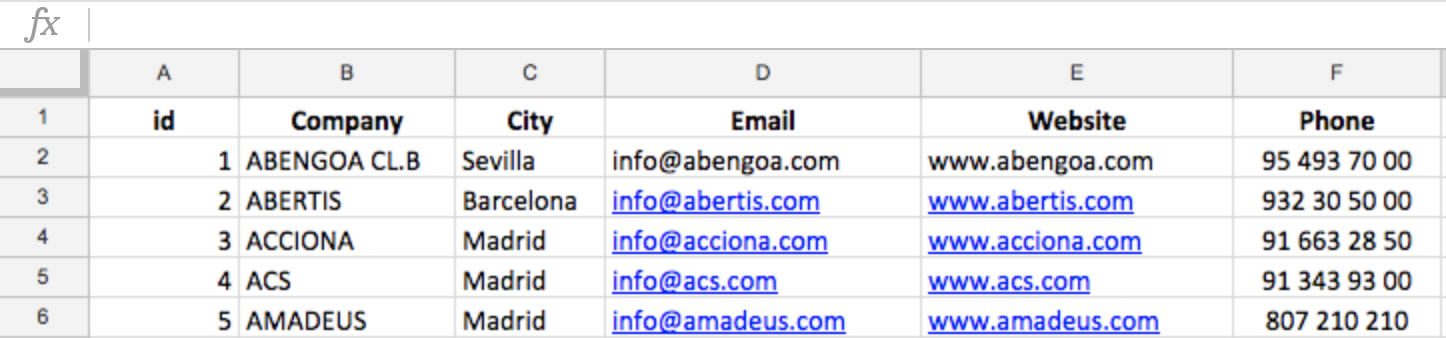
To begin with, you need to create a database with all the information needed, for example: company, city, telephone, email and address.
You can create the database with Excel, Google Sheets, et cetera. Make sure that you meet all the requirements. To have an effective data import to the Platform, all the columns of the document need to have a title and the first column has to be called 'id' and needs to include a unique combination of numbers/letters.
If your document is an Excel file, make sure that it has the correct .xslx extension so that the data can be imported.
2. Search for the location
Once you have all the information ready, it is the moment to add Google Maps' location to your database. In order to do so, look for the address that you want to add to your database on Google Maps. You will need to use only the part of the link that includes the link to Google Maps (https://www.google.es/maps), the name of the place and the coordinates.
Here is an example:

3. Add the location to the database
Go back to your Excel or Google Sheets database and add a new column for the location. In this column, you will need to paste the Google Maps link that you have obtained in the previous step.
3.1 Use the coordinates
If you also want to include the coordinates in your database, you can obtain them from the Google Maps link. Create two new columns, for the latitude and for longitude, where you will insert the coordinates of each location. In this example, the values will be:
- Latitude: 37.3390289
- Longitude: -5.9788817
After following all these steps, you will obtain a document similar to this one.

4. Import data to MoreApp
Log in to the Platform. Go to Data sources tab and click + New data source.
You have the option of importing using different formats (access the tutorial on how to do it just by clicking the desired option):
5. Add the Search field
Go to the digital form where you want to add the data source, click Edit form and add the Search field.
Edit the Search field by clicking on it and give the field a name under Label. Then, choose the data source you have just imported at Data source.
Once the field is configured, click Publish so that your form is available to be filled out using the App.
6. Fill in the form
Open the App and open the form. Open the Search field and click on the info icon of the customer you want to see the location from.
Once the details appear, click on the location link and you will be redirected to Google Maps.
After clicking on the link, a map will appear with a pin at the location.

Once you have seen the location within the map, you can come back to the form and continue filling it in.
7. Congratulations!
You now know how to import and open Google Maps location in your form.
Want to stay up to date with our latest tutorials? Go to YouTube and hit the Subscribe button!