No MoreApp account yet? Sign up here.
1. Add the fields needed
Go to the MoreApp Platform, select a form and click on Edit form.
There are two different ways of sending an email to multiple recipients, based on the option selected in the form.
1.1 Option 1: Lookup field
Add a Lookup field to the form and edit its properties by clicking on it. Under Label, you can add a name for the field. Then, write the different Options.
1.2 Option 2: Checkbox fields
Add Checkbox fields to your form and click on them to edit the properties. Configure the field by giving a name under Label.
2. Add the Email fields
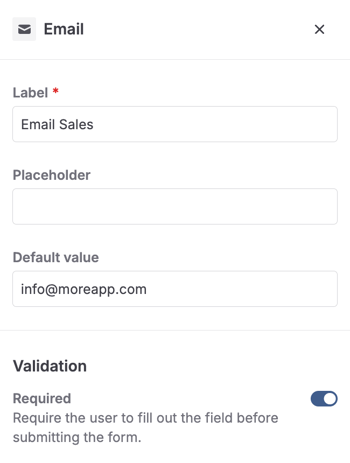
Add the Email fields, under the Lookup or Checkbox fields. Every Email field stands for an option. Therefore, you will need to add as many Email fields as options you have configured.
Configure each Email field. Add the name of the options at Label, for an easier distinction, and write down the email of the recipient as Default value.
3. Configure the Rules
Go to the Rules tab and click on + Create rule. Every Email field has its own Rule.
Tip: Give the rule a unique name.
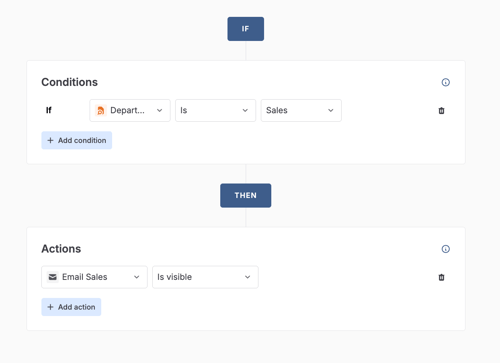
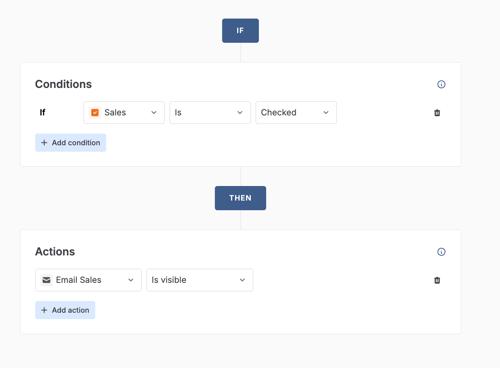
Configure every rule like the images below, depending on which field you are using on your form:
3.1 Lookup field
3.2 Checkbox field
4. Configure the Email
Go to the Emails section on the Integrations tab and select all the Email fields as Dynamic Recipients. Go to the section Recipients and find them by clicking on the thunder icon.
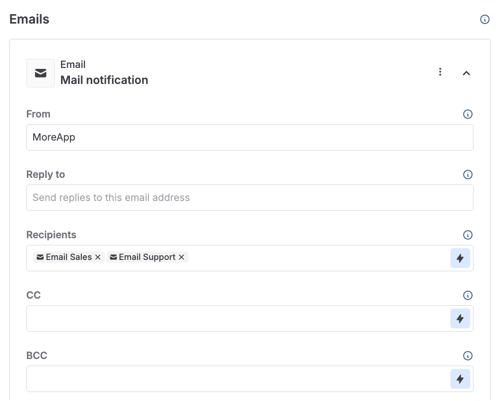
Click Publish when done.
Congrats! When selecting one or more options in the Lookup or Checkbox fields, the email will be sent to the linked email addresses.
Want to stay up to date with our latest tutorials? Go to YouTube and hit the Subscribe button!