You can use MoreApp as an Order App by using Subforms linked to your products databases. Then, use the Calculation-widget to obtain the totals.
No MoreApp account yet? Sign up here.
1. Create the Database
In order to get started, you will need to create a file with all the products on your catalogue. You can include the following columns in your sheet: id, name, description and price.
Please, remember that it is very important to name the first column with 'id' and use unique numbers.

2. Import the Data Source
Now you will need to add the file as a data source to MoreApp, by logging in to the MoreApp Platform and going to the Data Sources tab. Add the data source by clicking on Add a data source, here you can give the data source a name and choose from where you will upload the file you have created earlier.
You can check these tutorials if you need to remember how to do the import:
Finally, click on Save.

3. Create the form
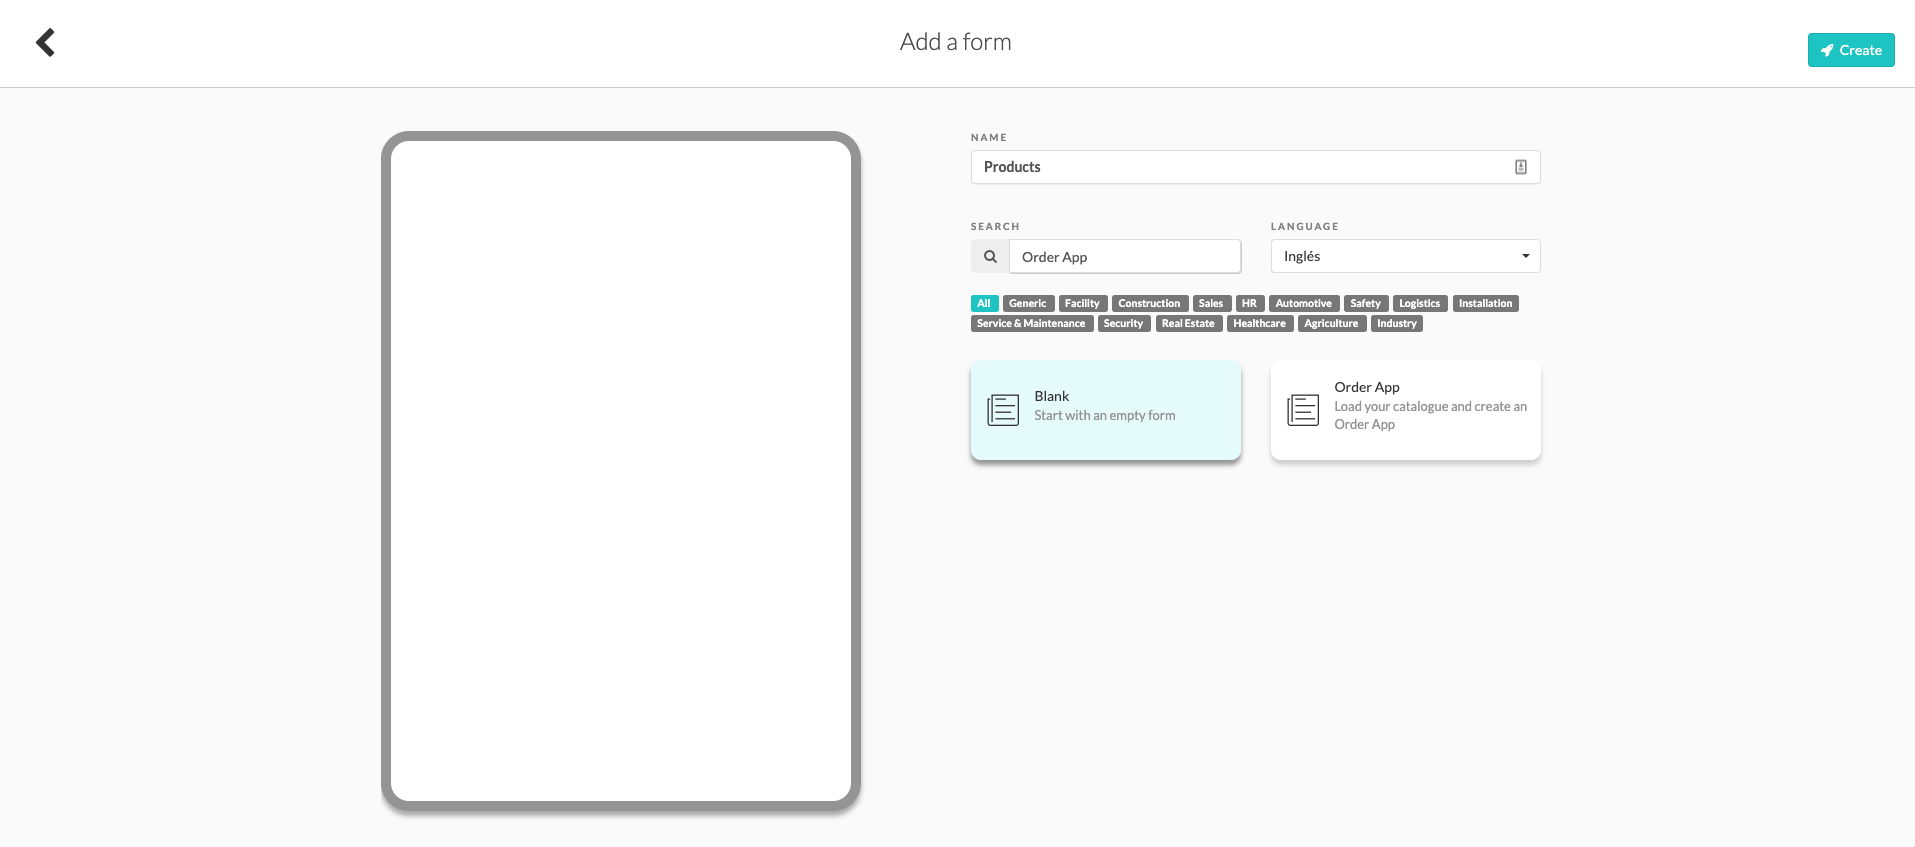
Once the Data Source is uploaded. Go to the forms tab and click on + Create a new form. Select our Order App template or start with a blank form. Give it a name and click on Create.
4. Add the Subform-widget
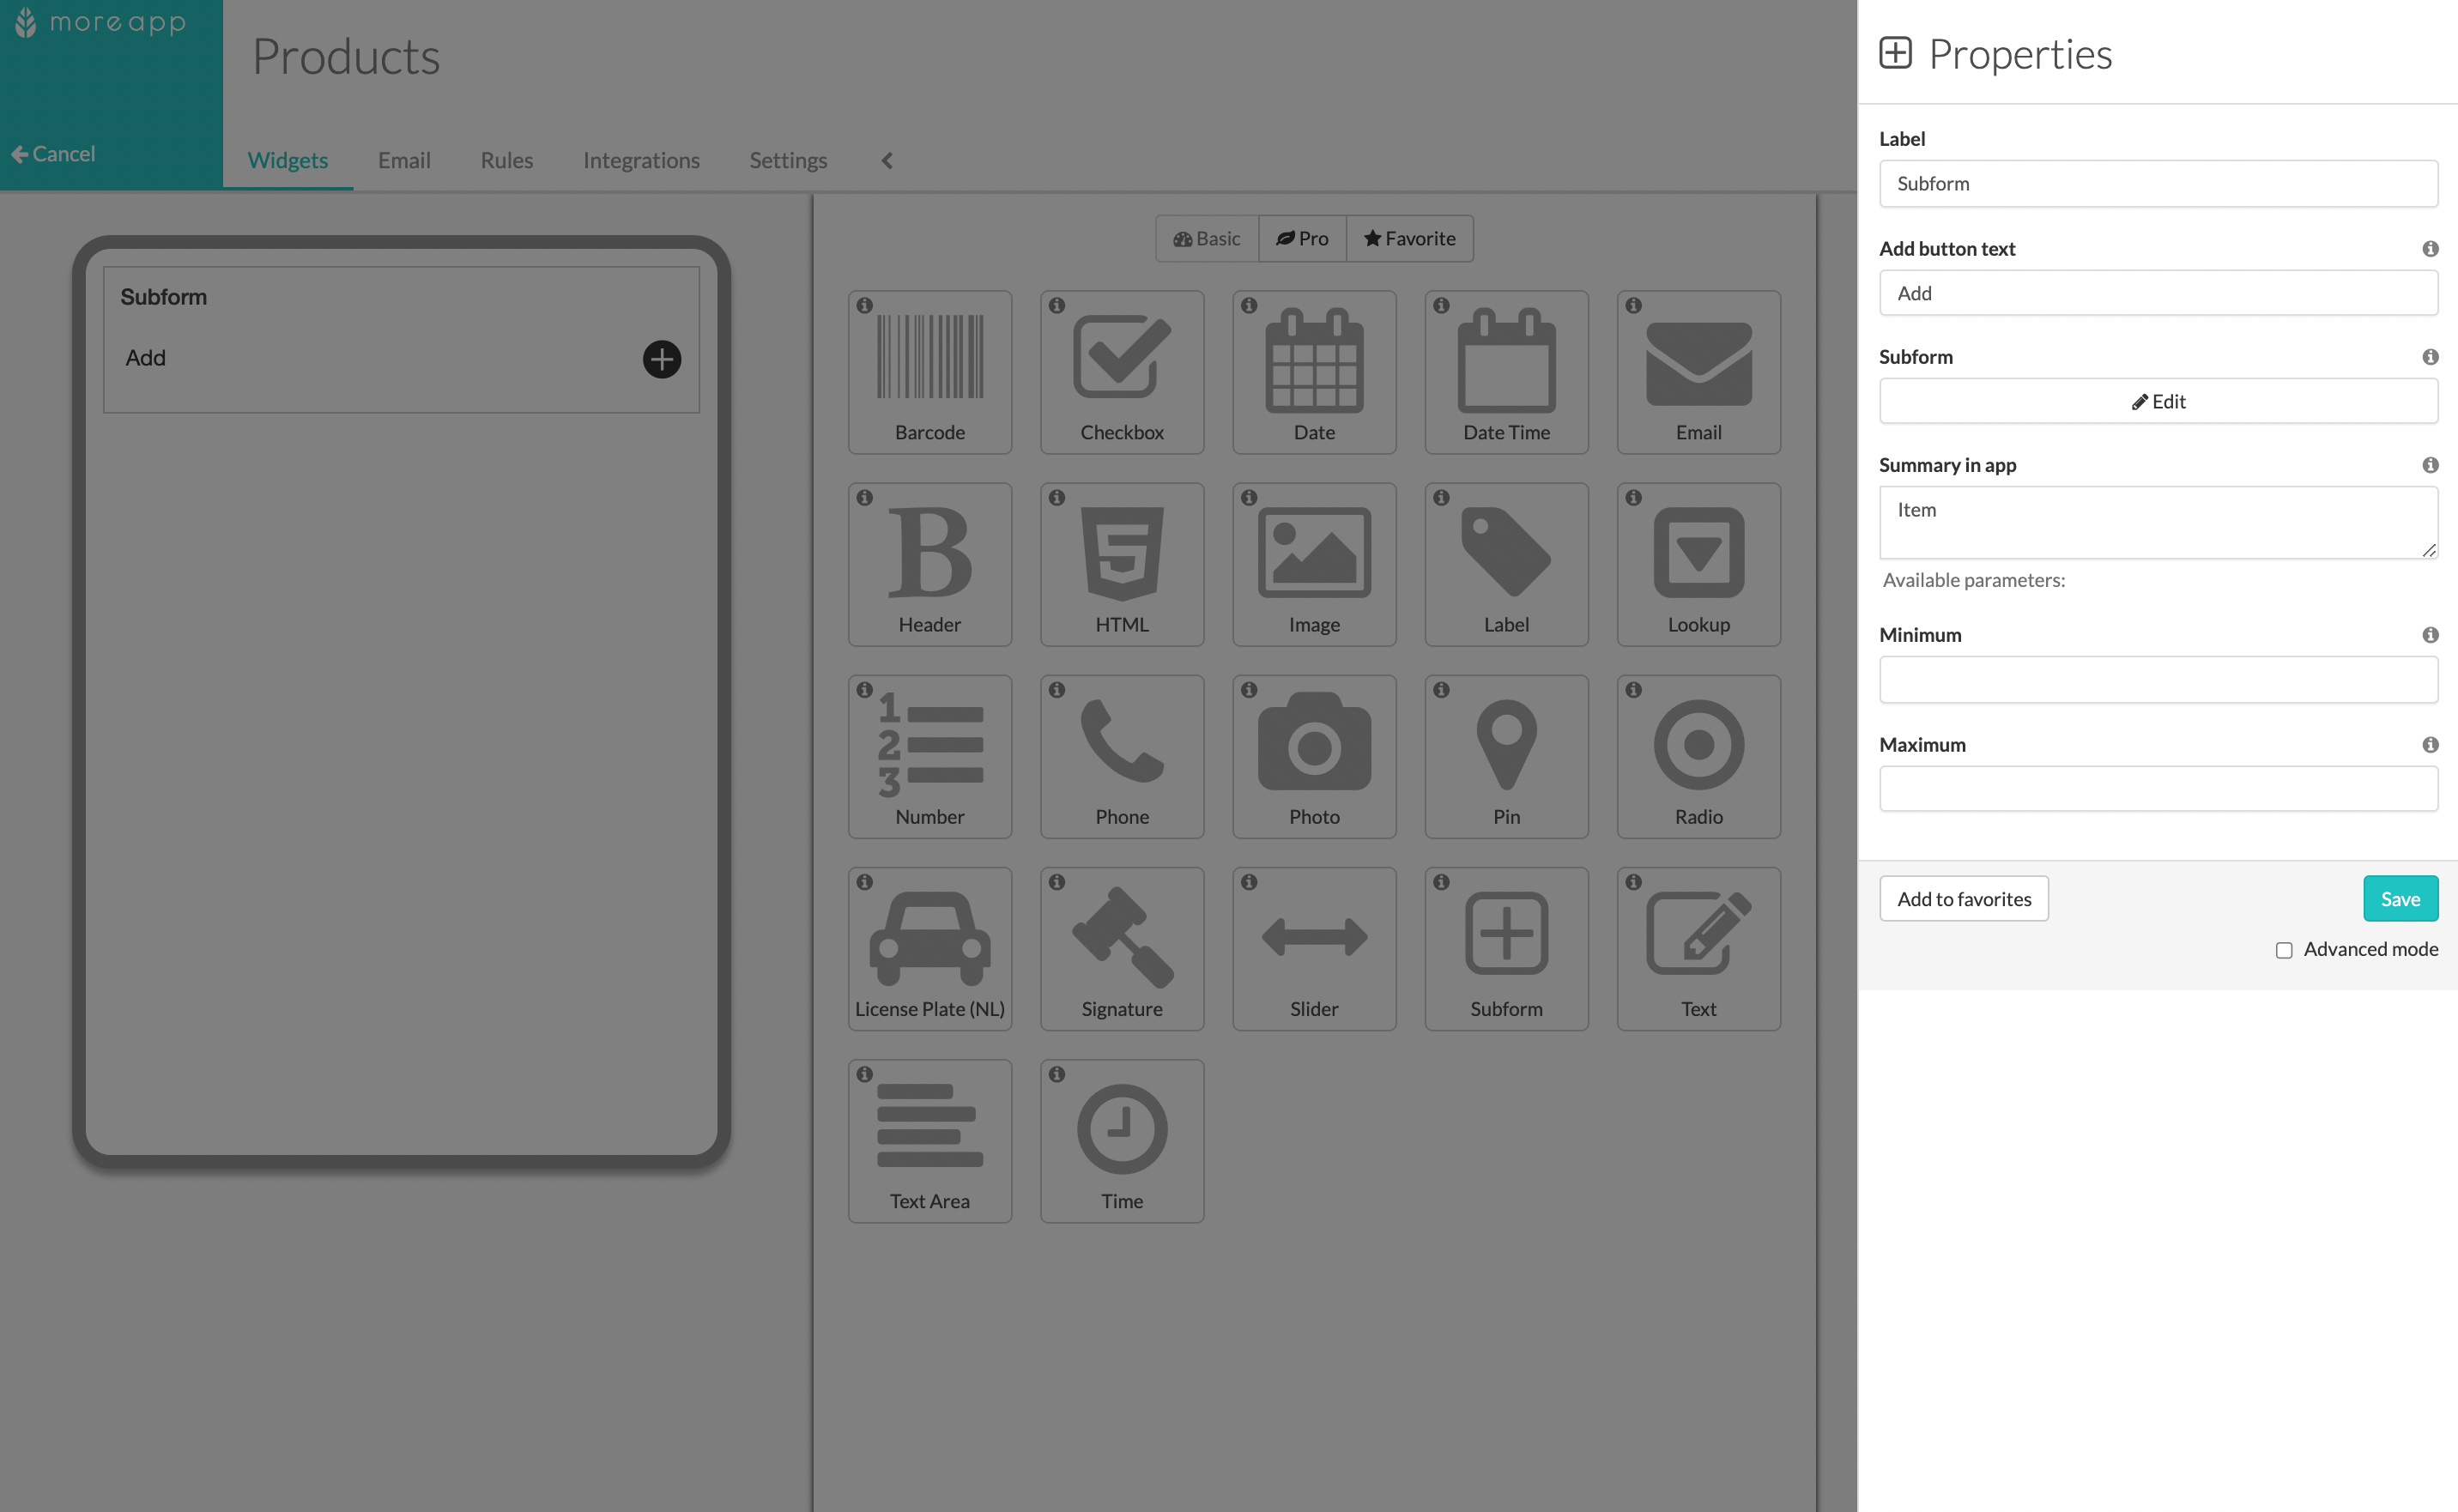
Now you can add the Subform-widget to your form. Open the form you would like to edit and click on Edit Form. Add the subform to your form by double-clicking on it.
5. Set up the Subform
Once you are inside the subform, it is time to add all the widgets to personalise your order.
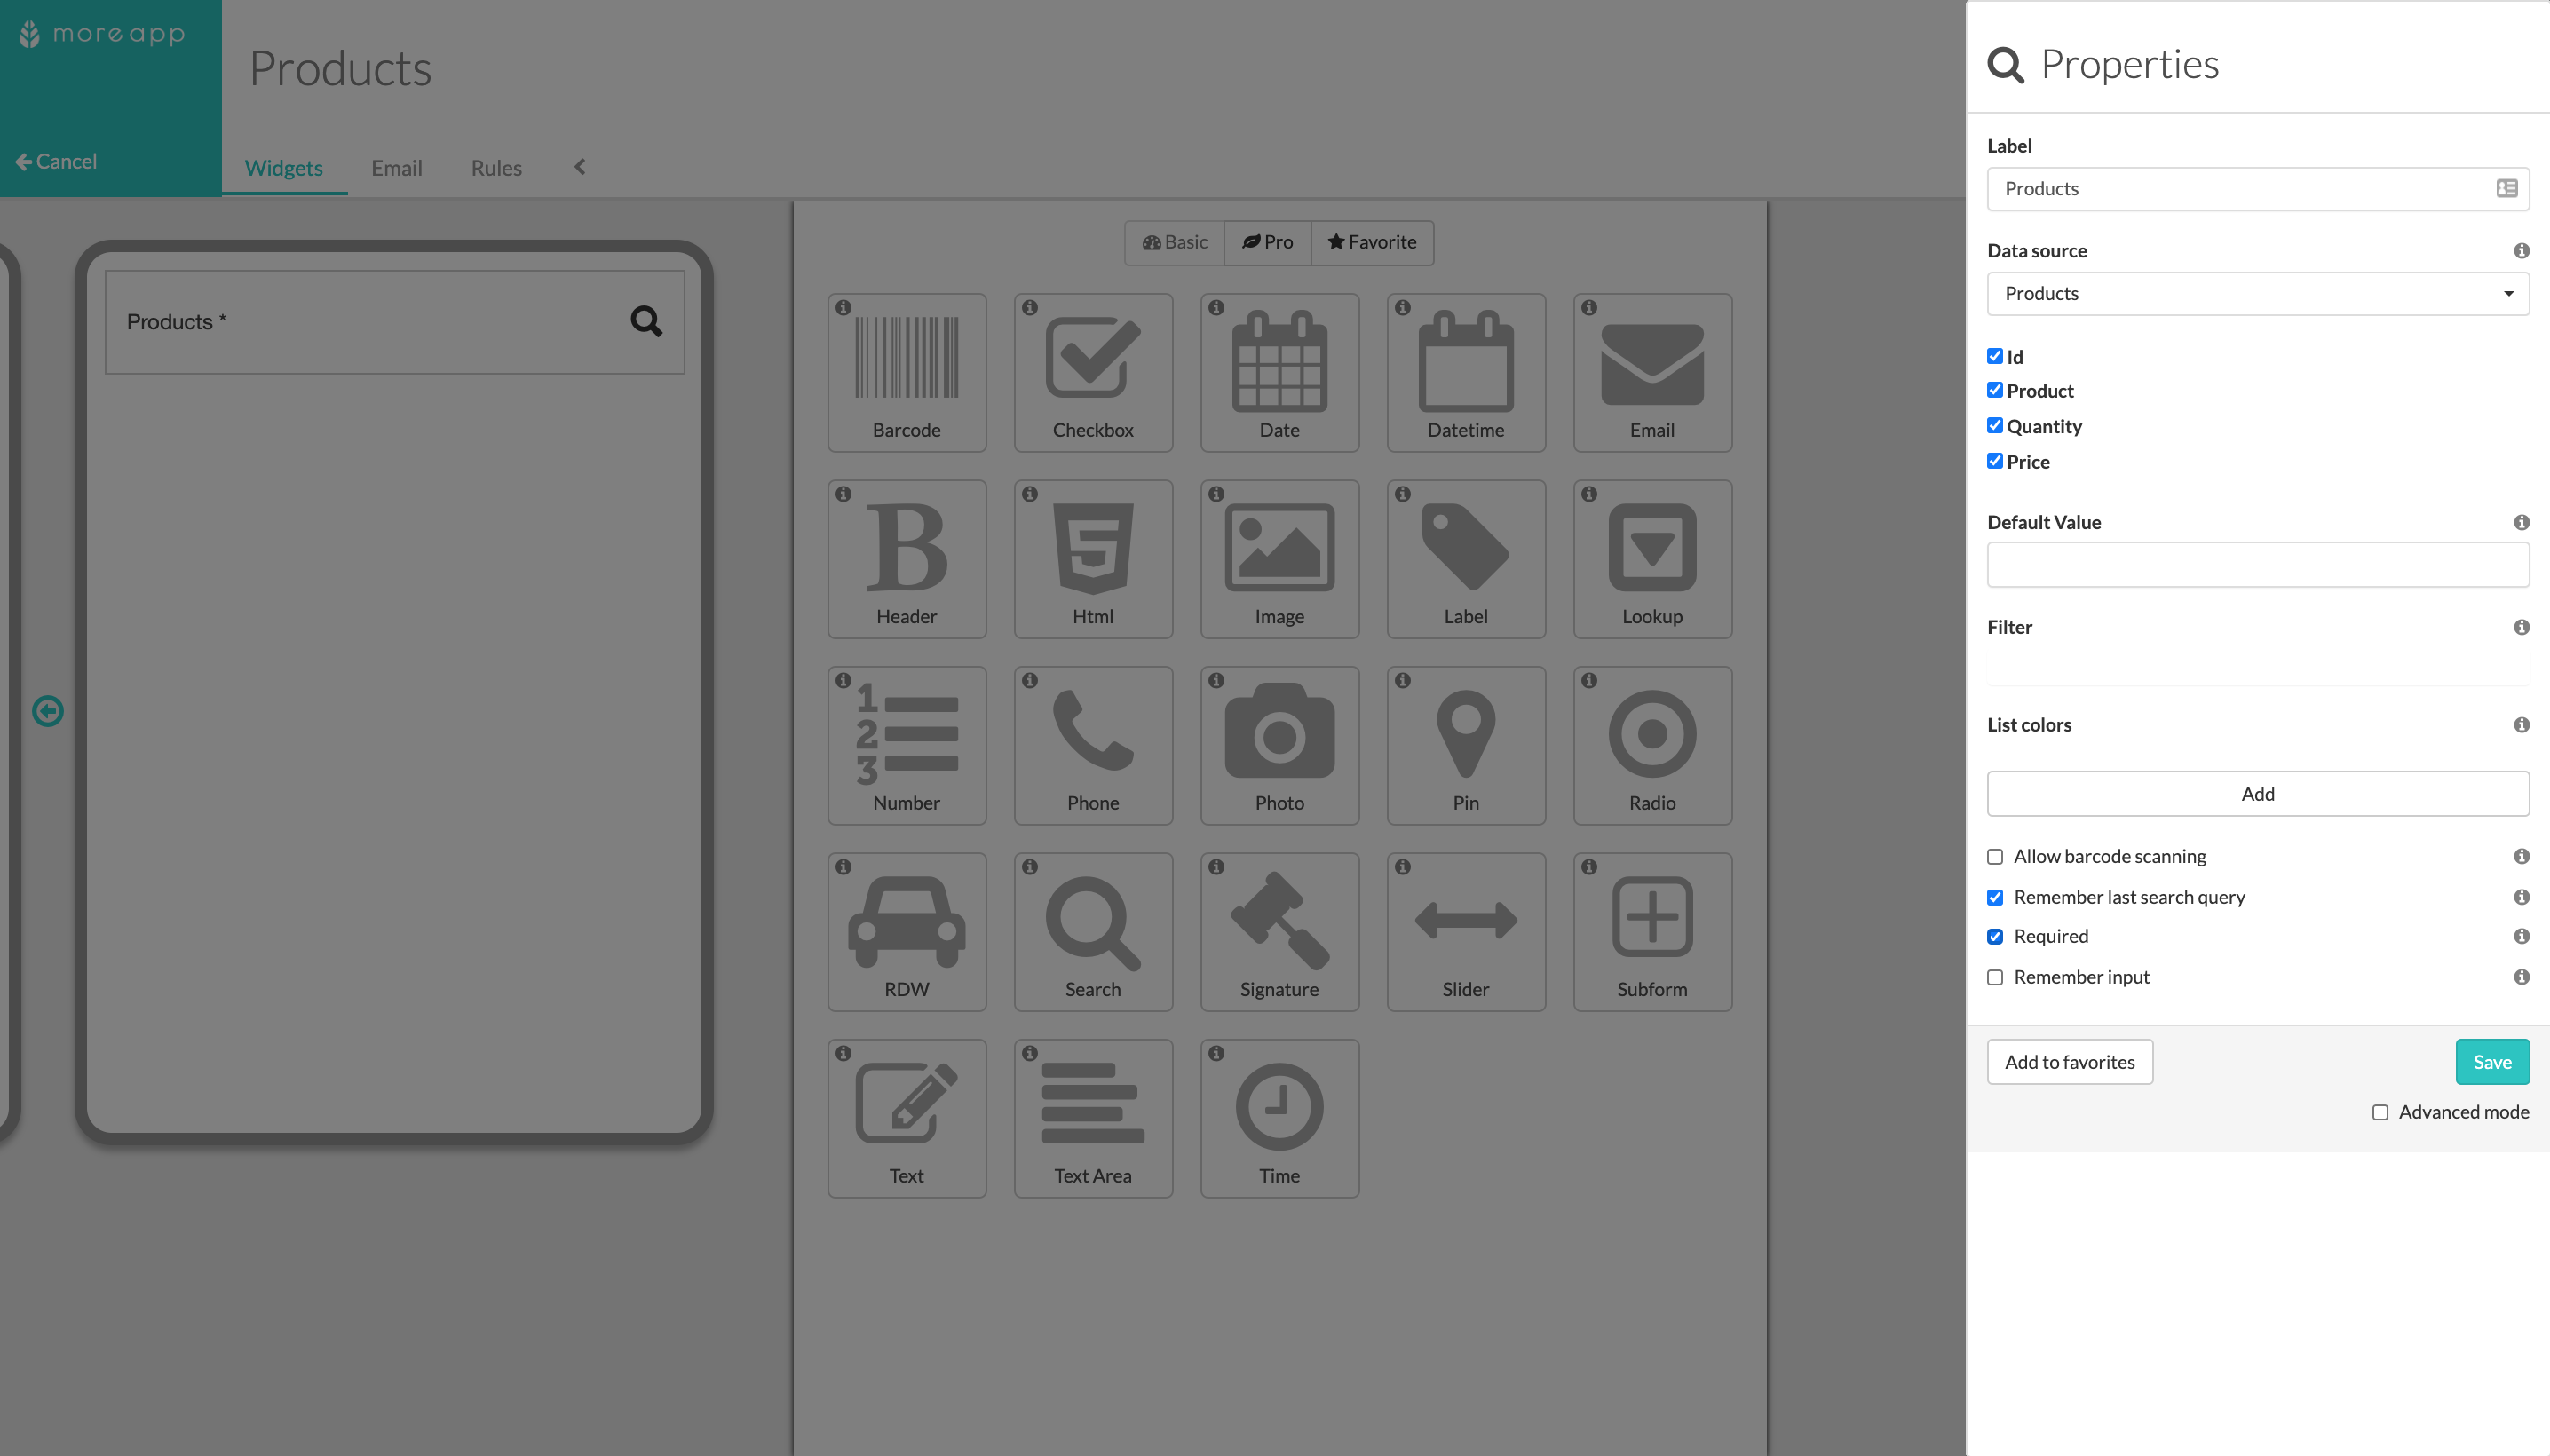
Add the Search-widget in order to link it with your database of products. To do so, put the desired name on Label and choose the proper file under the Data source tab.
You can select the columns that you would like to have visible in the app and if you want the widget to be required. Once you finish, click on Save.
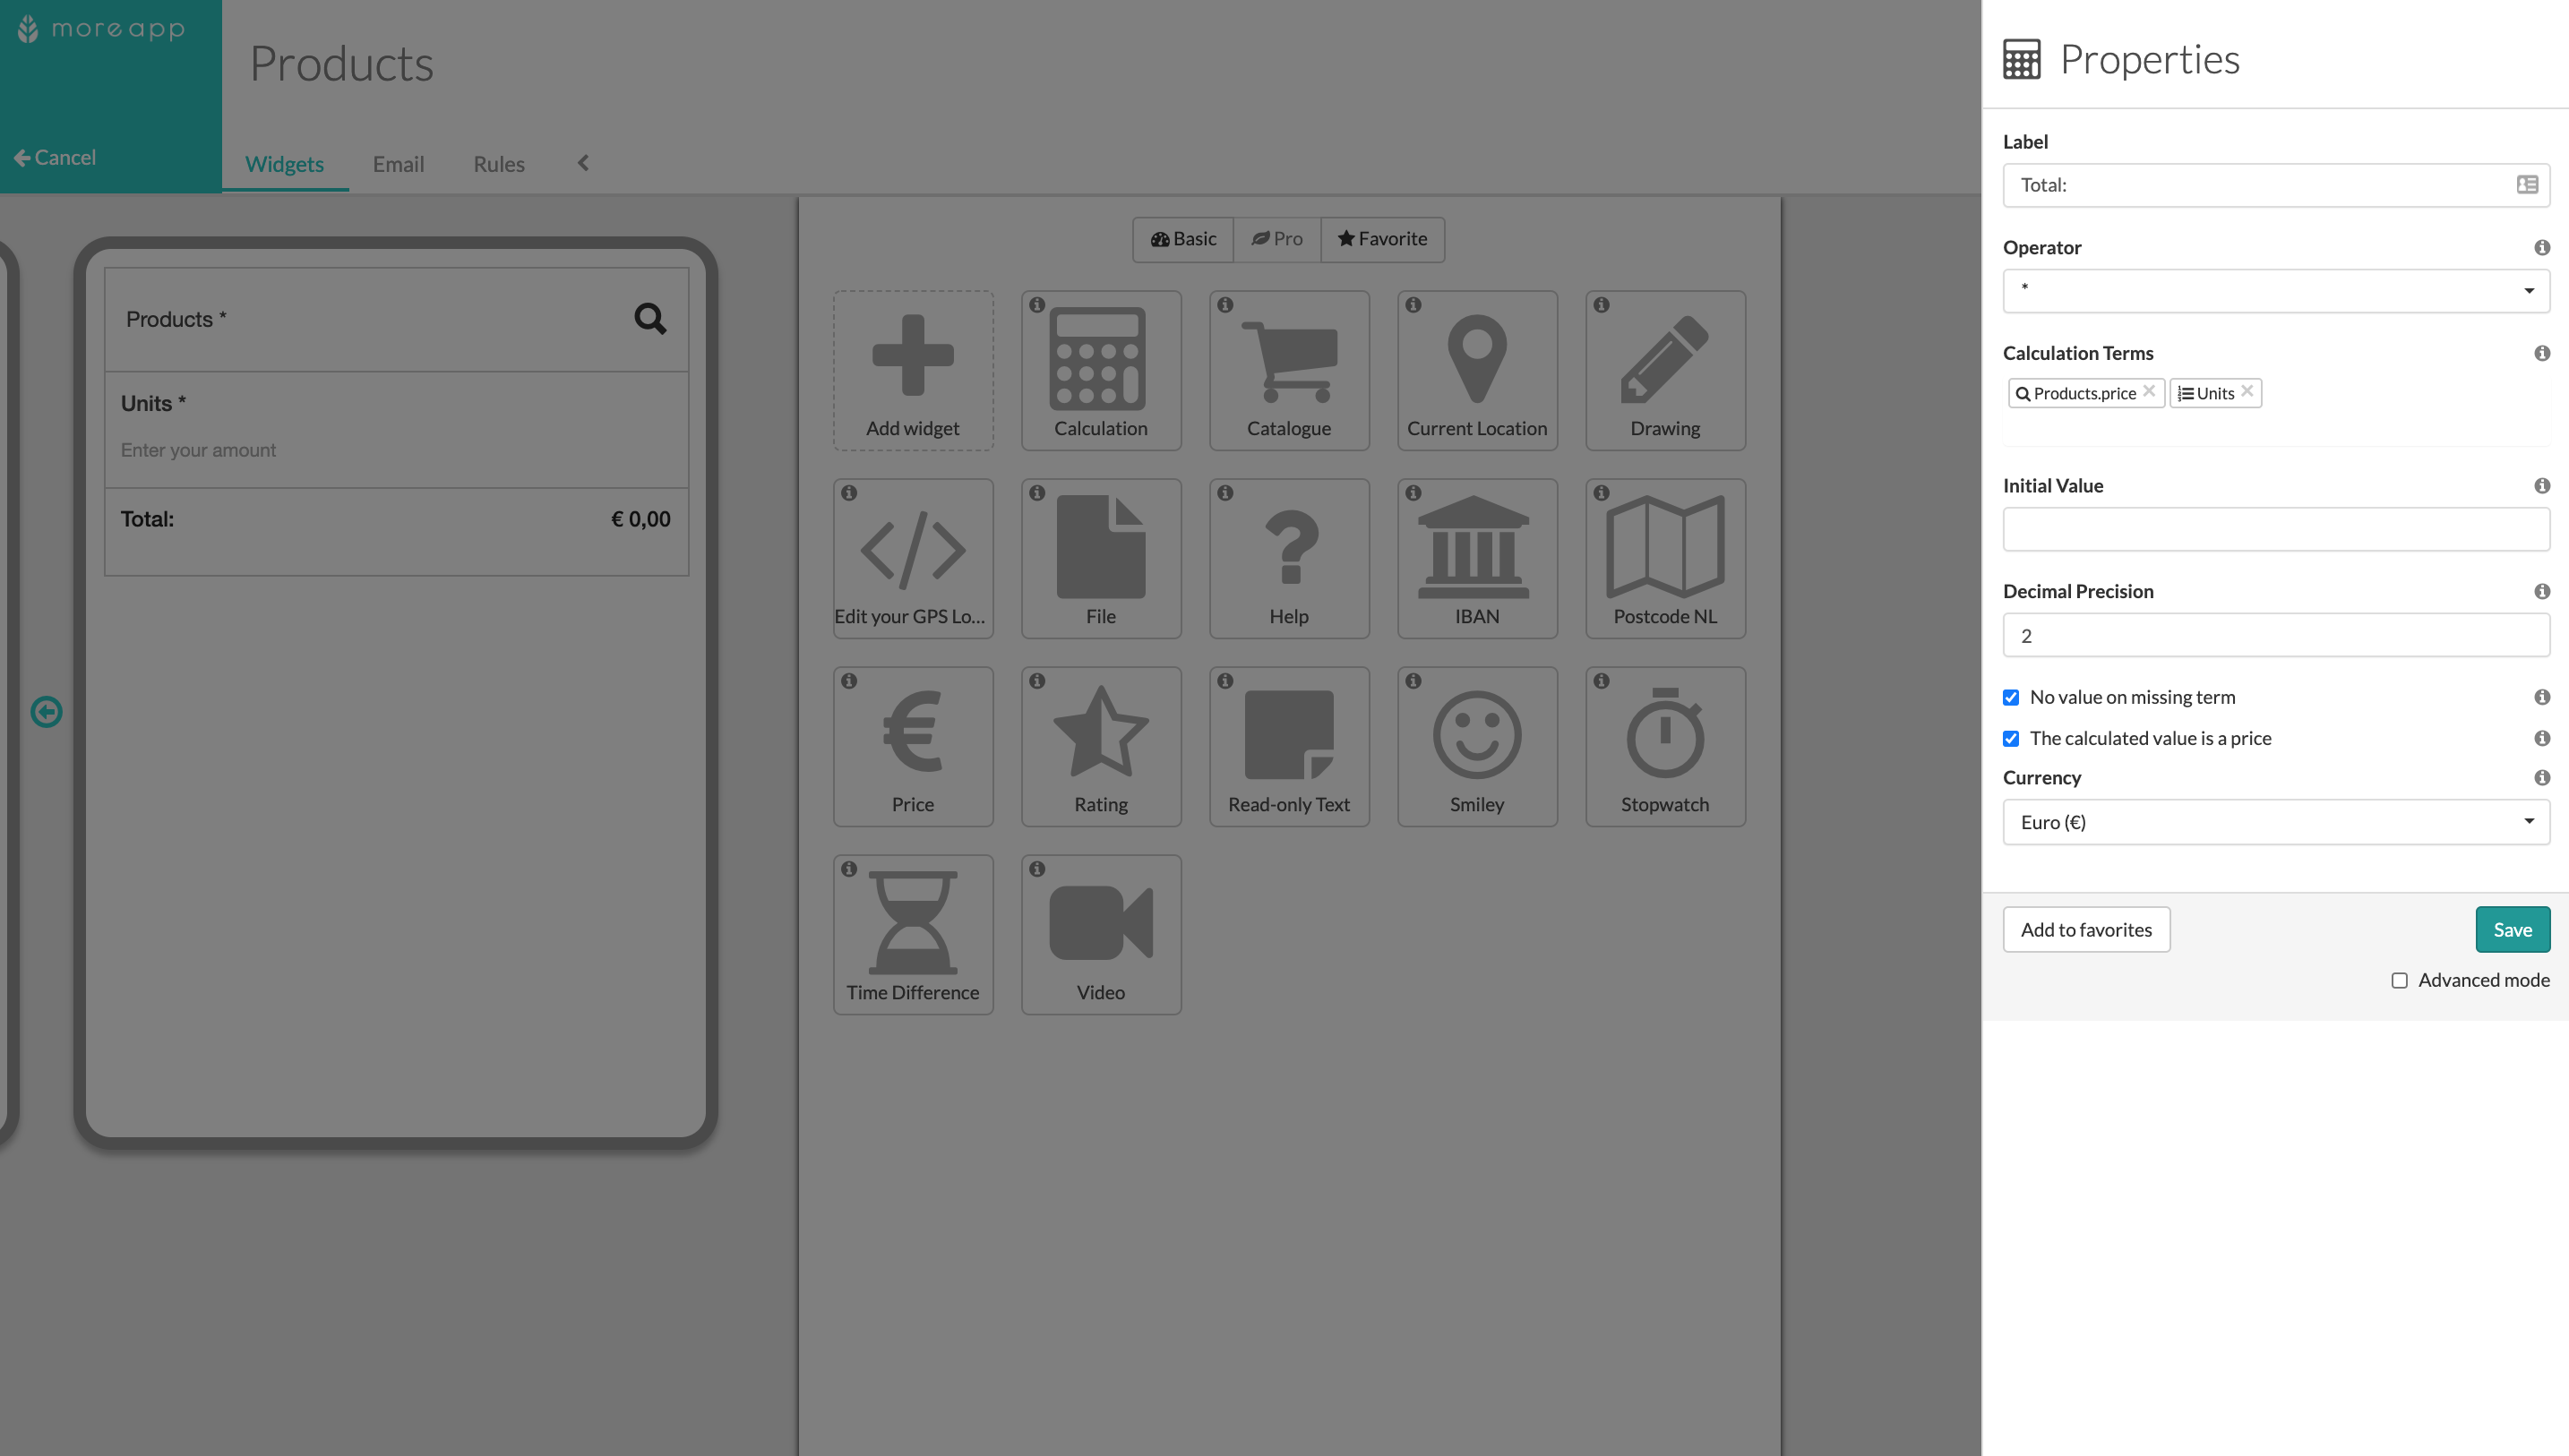
After the Search-widget, you can add the Number-widget so users can choose the amount of each product they want to buy.
Then, add the Calculation-widget. Go to the Pro widgets tab and select the widget.
Choose the type of operation you need to do, under Operator, and the Calculation terms. In this case, you will need to multiply price * amount of units.
6. Configure the Properties of the Subform
Now, open the properties of the subform-widget, by clicking on the pencil. Choose the text you want to show after filling the subform, under Summary in app. You can select, for example: name, price and units of a product.
You can also configure the maximum and minimum amount of times this subform can be filled. Click on Save when everything is done.
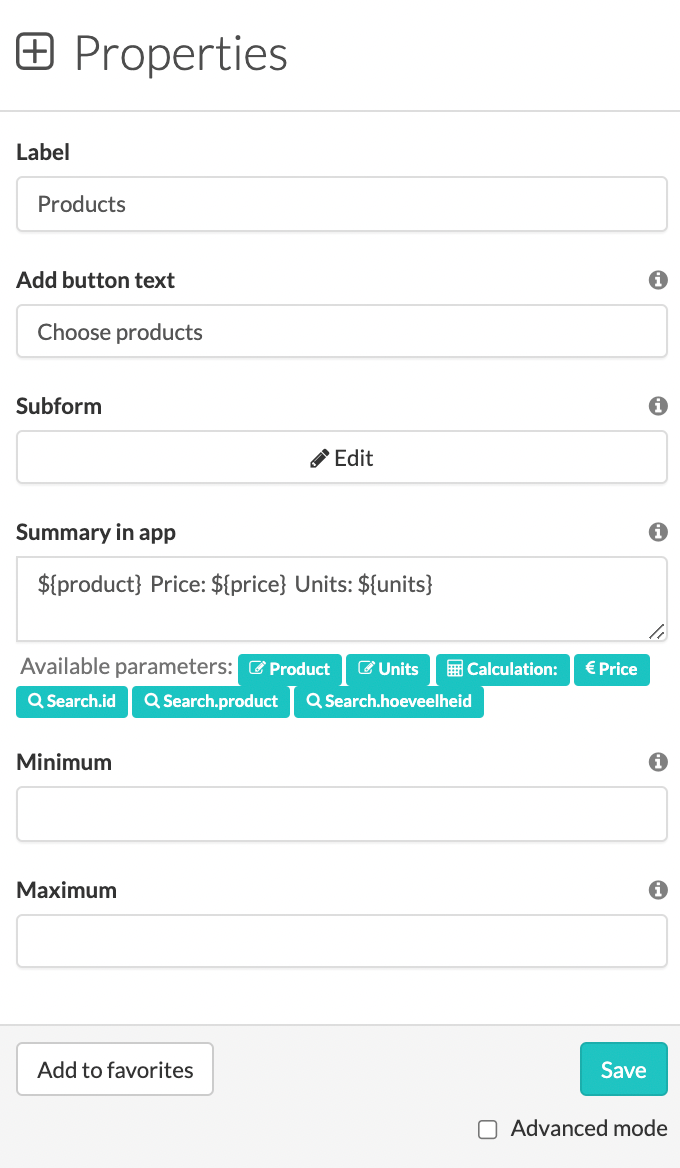
7. Add the Calculation-widget
Once you are on the main form again, add the Calculation-widget at the end in order to obtain the total price of the desired products. Find this widget under the Pro tab.
Configure its properties so all the calculations are done properly. In this case, the Operator should be + and Calculations terms will be the placeholder for the calculations inside the subform.
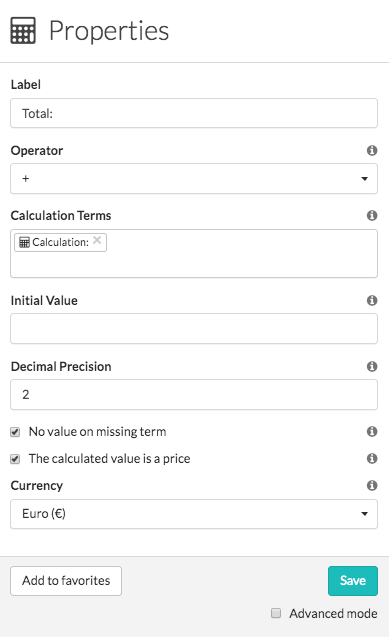
8. Congratulations!
You have successfully configured your Order Form using subforms!
Want to stay up to date with our latest tutorials? Go to YouTube and hit the Subscribe button!
