No MoreApp account yet? Sign up here.
This feature is available in the Branch, Tree and Forest plan. Visit our Pricing page.
1. Create the Word template
Open a Word file to configure the Word template. Use placeholders in your Word template in order for MoreApp to know where the form entries will be placed in the report.
You can identify the placeholders based on the data names of the fields. You can find the data name in the properties of each field. Click on the fields to open all the details.
It is important to use the exact same Data name in your Word template.

Most of the fields on the Platform use the placeholder: {dataname}. For example, the Text field named 'Company' will have the placeholder {company}.
Some fields use a different placeholder. This is the case with the File, Photo, Drawing and Signature fields. These fields use the placeholder: {%dataname}.
Note:
-
Only the images of the File field will be added to the report.
-
The Video field is not displayed in the report.
-
The report will not include a URL for downloading the videos.
-
You can’t adjust the size of the images in your report.
-
The map of the Location field is not displayed in the report. However, you can add the latitude and longitude by adding the appropriate placeholders.*
* The placeholders are {location.coordinates.latitude} and {location.coordinates.longitude}. The values of the placeholders should match the data names used in the Location field.
For example, if the Location field data name is companyLocation, the placeholders should be:
-
{companyLocation.coordinates.latitude}
-
{companyLocation.coordinates.longitude}
Check the following image, as an example, of what the placeholders will look like in your template.
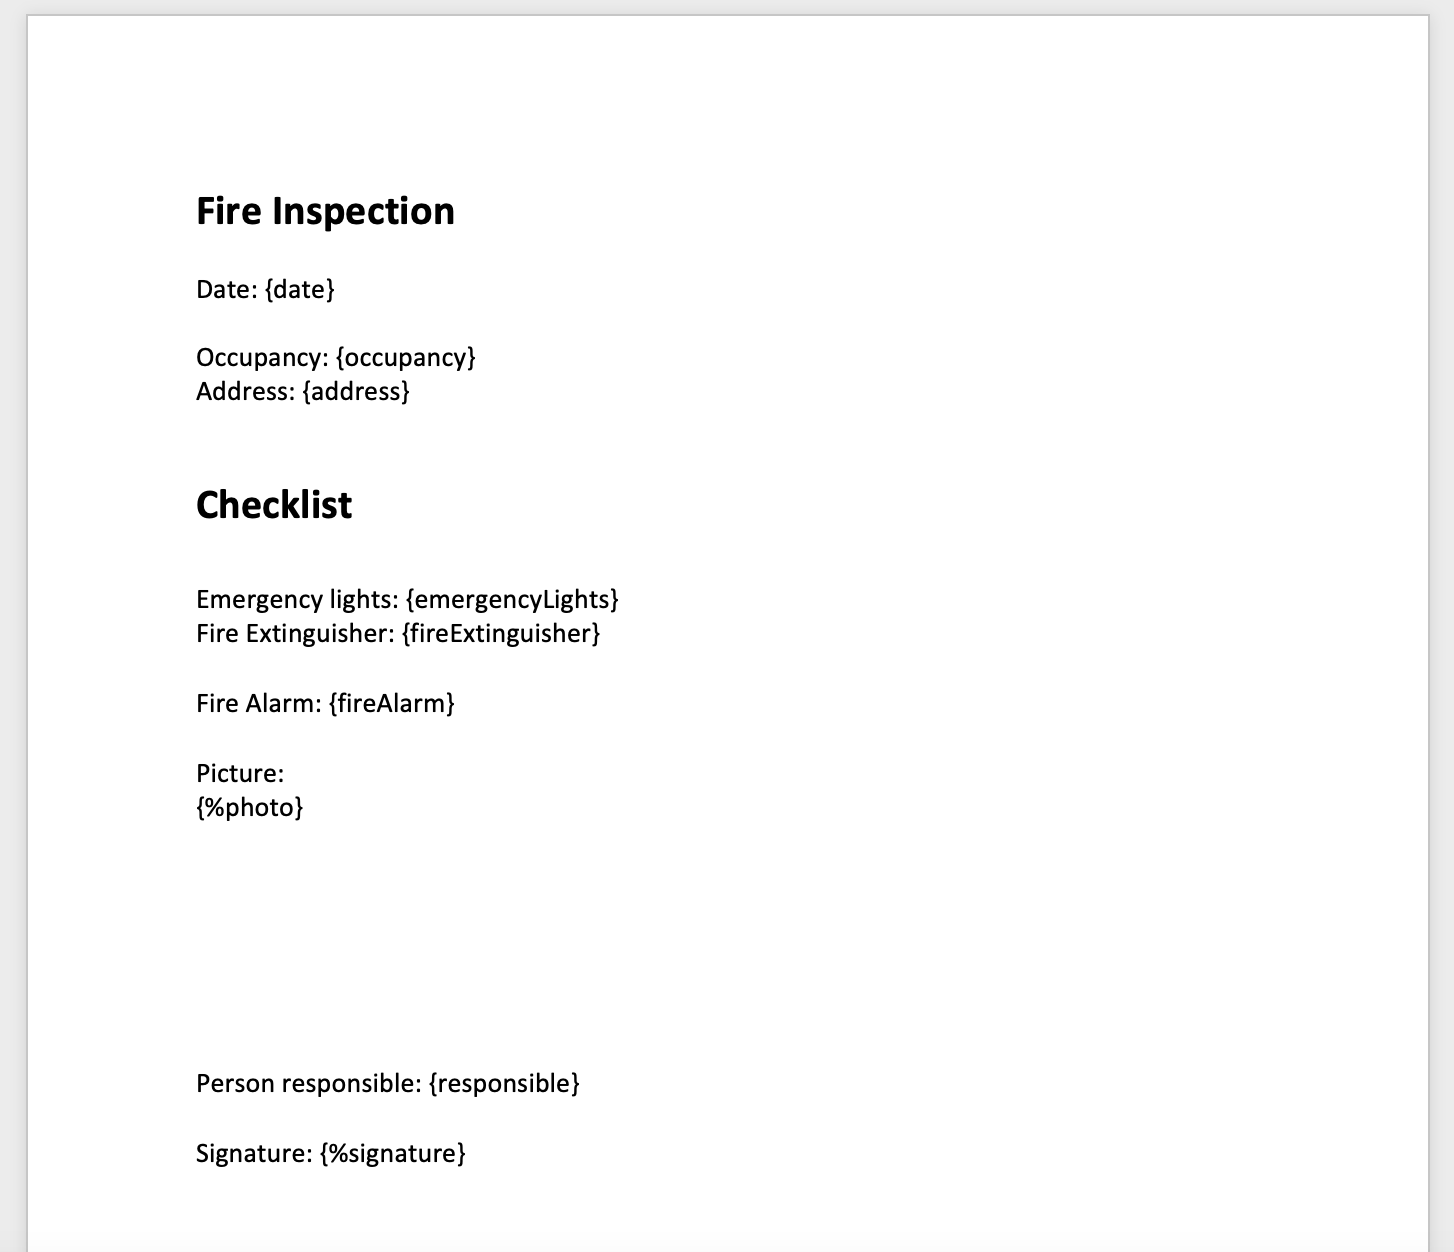
1.1 Subform
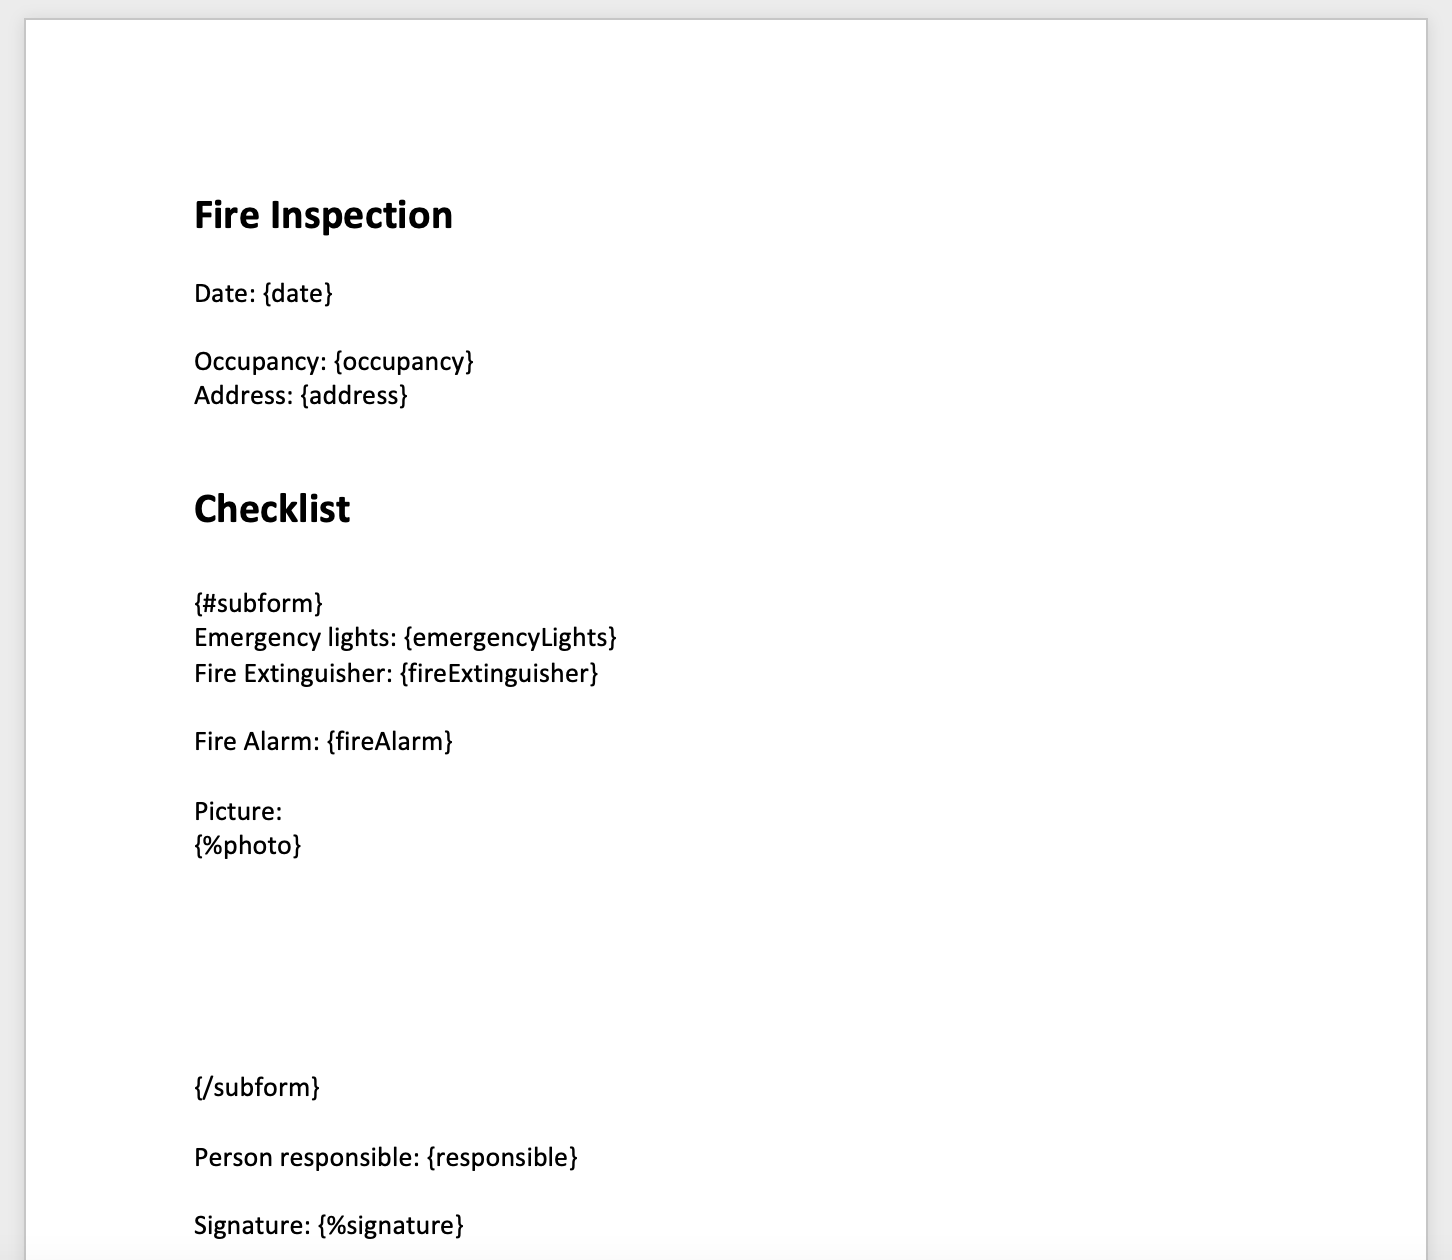
A Subform creates a loop that repeats every time the subform is filled out again. This loop has to be opened with a # and closed in the Word template with a / as shown in the example below.
{#subform} {field1} {field2} {/subform}
Take the example, change the word ‘subform’ to the Data name from your Subform. Do the same for the fields inside the subform.
It's possible that you have a subform within a subform. Make sure that the placeholders of the first subform are around the placeholders of the second subform. Example:
{#subform} {field1} {field2} {#subform1} {%photo} {/subform1} {/subform}
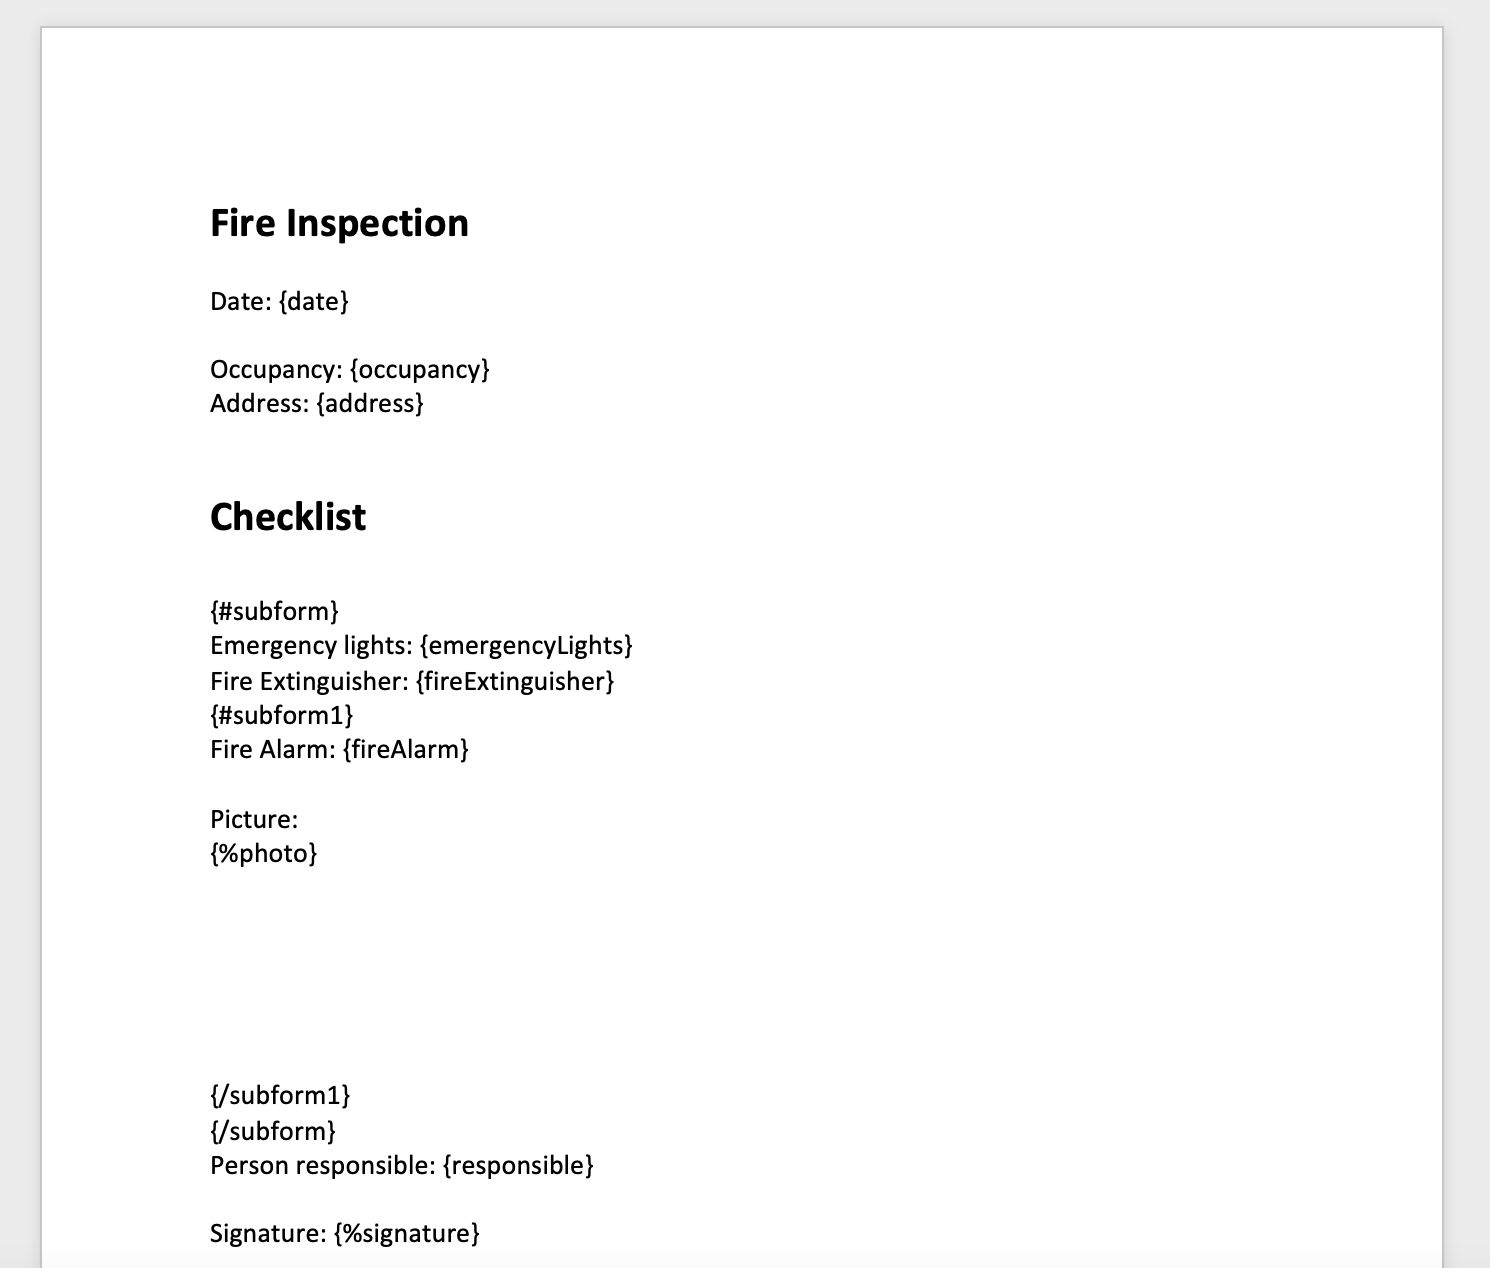
Note: It is important to use unique data names in the Subform. Avoid using the same name for the Subform and the fields inside.
All information in the loop (between the # and / ) will be copied each time the subform is filled out. Keep this in mind when creating a table.
For example, when the loop is included in the cells of the table, each filled-out subform will be presented as a new row in this table.
Template:

Output:

When the loop is not included in the cells of the table each filled-out subform will be presented as a whole new table:
Template:

Output:

In the App, the Subform entries are automatically numbered.

Use the following configuration to display the item counters from the Subform in the report.
Add automatic numbering in the Word template.

Option 1: In a table

Option 2: As a list

Now, each subform entry will be shown with an automatic counter.
1.2 Search, License Plate (NL) and Address (NL)
For these fields, there are several placeholders available.
For example, for one Search field, there is a specific placeholder for each column of the data source. In this example, if you want to add an email address from the data source, you can use the placeholder: {search.email}.
Note: Do not add the $ of the placeholder to your Word document. In the Word integration you only need to add {dataname}.
1.3 Radio and Lookup fields
These fields use the standard placeholder {dataname}. However, when using these fields, keep in mind that the value appearing in the Word report will be the one added in the Value in submission field.
Besides changing the name of the Options, you can also change the name of the Value in submission.
Note: Value in PDF does not apply for the Word integration.
For example, the placeholder {meeting} will show either Sales or Support in the report, depending on the selection in the form.
You can also rename the Value in submission field. This does not have to be the same as the Options field. For example, the user will need to select Sales or Support in the form. The output, however, can show something else (like an emoji).

Want to give the answers that are selected, for example with a Radio field or Lookup field, a colour? Use the following logic:

Want to show a space between the selected options of the Lookup? Use this logic:
{#lookupdataname}{.}, {/lookupdataname}
Want to show the values of Lookup fields in multiple lines? Then, use the following logic:
{#lookupdataname}
{.}{/lookupdataname}
1.4 Catalogue field
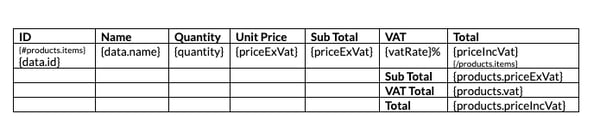
When using the Catalogue field, you can add a table to your Word report showing all the items selected and the total price.
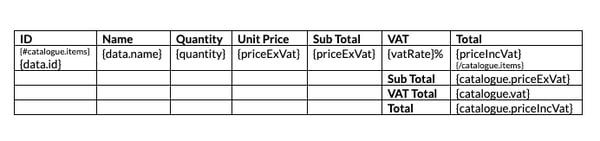
To do so, you need to open with {#catalogue.items} and close with {/catalogue.items}, as shown in the example below. Between these placeholders, you will include all the columns of the catalogue’s data source (name, quantity, price, etc.).
An example will be:
{#catalogue.items} {data.id} {data.name} {quantity} {priceExVat} {/catalogue.items}
After this, you will need to include the placeholders for the Sub Total, VAT and Total. That way, you will obtain the sum of all the items included in the catalogue.
These placeholders are: {catalogue.priceExVat}, {catalogue.vat} and {catalogue.priceIncVat}.
You can see how the template should look in the following screenshot:
Note: If you use the example placeholders, remember to change the word “catalogue” to the data name you gave to your Catalogue field, as in the image below.
1.5 Pin field
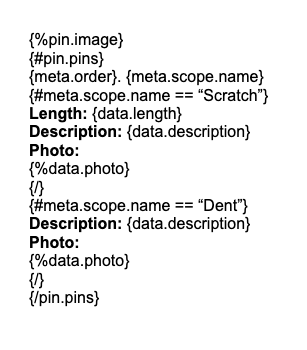
You can also include in the Word report the image used in the Pin field and the details of each pin. To have the Pin image in the report, you will need to add the code {%pin.image}.
Note: The pin icons will not be shown in the image, but their details will be added separately.
Then, you need to indicate the start and end of the Pin field. This will be done by using {#pin.pins} as opening and {/pin.pins} as closing. Keep in mind that the word ‘pin’ will be replaced by the name of your Pin field. For example: {#car.pins}
If you have configured Subforms inside each of your pins, you will also need to indicate where each pin opens and closes. The item will be opened with {#meta.scope.name == “name of the pin”} and closed with {/}. Between these placeholders, you can add as many fields as the Subform of the pin has. That way, all the details of each pin will be displayed in the report.
Note: Remember that each pin must have a unique name.
Here is an example of the format to be used:
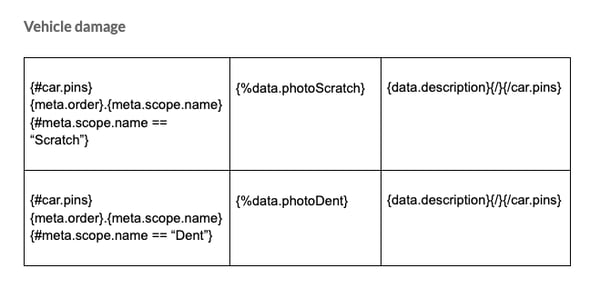
You can also organise the pin details in a table for a better overview. Here is an example:
1.6 Hide fields without data
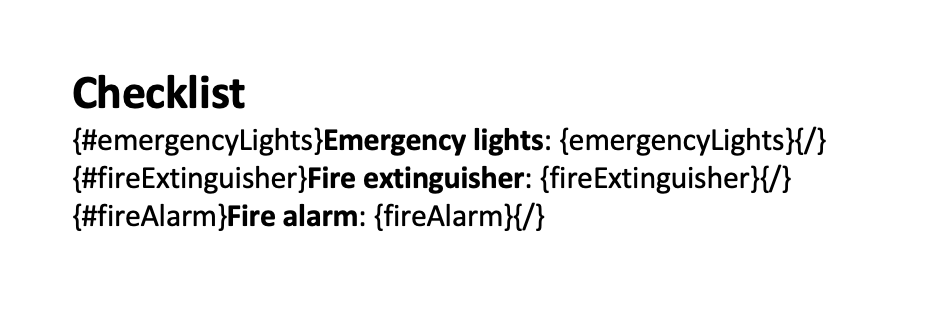
If you use fields that are not required to be filled in or rules that hide part of the fields in your form, you need to configure this in the Word template as well.
You need to indicate an opening and closure of the fields (the same way as the loops used for the Subforms, with # and /). Therefore, the field will only be shown if there is data filled in.
Follow this format: {#dataname} {dataname} {/}
In the following image, you can see an example:
What will this look like in the Word report? Here is an example of the output if the option ‘Fire extinguisher’ is empty:

To avoid having a blank space between fields, you can place the loop in such a way that the enter will not be included. To do this, change the format in the template to the following:

This will be the output in Word:

1.7 Work with Checkboxes
If you are using a Checkbox field, the placeholder {dataname} will show TRUE or FALSE in the output.
Do you want to represent the answer differently, like Correct / Incorrect, or ❌ / ✅ ?
Then you can use this configuration:
{#dataname} Correct {/dataname}{^dataname} Incorrect {/dataname}

Depending on the answer of the field, an icon will be shown in the report. Here is an example of the output:

Note: When choosing PDF as output for the Word integration, the icons of the Checkbox fields do not work.
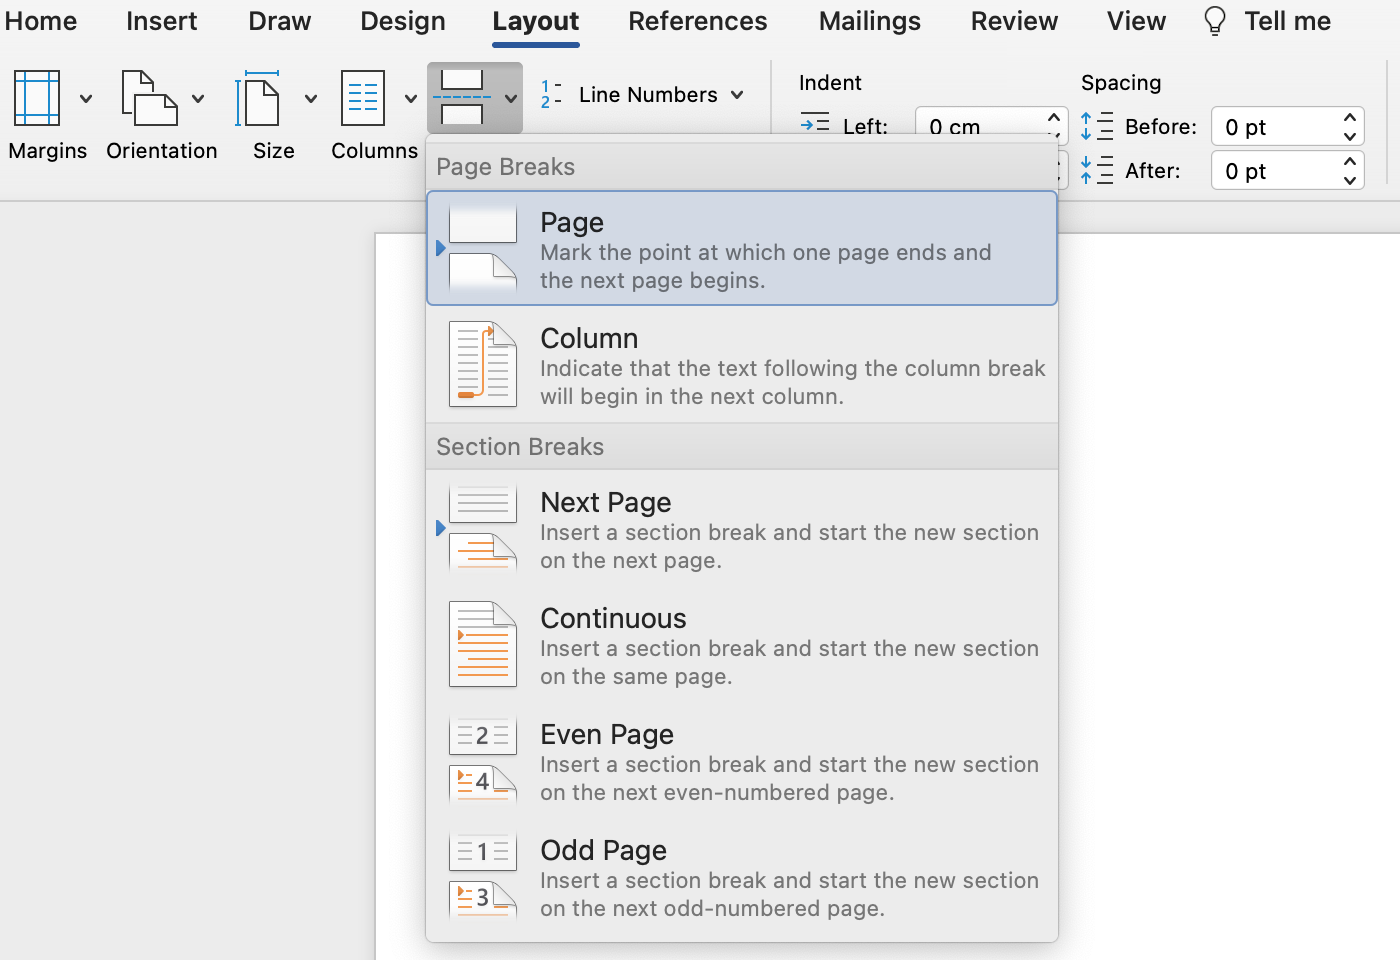
1.8 Pagebreak
It's also possible to add a page break in your Word template. Go to Layout > Page Breaks > Page.
Note: When using a page break in combination with a Loop (like the Subform), make sure to include the page break in this ‘Subform-loop’. For example:

This way, each time the subform is filled out, a new page in the report will be created for this subform.
2. Configure the integration
Go to the MoreApp Platform, select a form and click on Edit Form. Go to the Integrations tab. Add the integration to your form
by clicking on Add integration. Select the Word Integration. You can now start configuring the integration.
-
Upload the Word template you created.
- You can choose Word or PDF as an Output format.
Note:
· If you choose PDF as the output format, the font of your report will change to the default MoreApp font.
· If the PDF doesn't look good, create the Word template with LibreOffice.
-
Give the file a name under Filename. You can use placeholders, to customise the name, by opening the dropdown in the thunder icon.
- At the From field, you can insert the name of the sender, like the company name.
- At the Reply To field, you type in the email address that the user can reply to.
-
Under Recipients, you can insert the email of the person who will receive the file, use a comma to separate the emails if there are more than one. Also, you can add Dynamic recipients which uses the email filled in the Email field in your form. You can also automatically send the form to the person who completed the form. You can do this by selecting the option ‘submission author’ under variables.
- Add to CC the email address where the copy should go to and to BCC e-mail addresses that should receive a copy, but should not be visible as recipient.
-
Next, add the Subject line of the email, here you can also use placeholders available in the thunder icon.
- You can add text and placeholders to the Body of the email. Use placeholders in the body to customise your email.
-
Then click on Verify. After verifying, a Multi error can occur. This means that there are wrong brackets in the Word file around the placeholders. Do you want to discover errors in your Word file? Then you can use this program.
Note: Some fields are not supported in the email Body of the Word integration. Here is the list of fields you can not use as placeholders in the email: Subform, Photo, Signature, Pin, Location, File, Catalogue, Header, HTML, Label, Image and Help.

Note: If you want the Word integration emails to be sent from another domain, you can use our feature Custom Email Domain to configure the domain. This allows you to send all MoreApp emails from a specific domain, not only the Word integration emails.
3. Image Quality
The Image Quality is set to High by default.
In case your form has dozens of images, it may happen that the email becomes too big and that the receiving mail server refuses the email. Therefore, choose the image quality that matches your form: Original, Medium or Low.
Original will send the images in their original size. The other options will reduce the images to a max of 1000, 600 or 200 pixels respectively. Choose Medium or Low so that a PDF with a lot of images can still be emailed. Choose Original or High if you only added a few images to your form.
Note:
- Images are not attached to the email as a file. You can only see the photos inside the Word report.
- If your email is bigger than 19 MB, your Word file and images will be added to the body of the email via a download link. This link is only valid for 7 days.
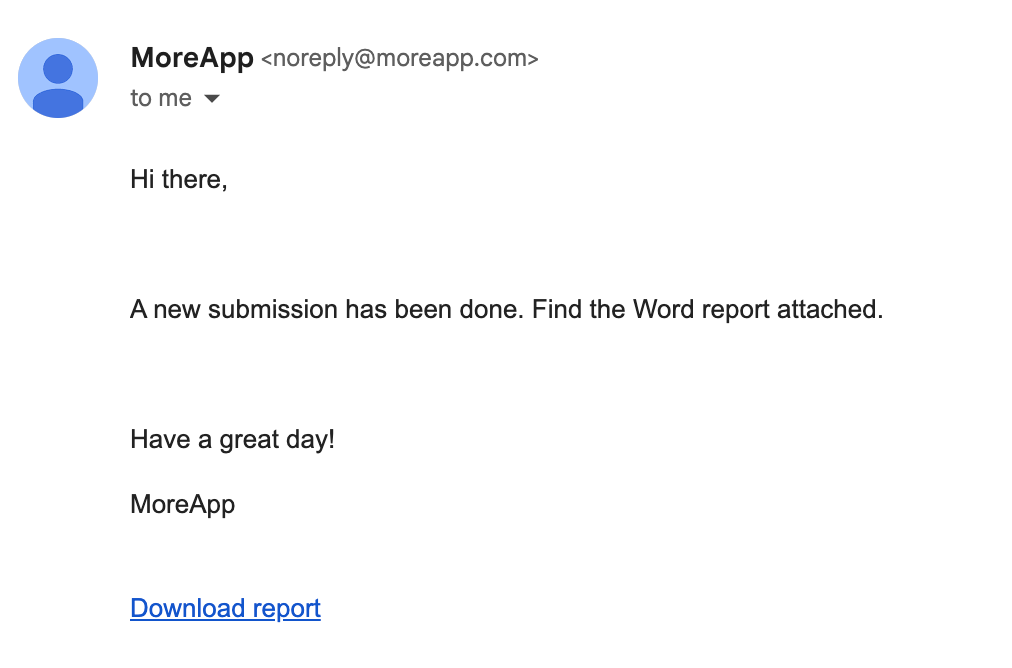
4. Remove the default email
Do you not want to receive the default email from MoreApp? Go to the Emails section, click on the three dots next to the email, and click on Delete. Then click on Publish.
Note: If you remove the default email, you will not be able to download the PDF report under the Submissions tab in the Platform.
5. Download the Report
It is possible to download the Word report on the Submissions tab, by clicking on the green checkmark of each submission. A new section appears and you need to click on Download report.

6. Congratulations!
You have successfully designed the reports of your form with the Word Integration!
Note: You can use this Word template to see what the report would look like with the Word integration. To test the Word template, you can select the predefined "Work Order” template in the Platform.
Keep in mind that this is just an example. Get in touch if you want a customised report and request a quotation.
Want to stay up to date with our latest tutorials? Go to YouTube and hit the Subscribe button!