How to Integrate via Power Automate | MoreApp
If your organisation uses Microsoft 365 applications, you can connect your tools with MoreApp through Power Automate.
No MoreApp account yet? Sign up here.
This feature is available in the Branch, Tree and Forest plan. Visit our Pricing page.
This Help Center post presents a general overview of how to connect MoreApp to other tools using Power Automate.
1. Create a Flow
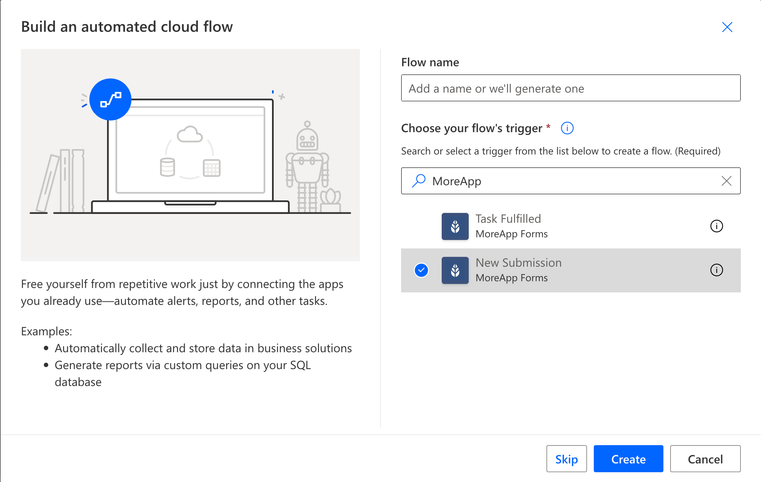
Begin by accessing Power Automate and clicking on Create to configure your flow.
You can connect to different tools, according to your needs, such as Teams, SharePoint, Power BI, etc. Take advantage of pre-existing templates that are already available for you.

2. Configure the Trigger
You can use MoreApp as a trigger to activate an action in another tool. These are the Triggers you can use:
-
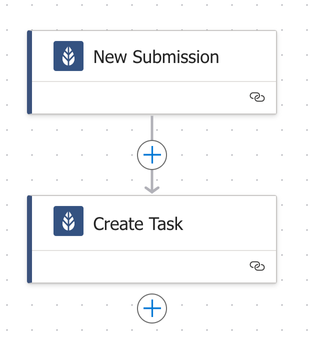
New Submission: This works as a trigger every time a new form is sent.
-
Task Fulfilled: This works as a trigger if a task is completed.

Once you have selected a trigger, the next step is to establish a connection if one does not already exist.
Note:
-
Ensure you have an API Key to connect to MoreApp.
-
Actions are available in all plans. Triggers, powered by Webhooks, become available from the Branch plan and above.
3. Configure the Action
You can execute an action in MoreApp after you have configured a trigger. These are the available MoreApp Actions:
-
Create Task: A new task will be created.
-
Download File: The file will be downloaded.
-
Download Report: The report will be downloaded.

Note: Word and Excel files can not be used for these actions.
4. Add a condition (optional)
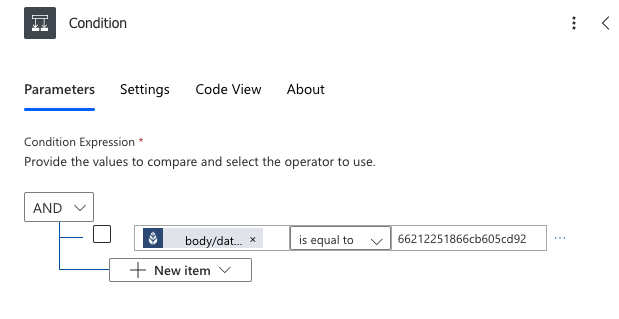
If you want this action to take place only for a specific form, you can add a condition to your flow. You can filter for example on form ID. In that way, the form ID will be verified before continuing.
Click on the + icon to add an action. Select in the search bar the Condition action, under Control.
Now, in the parameters section, you can search for dynamic fields by adding a / in ‘Choose a value’. Once you click on Insert Dynamic content a dropdown will appear. Select the option: body/data/info/formId.

5. Activate the connection
Once the configuration has been completed, it is time to activate the connection. Hit Save and test your workflow!
Want to stay up to date with our latest tutorials? Go to YouTube and hit the Subscribe button.