How to build a Workflow with the Task Integration | MoreApp
Build a workflow and assign a task to another user based on a submission. You can use it to ask for approval of an invoice, travel request or declaration.
No MoreApp account yet? Sign up here.
This feature is available in the Branch, Tree and Forest plan. Visit our Pricing page.
In this Help Center post, we will show you how to configure this integration and provide an example of how you can use it.
1. Create a form
Go to the MoreApp Platform and create a form.
In this example, we will call it Form 1. Copy the form by clicking on Copy in the Form Overview.

The copied version has the same data names as the original form. In this example, we will call this Form 2.
Note: The Read-only Text-widget does not support Subform, Catalogue, Search, Drawing, Photo, Signature and File-widgets.
2. Add the Task Integration
Go to the MoreApp Platform and select a Form 1. Click on Edit form and go to the Integrations tab. Then click on Add Integration.
Select the Task integration and click on Add.

3. Configure the Integration
The next step is to configure the Task integration. Open the first form in the Form Builder and go to the Integrations tab.
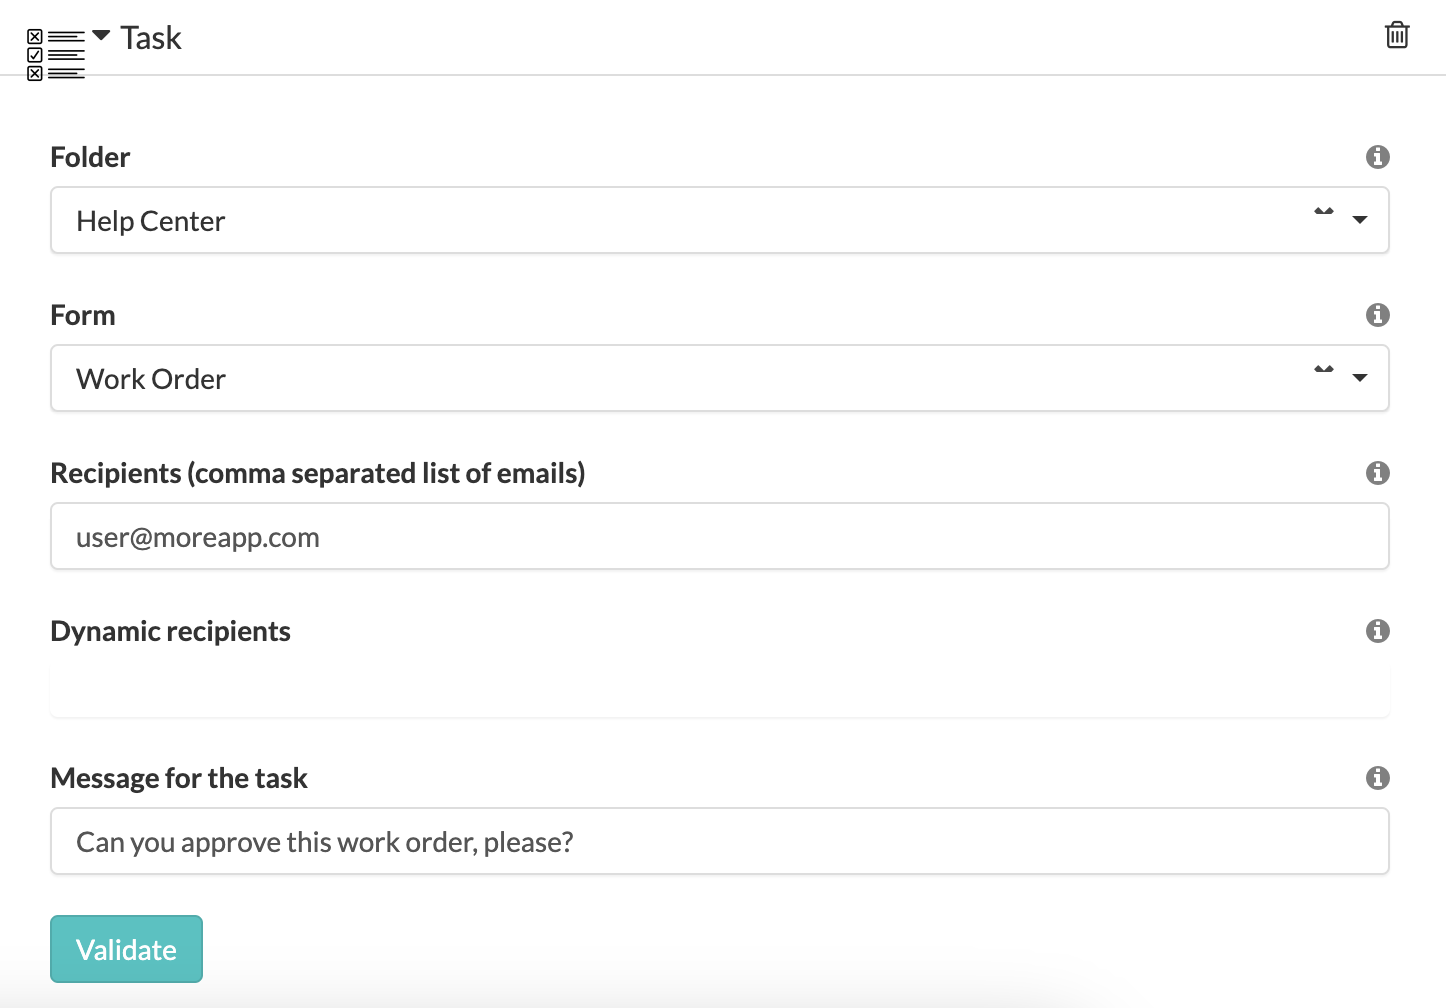
Select the Folder which contains your second form for the Folder-property. Select your second form for the Form-property. Choose the Recipients of the task and add a message if it's necessary.
If you're working with dynamic recipients, make sure you use a widget which can contain an email address, for example, the Email- or the Search-widget.
Note: The recipients (also Dynamic recipients) need to be added as a user to the form to open the task.
Lastly, click on Validate and then on Save & Publish.

4. Test your new workflow
We're done configuring the integration and it's time to test! Open your first form in the App and fill it out. After the form is filled in, the administration or manager receives a notification to approve the request.
The Task integration will automatically send a task to the person who has to sign the form. Upon sending your integration you should see that the recipient(s) of the Task integration receives a new task. Open the task and check if all your data is there.
Note:
- With this integration, you can get a notification also in the email by configuring the Email tab of the first form.
-
Form 2 is only used for tasks and you don't want the users to fill out this form without a task, you can Hide the folder in the App. This setting can be configured in the Platform.
5. Example: Create a Workflow with a form that must be approved
After explaining how to build a workflow with the Task-integration, we will show a specific example on how to configure this workflow within this section.
The example involves creating an Inspection Form that requires approval from a Team Lead.
-
Team Lead approves the form
-
Workflow ends
-
Report is sent
Note: If the form is rejected, it will be send again to the user via a new Task.
5.1. Set up Form 1
Go the the Platform and create an inspection form. In this case, we call the form “Inspection Form - Form 1”.

Note: Add the email address of the user to this Email-widget and make sure to add the email address of the Team Lead. This is important for the workflow to work properly.
Now, copy this form and name the copied form “Inspection Form - Form 2”.
5.2. Set up the Task Integration
Add the Task integration to “Inspection Form - Form 1”. Link this task to “Inspection Form - Form 2”.
As Dynamic recipient, add the Email-widget of the Team Lead. Then, add a message to the task that the Team Lead will receive.
Click on Validate.

5.3. Set up Form 2
To configure "Inspection Form - Form 2" for team lead validation, follow these steps:
Navigate to the form and click on Edit Form.
This form requires the Team Lead to approve or reject the inspection. To achieve this, you can enhance the form by adding the following widgets:
-
Radio Widget: Use this widget to allow the Team Lead to select between two options: Approve or Reject the inspection.
-
Text Area Widget: Include this widget to provide a space for the Team Lead to give feedback on the inspection results. This feedback will be visible to the user.
-
Email Widget: This widget can be used to send automatic notifications based on specific form conditions. Detailed setup instructions for this widget will be provided later in this article.
-
Signature Widget: Add this widget to collect the Team Lead's signature, confirming the approval or rejection of the inspection.

5.3.1. Add rules
Go to the Rules tab and click on Add Rule. Enter the following rule:
Condition:
-
“Approved” is “No”
Actions:
-
“Sent inspection back” is “Visible”
-
“Sent inspection back” gets value “${inspectionEmail}
-
“Feedback” is “Visible”
Setting Up a Rule for Rejected Inspections
When an inspection is rejected, we want the following actions to occur automatically:
-
The Email Widget ("Sent inspection back to") will become visible and will be populated with the inspector's email address.
-
The Feedback Widget will become visible, allowing the Team Lead to provide additional comments or instructions.

5.4. Set up the second Task Integration
Note: Since the rules and integration from form 2 are copied to form 3, you must delete them in “Inspection Form - Form 3”.
-
Add the Task Integration to "Inspection Form - Form 2".
-
Link this task to "Inspection Form - Form 3".
-
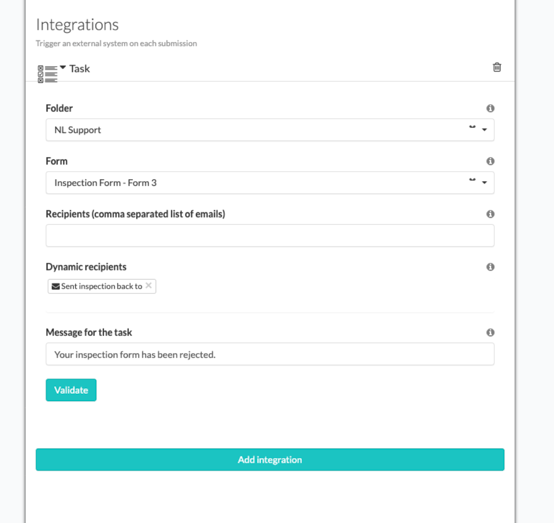
Set the Dynamic Recipient to the Email Widget ("Sent inspection back to").
By following these steps, the rejected inspection will be routed back to the inspector for further action.

5.5. Set up Form 3
-
Copy "Inspection Form - Form 2" and click on Edit Form.
This form will be sent to the user once an inspection has been rejected. To adjust it accordingly:
-
Remove unnecessary widgets:
Delete the widgets below the 'Validation' section. -
Add a Read-Only Text Widget:
Place this widget at the top of the form and give it the same data name as the Text Area Widget in "Form 2" (in this example, the data name is "feedback").This ensures that the user can read the feedback provided by the Team Lead.
Note: Remove the field from the second form to avoid having the feedback field duplicated.
By following these steps, the user will receive the feedback and be able to make a new submission to restart the inspection process.

This is how it looks in the App:

Note: You can add as many forms to your workflow as needed.
Want to stay up to date with our latest tutorials? Go to YouTube and hit the Subscribe button!