No MoreApp account yet? Sign up here.
1. Create the Google Spreadsheet
In order to have your data exported to a specific Google Spreadsheet, you will need to create a new sheet, or you can also use an existing sheet. Once you have created your sheet, you can go to the MoreApp Platform.
2. Configure the Google Sheets integration
Log in to the MoreApp Platform and select your form. Click on Edit form and go to the Integrations tab. Then, click on Add integration and select Google Sheets.
First, connect your Service Account. You can connect a new account or use one that you have previously connected. Read more about Service Accounts.
Insert the Spreadsheet ID from your Google spreadsheet. The ID can be found in the URL of your Google Sheet as shown below.

As the Sheet name, you will have to put the name of the sheet that can be found at the bottom of your sheet, in this example that is 'Sheet1'.
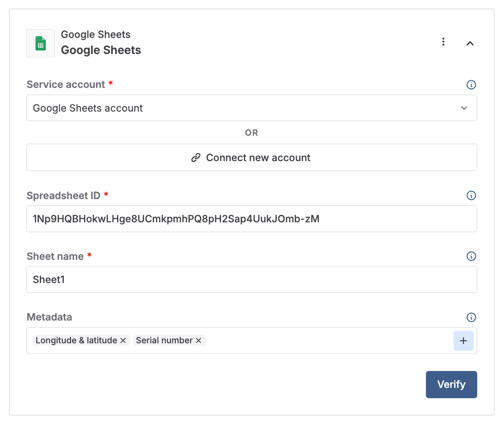
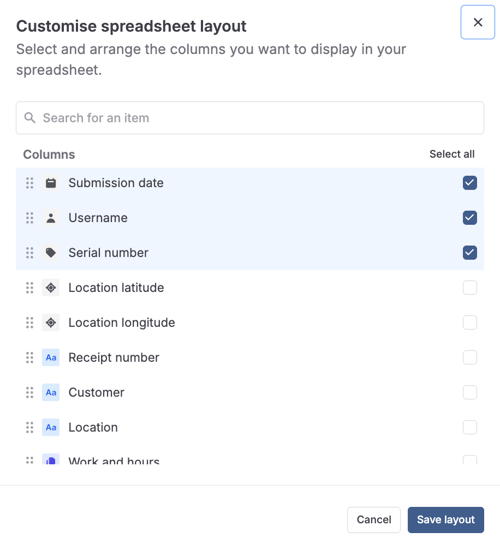
Under Spreadsheet columns, you can modify the column arrangement in the spreadsheet. Click on Edit layout to organise the columns according to your preferences. Once you have done the selection of columns, click on Save layout to confirm.
Note: This will impact your existing settings. Consider creating a new sheet to preserve the original setup.
Click on Verify and then on Publish.
3. Result in Google Sheets
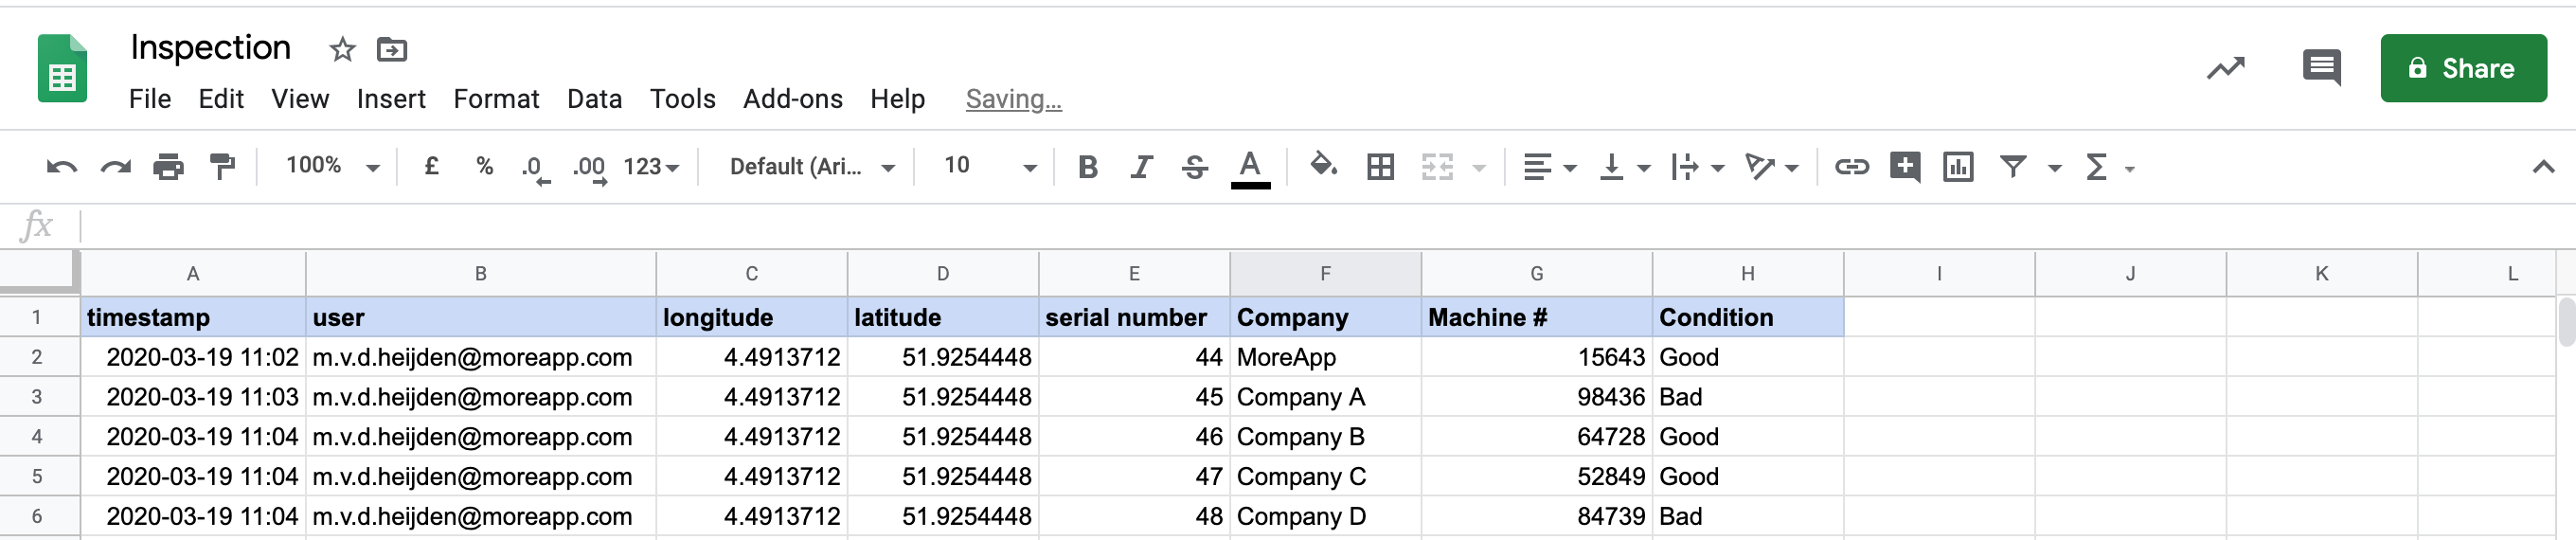
When a user fills in the form, the data is automatically added to the Google spreadsheet as shown below.
4. Adjusting the data
If you want to adjust the data in the sheet, create a second sheet. Link the first sheet and the second sheet. Adjust the second sheet, so you will not lose any data.
The formula to link both sheets is: =importrange("URL-sheet1"; "sheet1!A1:Z500").
Insert this formula in the first cell of Sheet2.
The first part of the formula is the URL of sheet1 which imports data to sheet2. Put this URL between quotation marks in the formula.
The second part of the formula is the name of sheet1 with an exclamation mark behind it. The third part of this formula is the cells that you import from sheet1. Put the name and cells between quotation marks and finish the formula with a bracket. The data from sheet1 will now be imported to sheet2.
When you inserted the formula, the cell will give an error: #REF, you have to give permission to link 2 tabs. Click on the cell, and click on allow access. Now, the 2 tabs are linked to each other.
5. Congratulations!
Now you have successfully added the Google Sheets integration to your form, which means that you will see your form submissions arriving in your Google Sheets in real-time
Note:
- In this version your submitted forms will simply be added as a new row in your sheet.
- We do not update the sheet headers whenever you update your form, so you'll have to do this yourself.
- This integration does not support images/files.
- All nested data (Subforms, Pin forms, Search field) will be added to a single cell.
- We suggest not to use the Google Sheet integration when using Rules.
Want to stay up to date with our latest tutorials? Go to YouTube and hit the Subscribe button!