How to Integrate MoreApp via Make | MoreApp
Connect MoreApp to any other software via Make. Synchronize your forms with other apps and automize your processes. Follow the steps!
No MoreApp account yet? Sign up here.
This feature is available in the Branch, Tree and Forest plan. Visit our Pricing page.
In this Help Center post, you will learn how to connect MoreApp with other apps, thanks to Make. If you want to use the integration, you need to have a MoreApp form in your account. To design a form, access the MoreApp Platform and click on + Create a new form.
You can join Make and start connecting MoreApp via this invitation link.
1. Create a Scenario
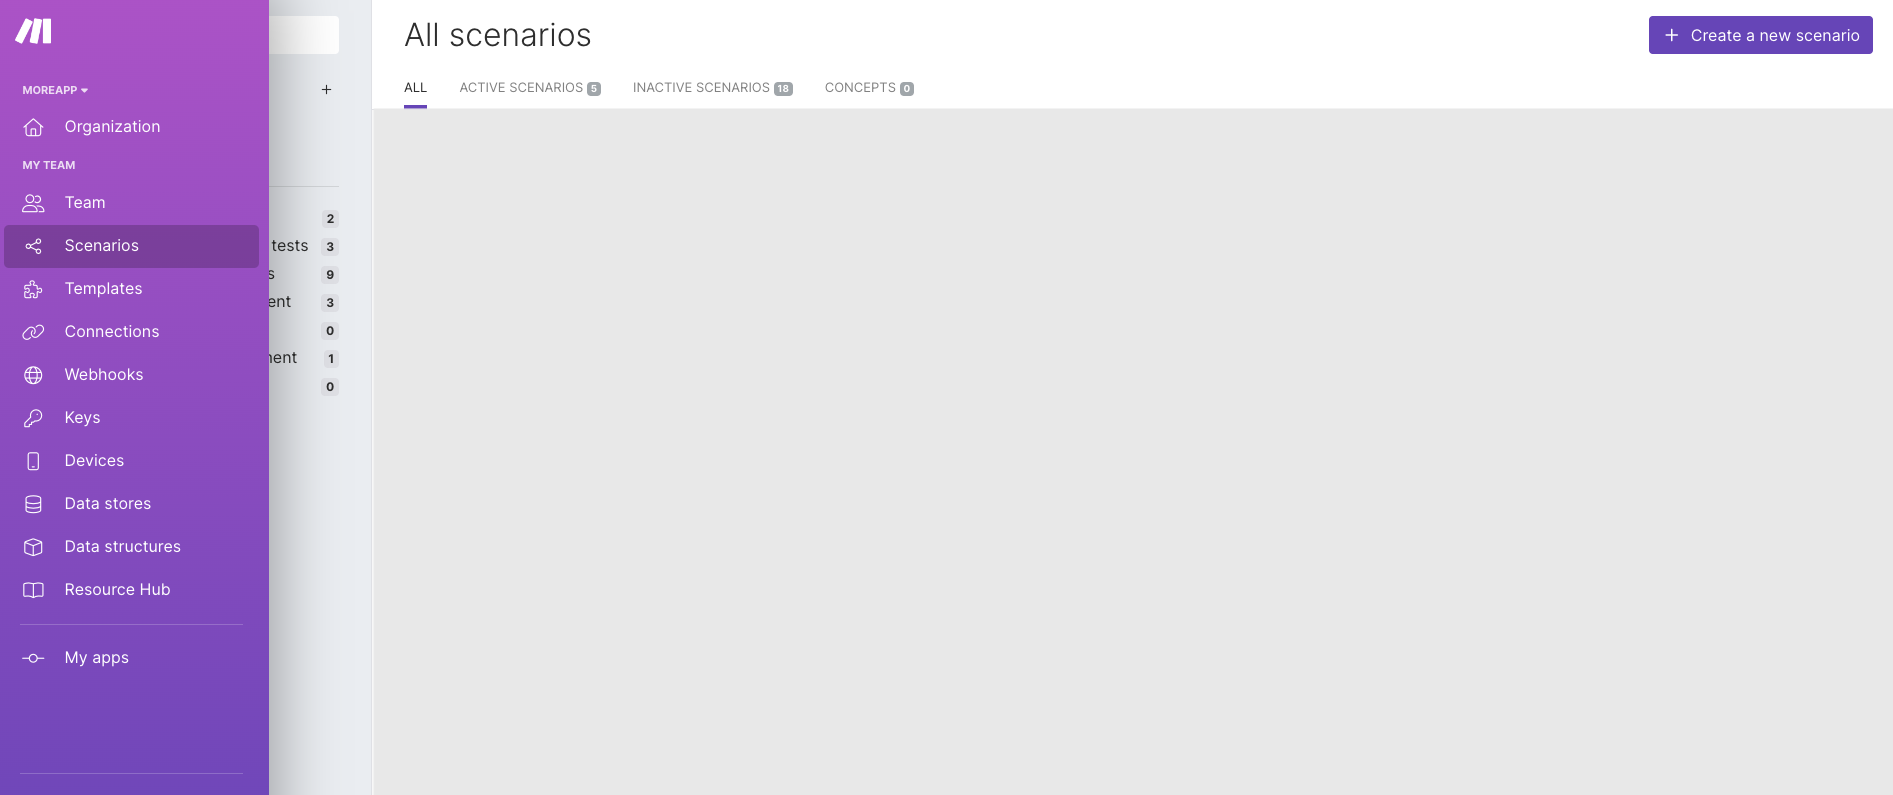
Access Make and click on the Scenarios tab, on the side menu. Once there, click on + Create a new scenario.
A new screen with a big plus sign will appear. Click on the + button in order to select the app you want to connect to.
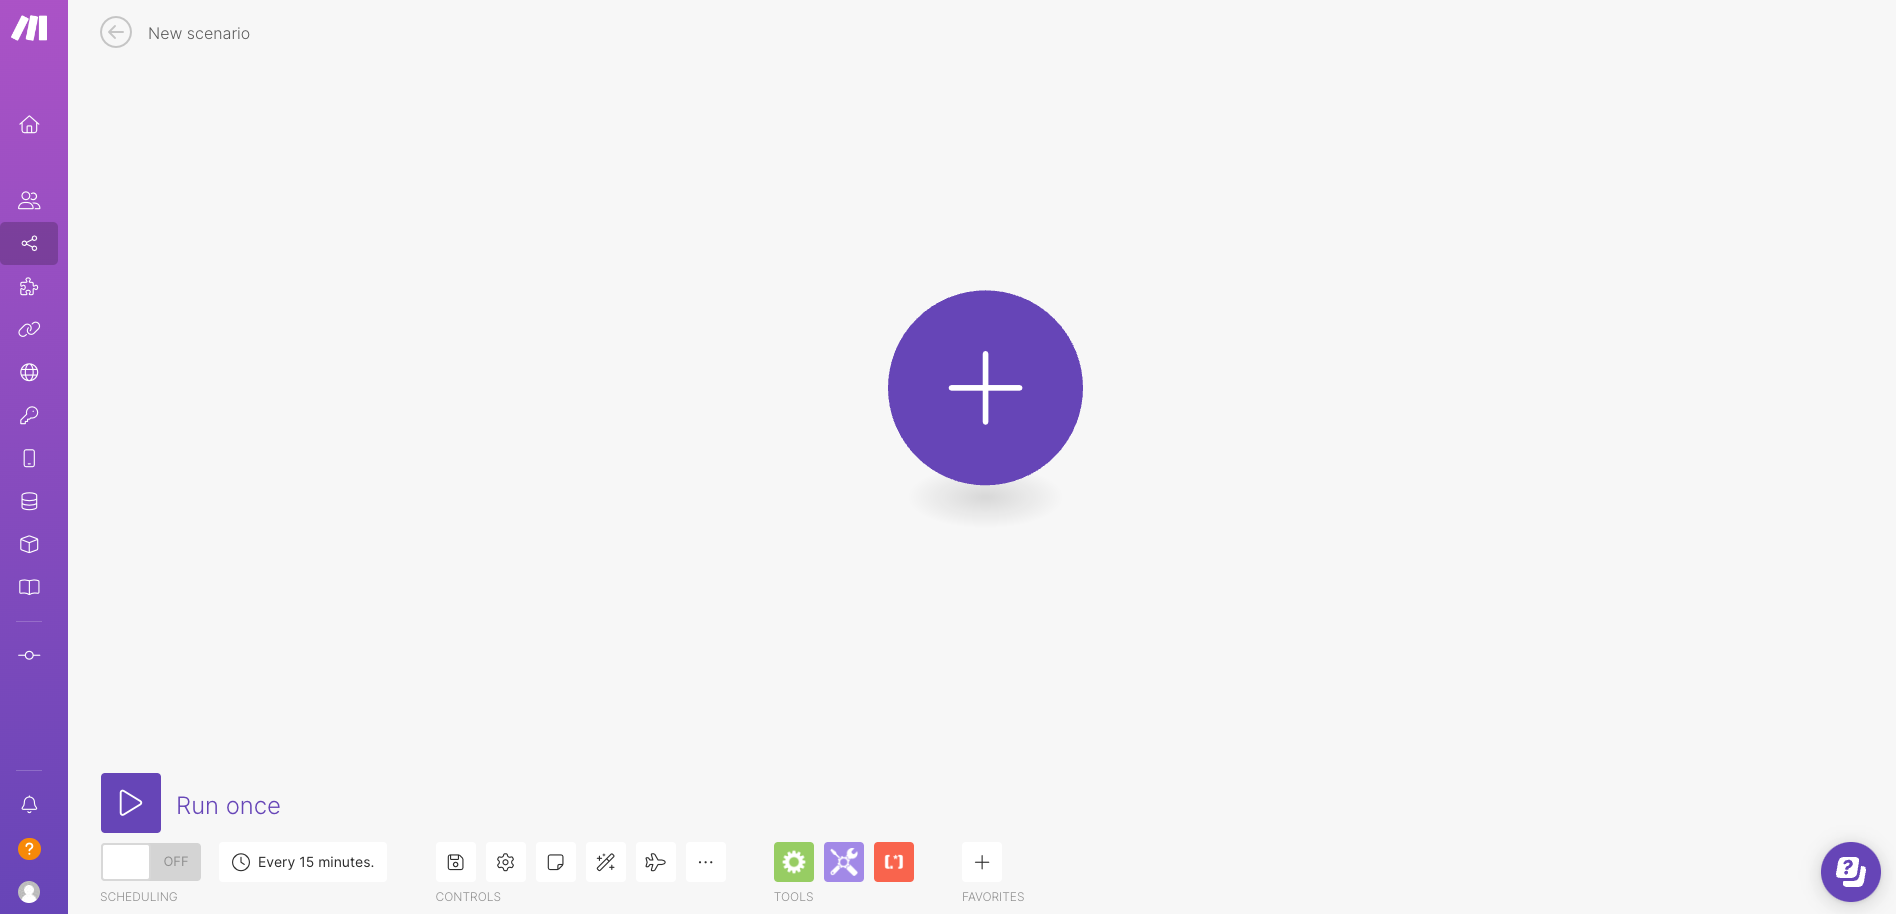
Note: You can use Actions in all plans. Starting from the Branch plan, you can use both Triggers and Actions. This is because, for Triggers, you need to use Webhooks.
2. Select a Trigger
Now, you will need to choose a Trigger. Select the app MoreApp. The available Triggers and Actions will be visible.
For this example, we will select the Trigger “Watch New Submission” so the desired Action will take place whenever a new submission is filled in.
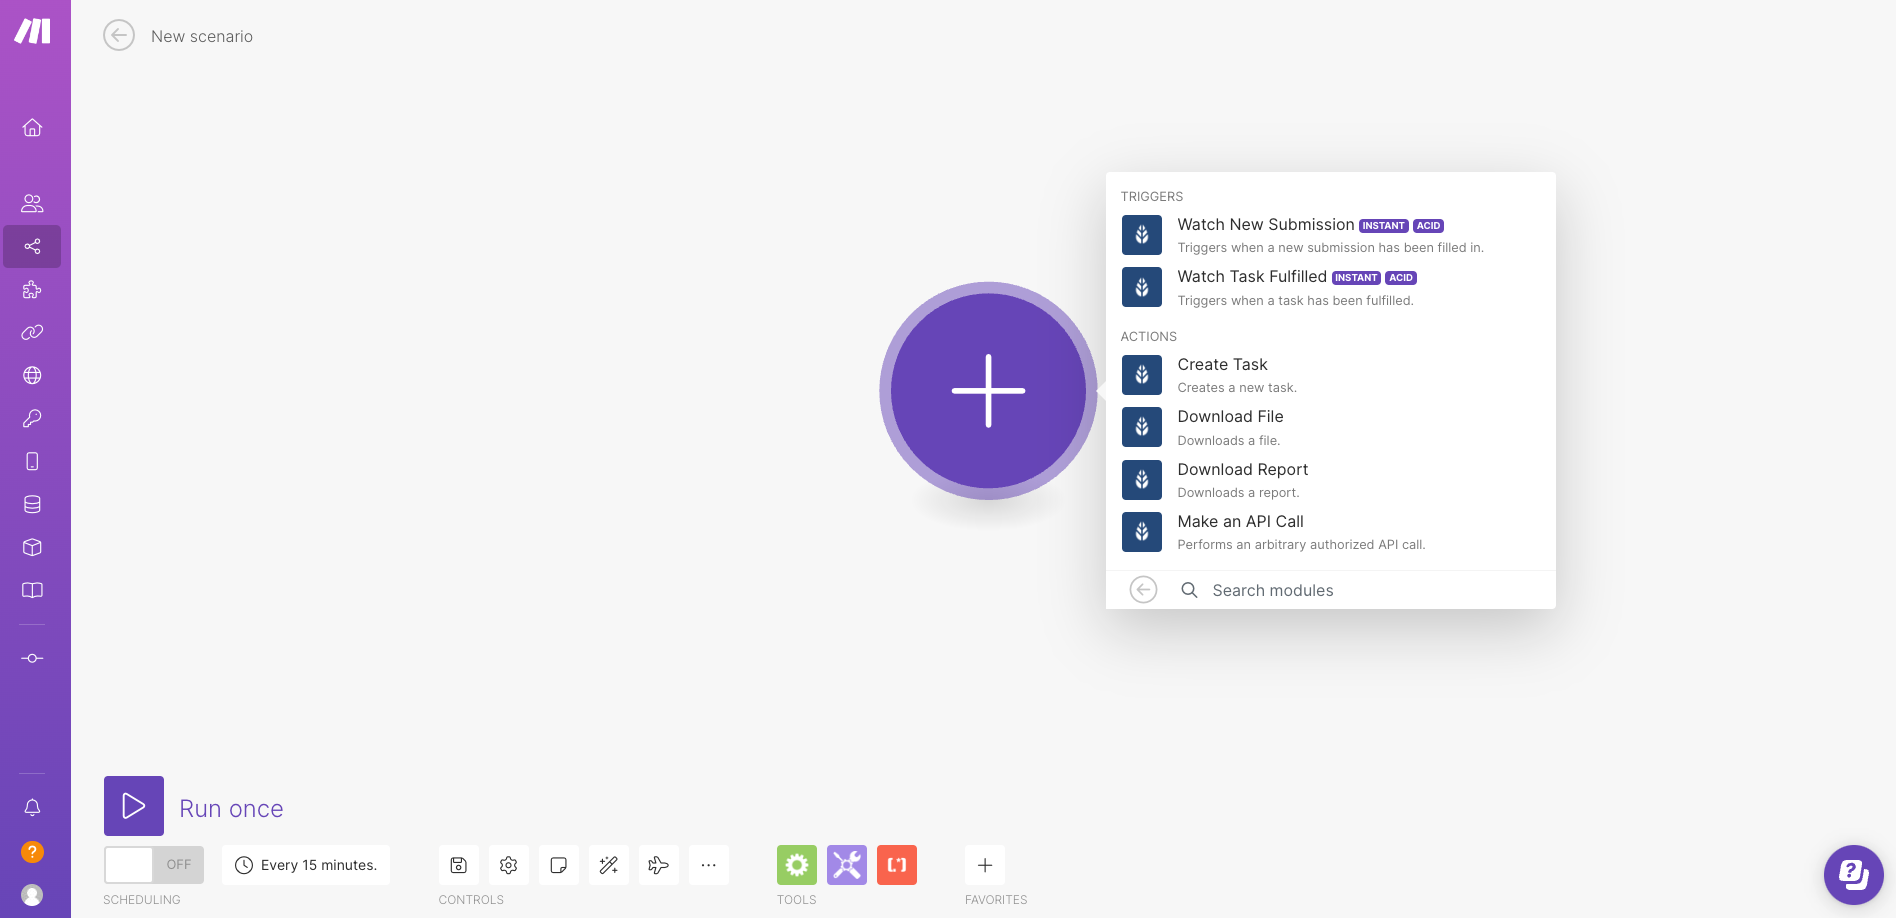
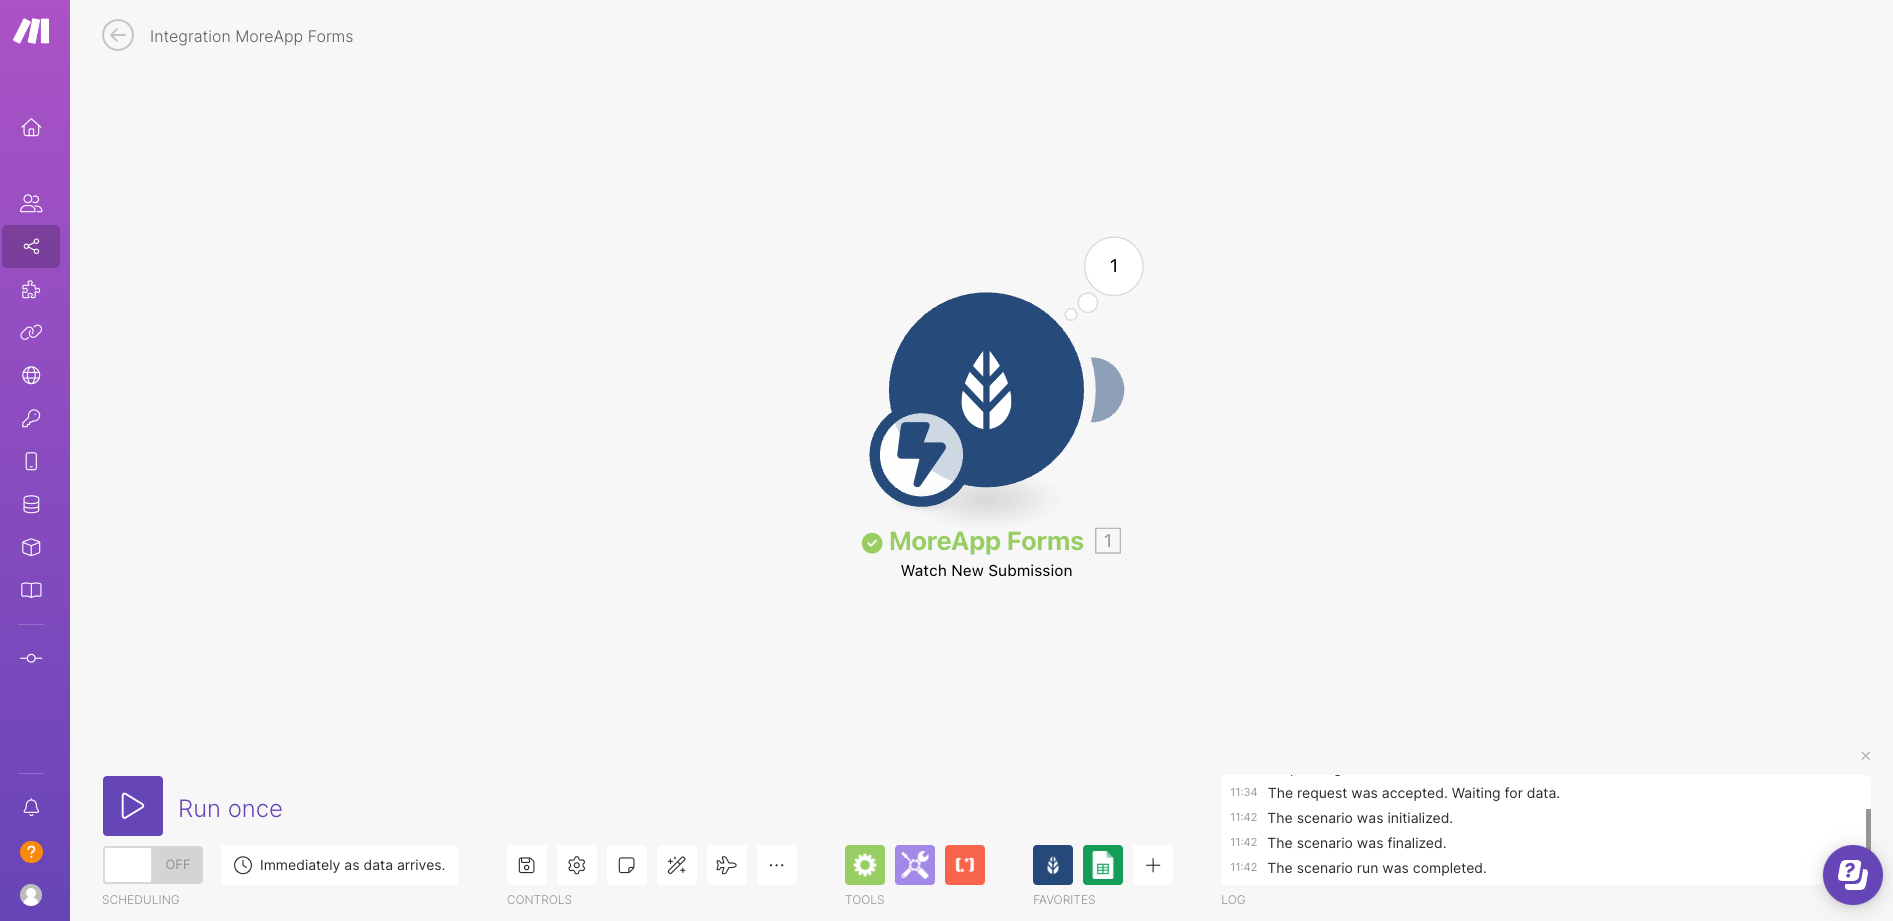
After that, the screen will change and the MoreApp icon will appear in the middle.
3. Create a Make Webhook
Create a Webhook or select an existing Connection. You need to add an API key to establish a new connection.
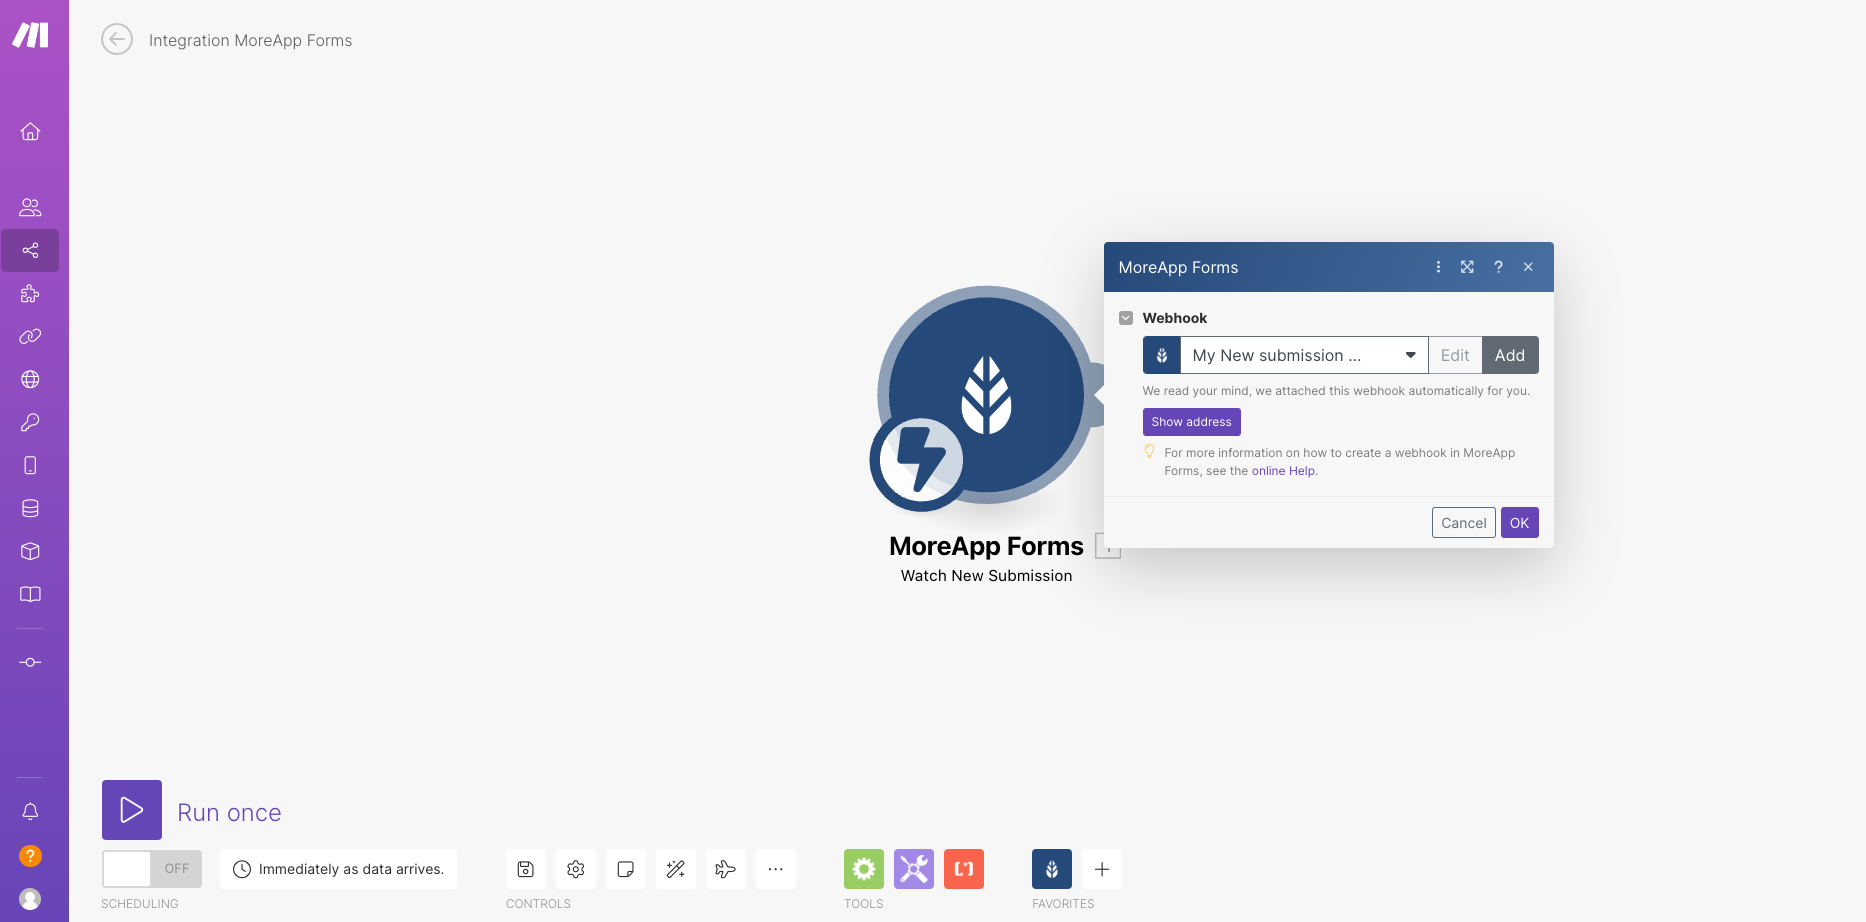
4. Send a Submission
Once it is configured, send a submission with any form. This step is necessary for the Webhook to work.
5. Test the Trigger
Go to Make and test the Trigger, by clicking on Run once. If the configuration has been done successfully, the scenario run will be completed. The MoreApp app will appear as green.
6. Choose an Action
To finish with the configuration, add an Action. Click on the + next to the MoreApp icon and add another module.
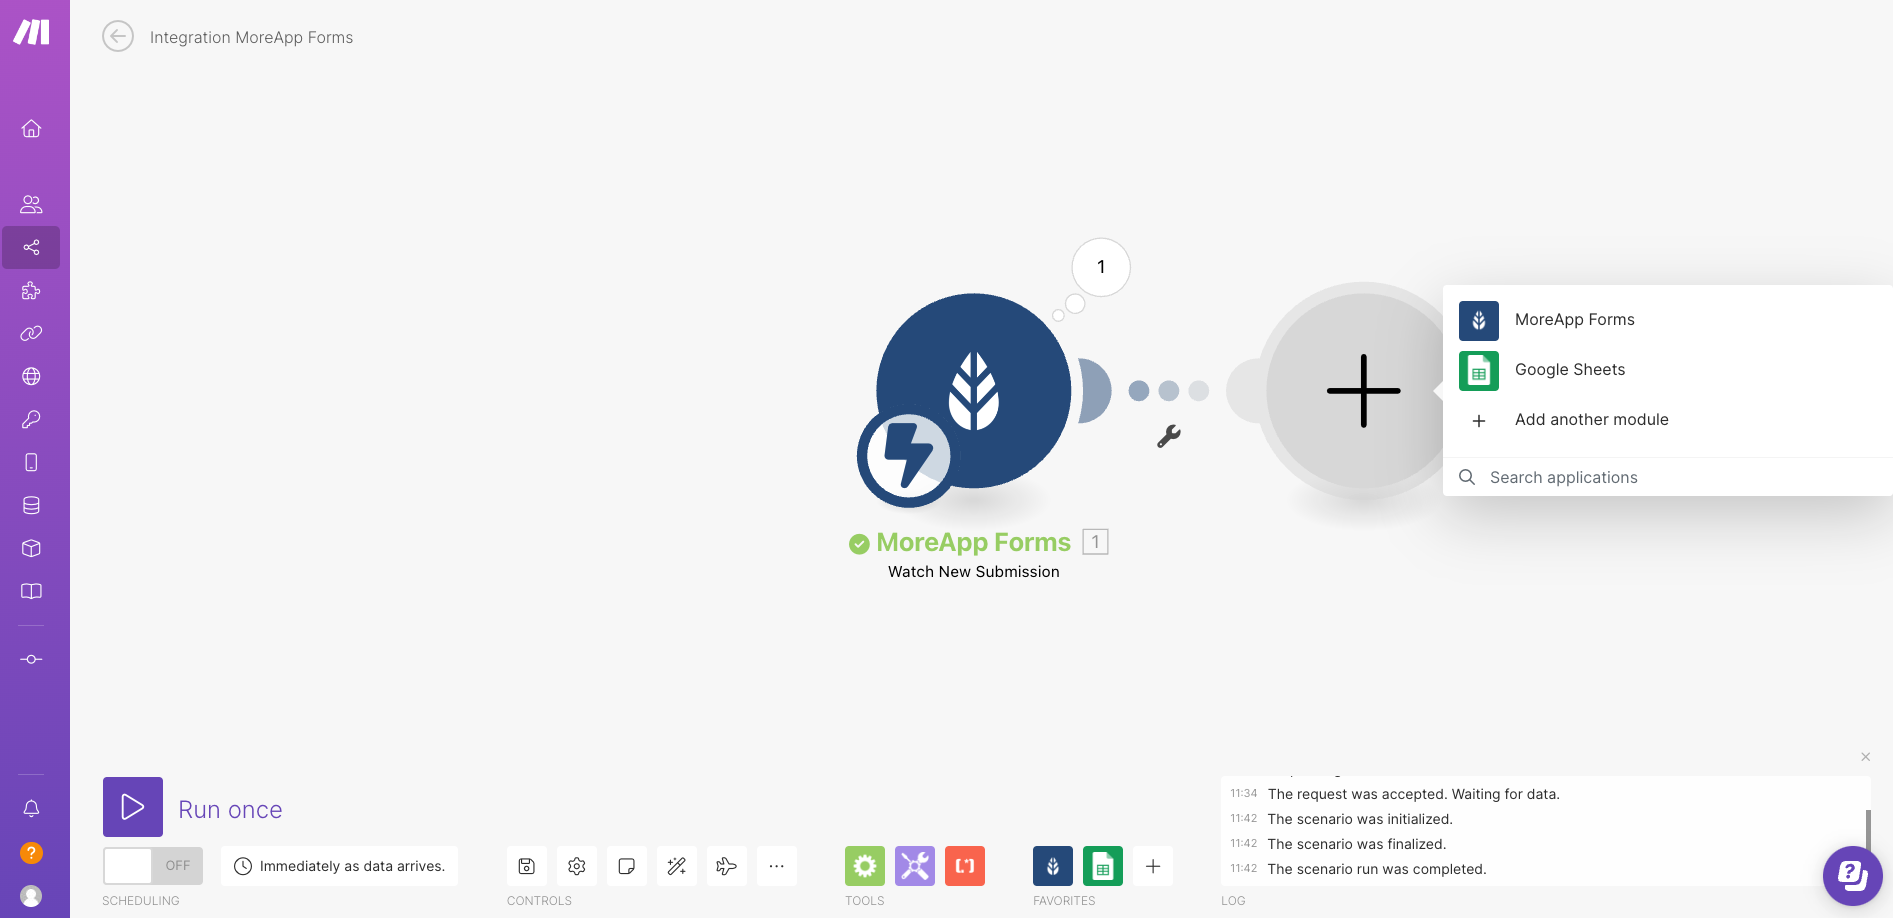
Choose which one of the listed apps you want to integrate with MoreApp. For example, select the app Google Sheets and the action Add a Row. This will create a new row each time a submission is created.
Click on the Google Sheets icon and configure the connection, by clicking on Add. A new screen will pop up so you can connect with your Google account.
Now, select the Spreadsheet where the data will be exported. Choose your Values, by filling in the fields of your submission that you want to export to the sheet.
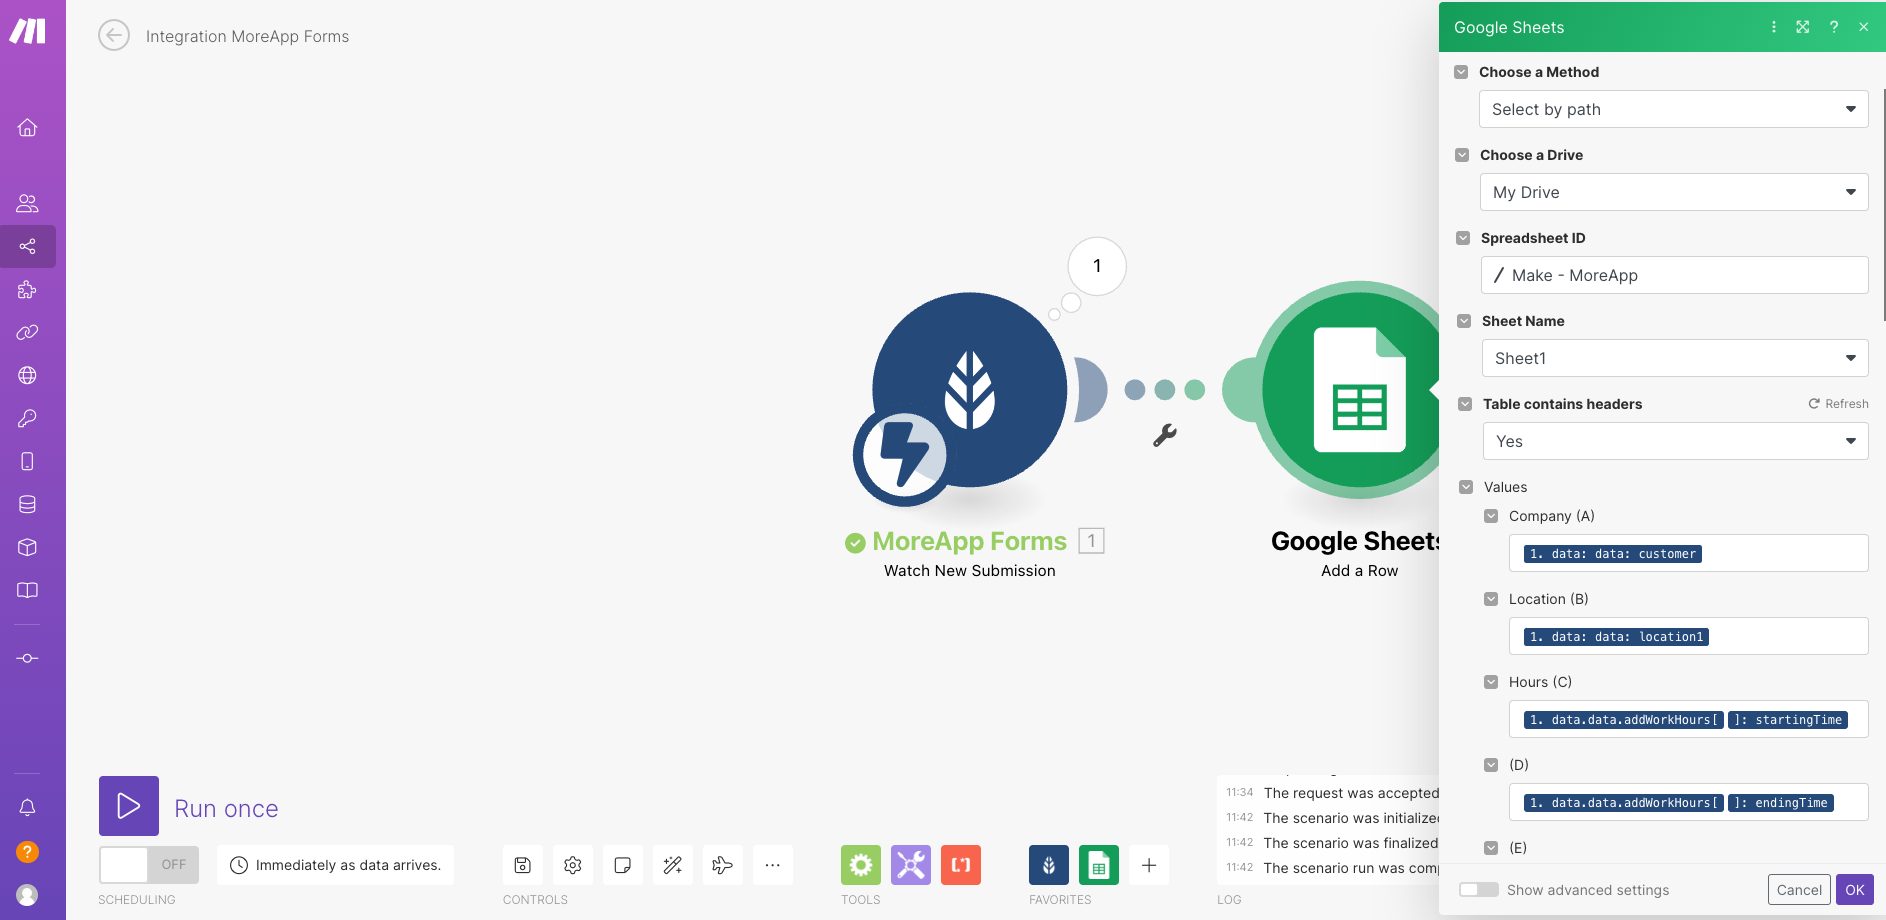
Note: On the Google Spreadsheet, add all the headers you need to export data.
7. Add a Filter
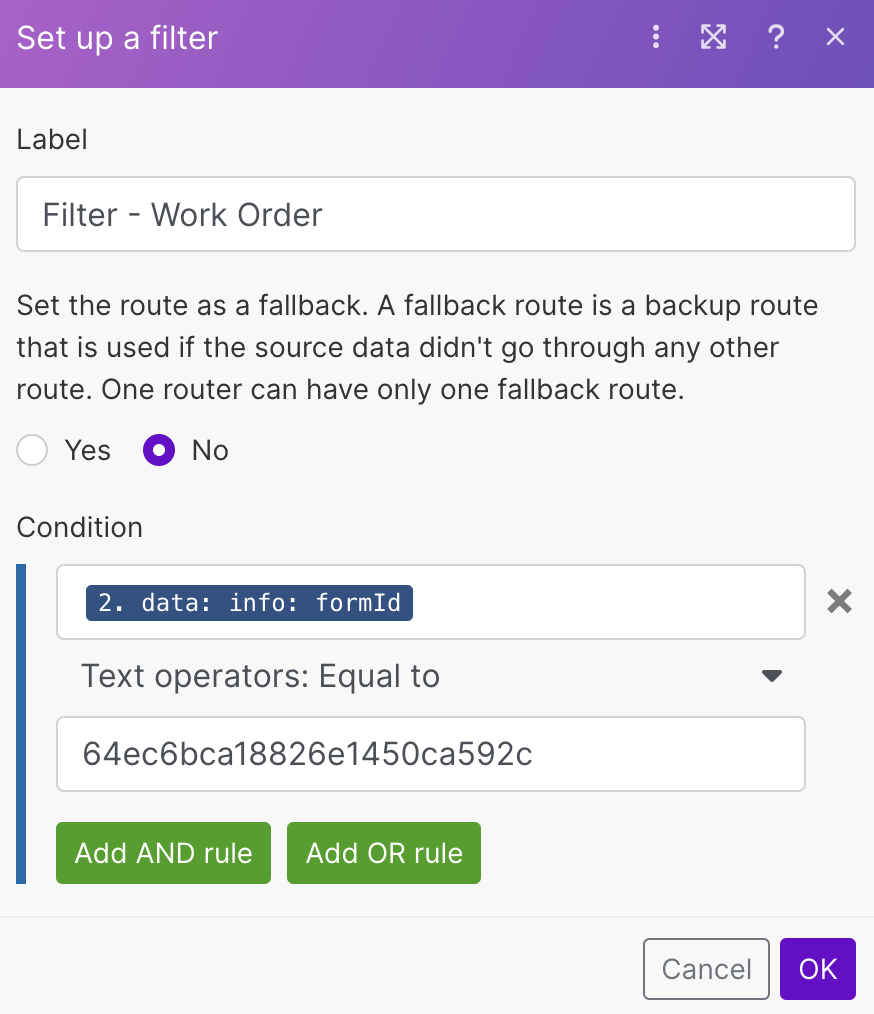
You can add a filter to activate the integration only for a specific form.
Go to the dots between the two modules and click on Set up a filter. You can filter by Form ID or form name, for example. Configure this under the Condition section.
8. Activate the Integration
Finish the configuration, by activating the integration. Click on the OFF button, on the bottom left corner, and turn it ON.
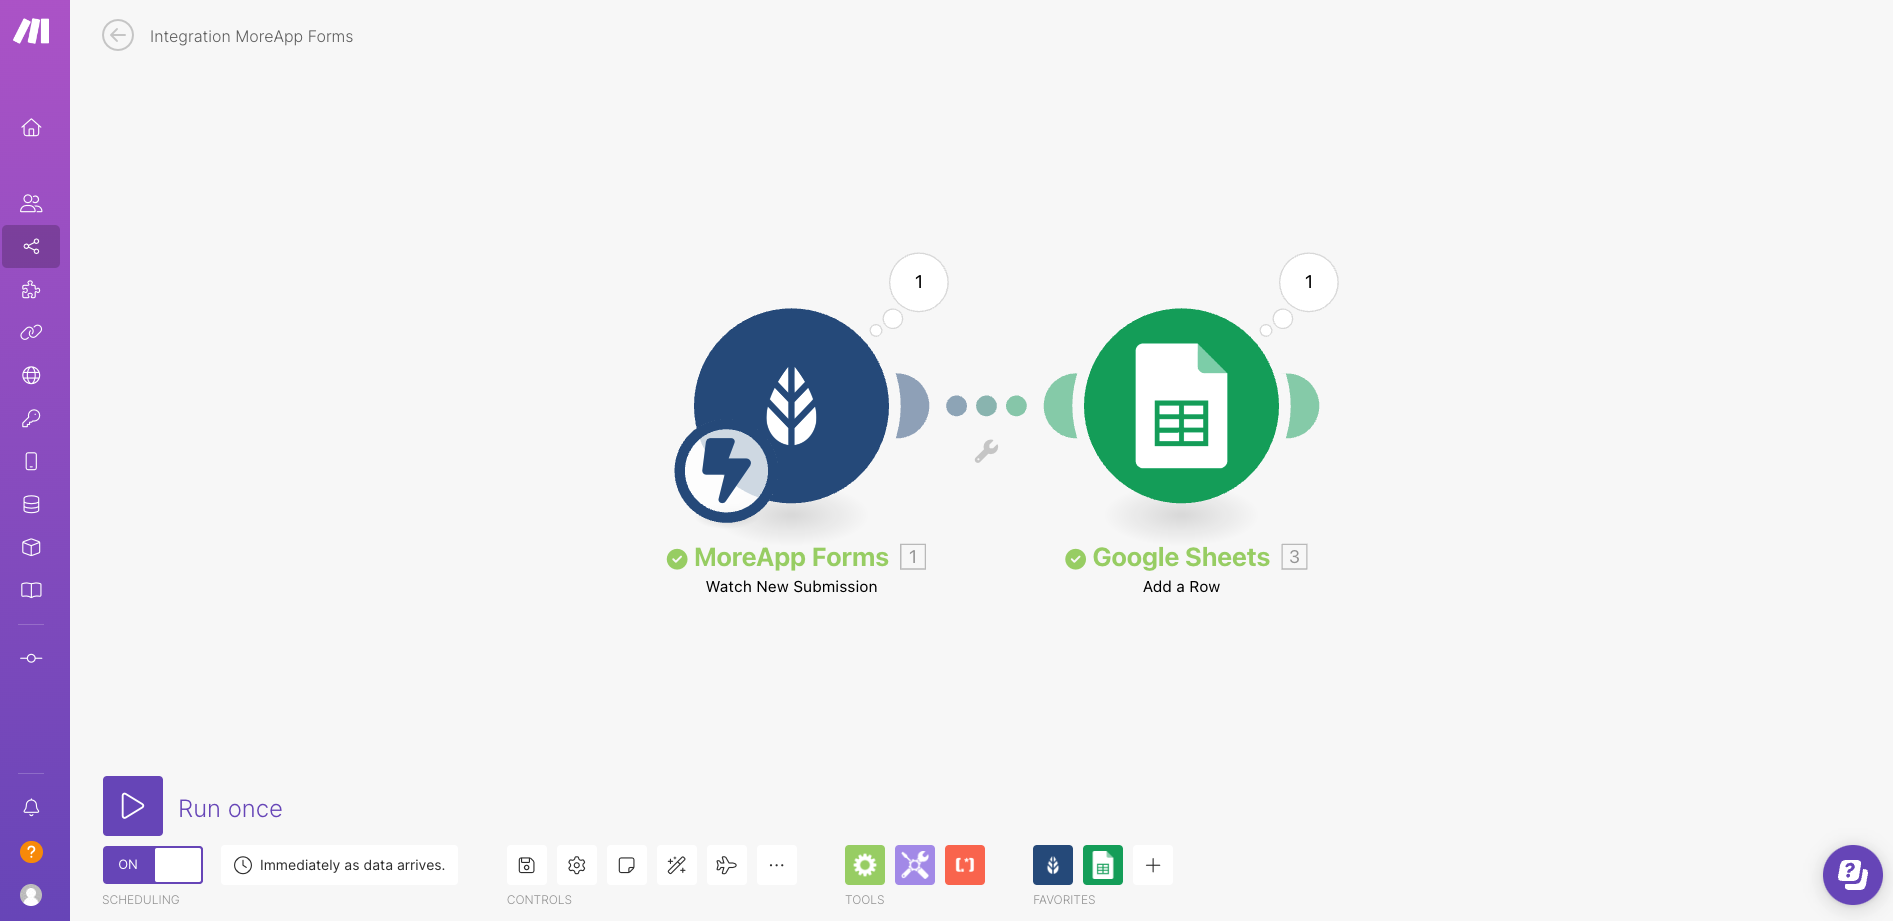
Start doing submissions on your form! Each time a form is sent, a new row will be added to your sheet.
Want to stay up to date with our latest tutorials? Go to YouTube and hit the Subscribe button!