No MoreApp account yet? Sign up here.
This feature is available in the Branch, Tree and Forest plan. Visit our Pricing page.
This Help Center shows a general overview of how to connect MoreApp to other tools via monday.com.
1. Get Started
Access our installation page here and install the MoreApp app to your monday.com workspace.
After you install MoreApp, you can start building automations.
-
Open the board you want to use.
-
Click Integrate, in the top right corner.
-
Search for MoreApp Forms.
2. Configure a Recipe
You can use one of the predefined recipes. The most used automations are already there for you to use.
-
Select a recipe
-
Choose the account you want to use for this automation. The first time you do this, you will need an API key to add the account.
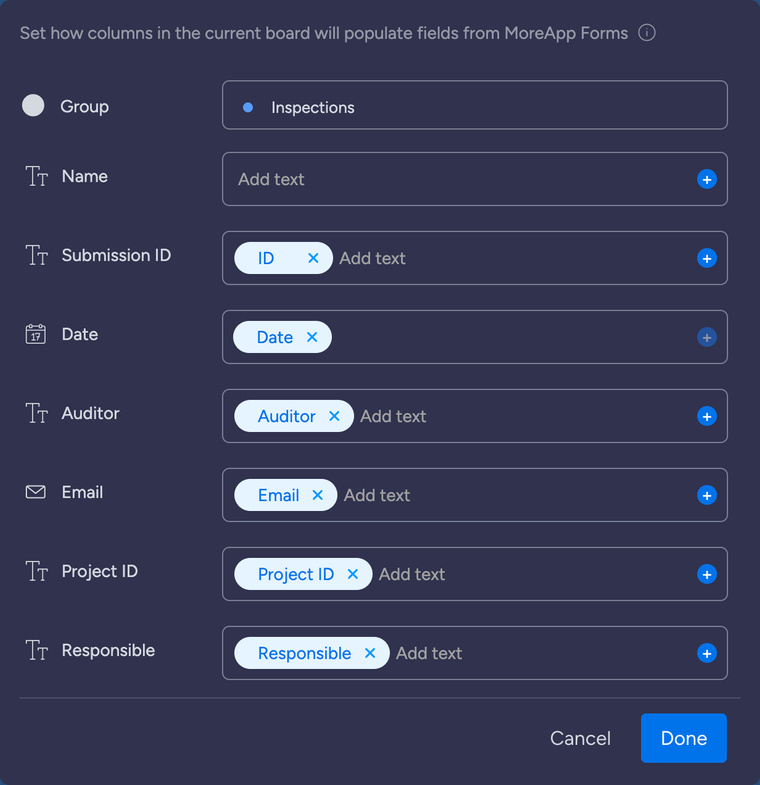
The template provides you with a sentence explaining the action of this integration. Complete the empty fields of the sentence to configure the automation.
Here is an example:

You can map the items from the MoreApp form to columns on the monday board.
Notes:
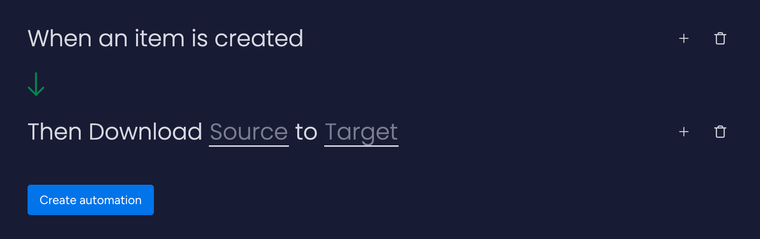
- You can not map files at monday.com. When mapping a file, the column will be populated with the file ID. You can download a file by its ID with a custom recipe, as is shown in the image below.
-
The “Download file” action can be used for any file that can be uploaded to the File-widget.
-
The reports (PDF, Word and Excel) can not be used in this action.
Note: You can also create custom recipes. For example:
-
Task fulfilled → Update status to done
-
Submission deleted → Delete item from board
For our custom actions, you need to have the Submission / Task ID in a column on your board. This can be done by mapping the ID to a monday.com text column.
2.1. Submission Template
Automatically create new items on your board for each form submission. Map form values to monday.com columns. You can use the template: “When there is a new submission for Form, create an Item in Board”.
2.2. Task Template
Create MoreApp tasks automatically when an item is created on your board. You can use the template: “When an item is created Create new task on Form for User with Message and Form content”.
Notes:
- To ease the configuration of this template, we suggest you use unique names for your forms in the Platform. That way, you can differentiate each form when creating the integration.
-
You can not select multiple MoreApp users to send the task to. You need to create an automation for each user you want to send the task to.
When creating a task, monday.com lets you select fields that can work as placeholders to personalise the task message for the users. Also, you can already add some information to the form so it appears pre-filled when the user opens the task.
2.3. Subform Template
Create new board items based on subform data. Every subform entry will create a single row in the group. You can use the template: “When there is a new submission for Form, for every Subform Create an Item in Board”.
Notes:
- This template only works for one subform layer.
-
For every subform you want to add to your board, a separate automation is needed.
3. Activate the automation
Once the configuration has been completed, hit “Add To Board” and test the automation!
Want to stay up to date with our latest tutorials? Go to YouTube and hit the Subscribe button.