No MoreApp account yet? Sign up here.
This feature is available in the Branch, Tree and Forest plan. Visit our Pricing page.
This post shows you how to sign a MoreApp document with DocuSign. Please note that an independent subscription to DocuSign is required.
1. Log in to Make
Access your account on Make.com and go to Scenarios. In the top right corner, click + Create a new scenario.
Click the + button in the middle of the screen, to select the app you want to connect to.
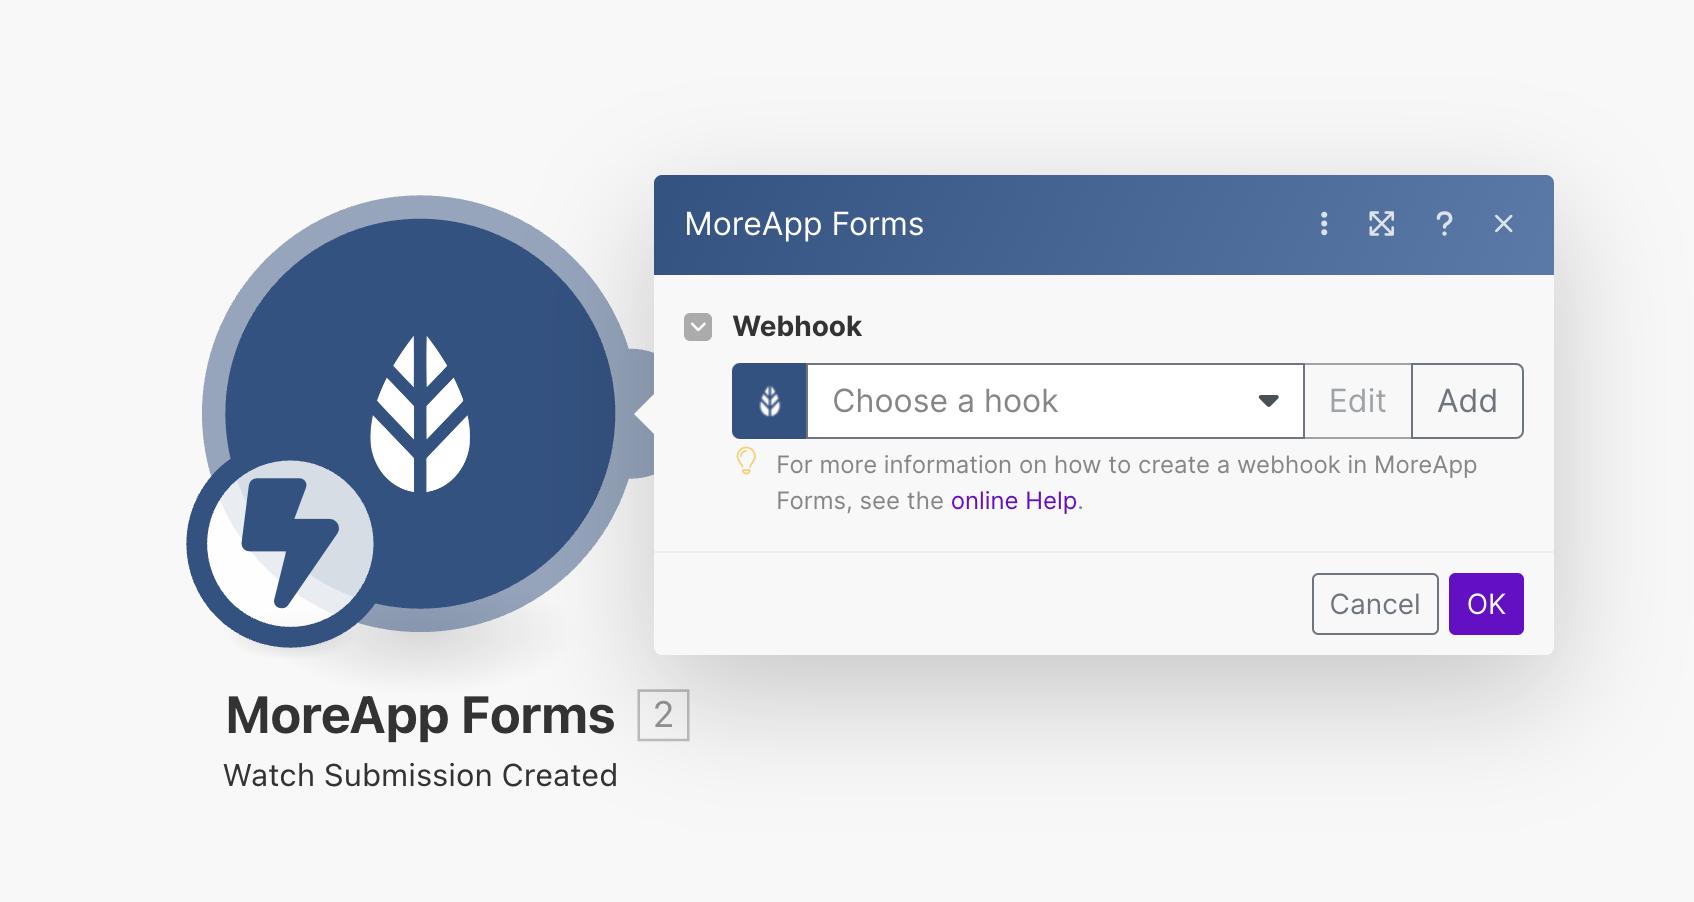
For this integration, you need to choose MoreApp Forms. The Trigger will be “Watch Submission Created“. That way, the action occurs every time a user submits a form.
2. Connect your MoreApp account
To configure the Trigger, select the MoreApp account you are working with. To do this, choose a Webhook by clicking Add.
-
If you already have an account connected to Make, you can select it in the dropdown.
-
If it is the first time you connect MoreApp to Make, an API key will be requested. Here you can find how to create this API key. Copy the API key into Make and the account will be connected.
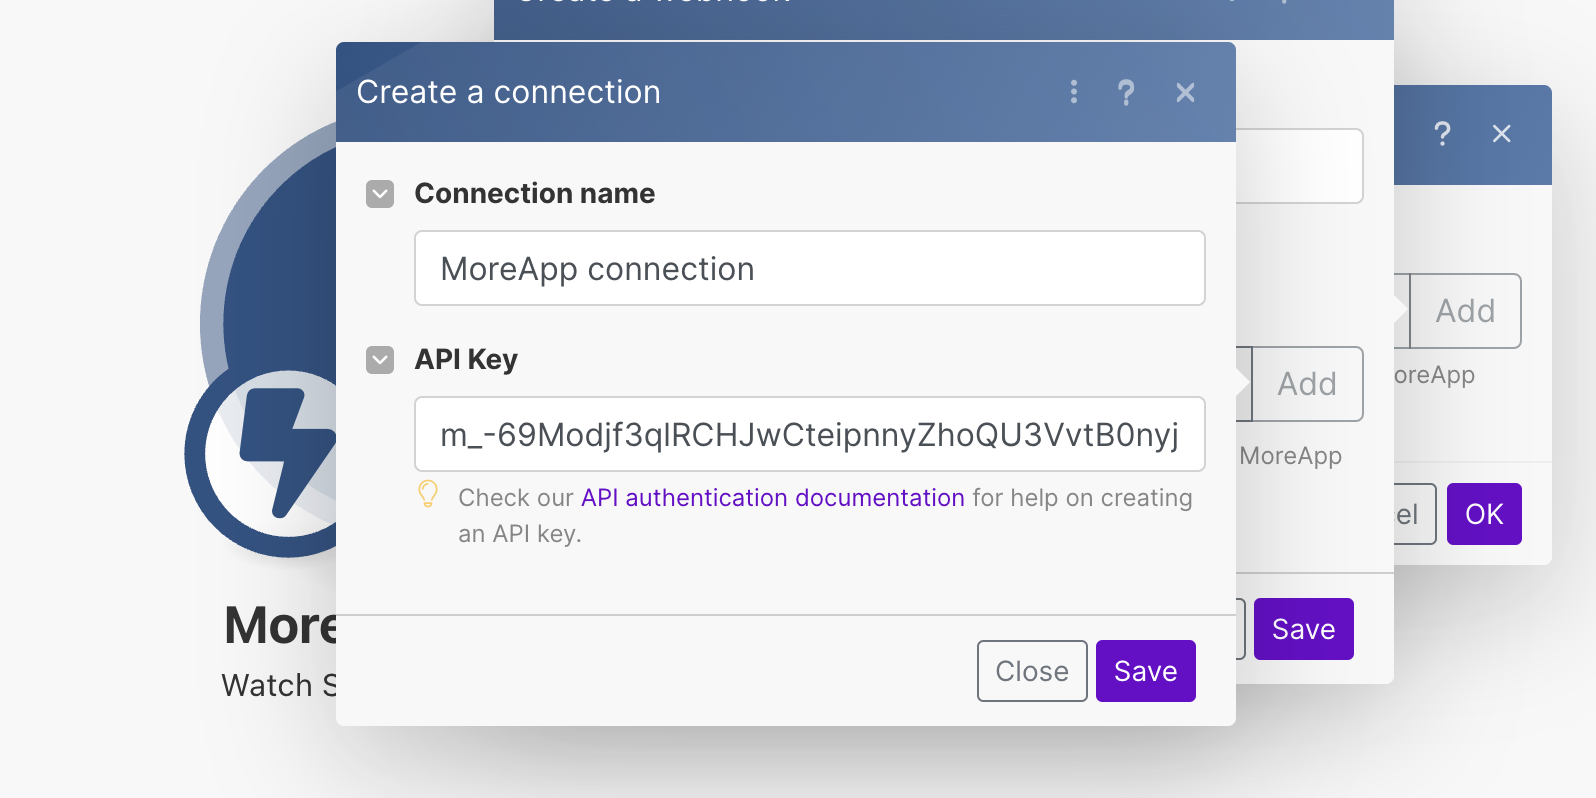
Click Save to make sure the connection is established. Once the Webhook is configured, click OK.
Now, submit any form. This step is necessary for the Webhook to function properly and to enable easy configuration of the next steps.
3. Obtain the MoreApp report
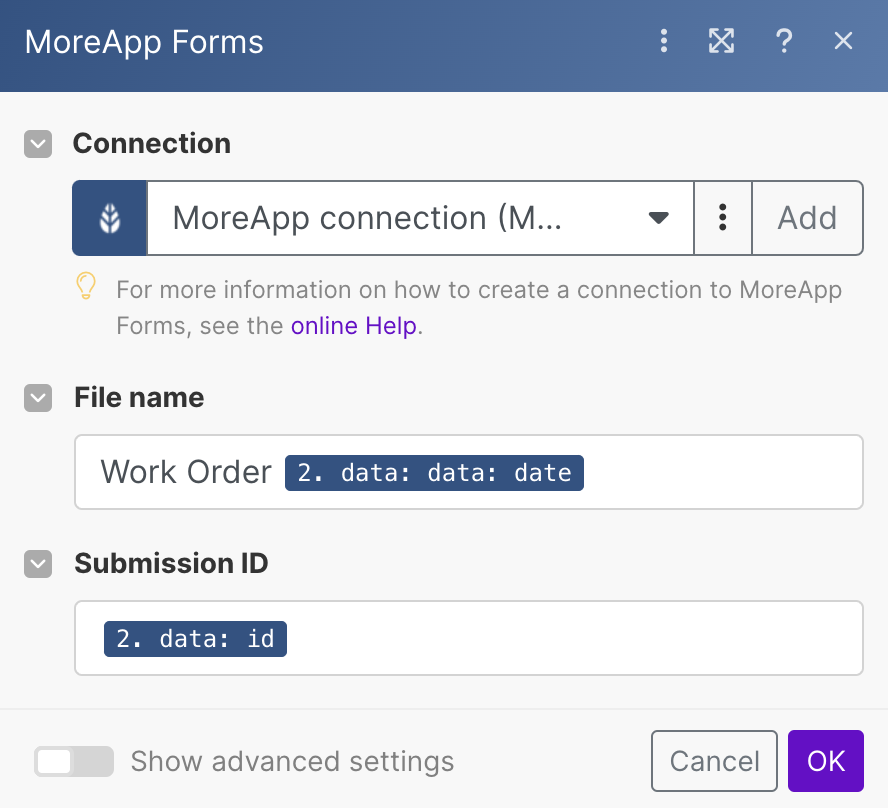
Add another MoreApp Forms module. This one will be configured to download the report created every time a form is submitted. Therefore, the Action will be Download Report.
Connect to your MoreApp account again. Probably, your account will already appear in the dropdown.
In the File name field, enter the name for the report. You can use placeholders to customise it.
Then, select the Submission ID, so the system knows which submission you want to use to download the report. For that, click on the id field that will be displayed, under the meta section, in the placeholders list.
4. Extra: Filter by form
Add a filter if you want this integration to be activated only for a specific form. To do so, click on Set up a filter between the two MoreApp modules.
Set up a condition to trigger the following actions based on specific criteria. For example, you can filter the form you want to use for this connection by choosing the form ID or the form name in the Condition section.

5. Connect to DocuSign
Click the + button to add another module. Search for DocuSign and select “Send a document to Sign”.
Same as the previous steps, you need to add the connection to your DocuSign account.
Then, fill in all the fields that appear:
-
Recipients: Add the emails that will receive the report to sign it. For a proper configuration, add the email address, the name and the ID for each recipient (if you add more than one).
-
Subject: Add the title of the email that will be received. You can use placeholders to customise it.
-
Message: Add the text you want to include in the email. You can use placeholders to customise it.
-
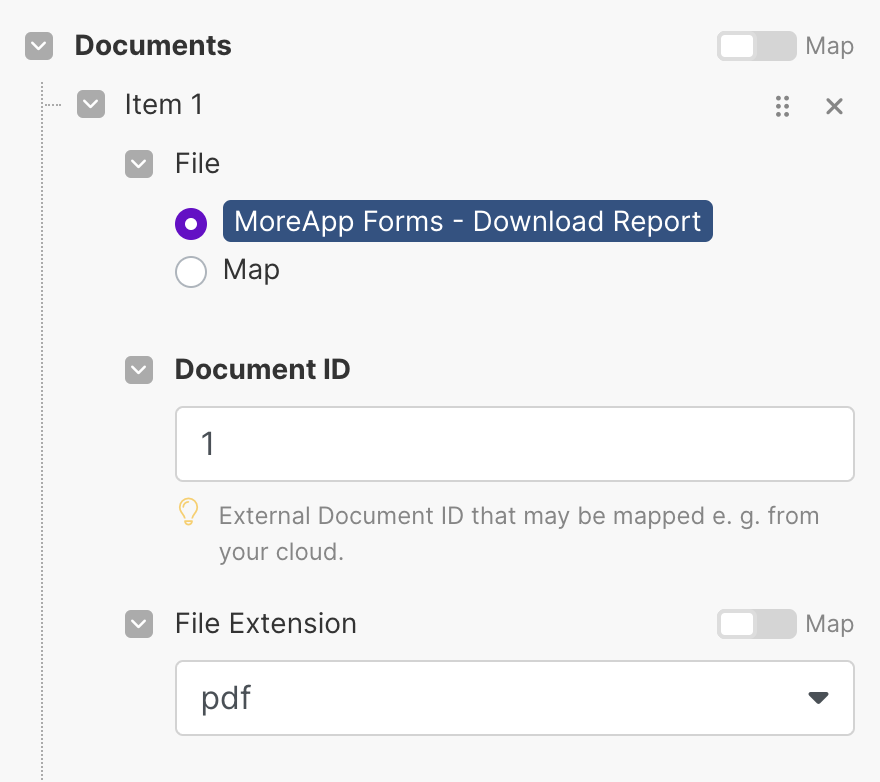
Documents: Add the file to sign.

In the Documents section, choose the File from the previous step. Since you’ve already selected the document you want to sign from MoreApp, it will be listed here.
Add a Document ID, which needs to be an integer number, and a File Extension.
For every submission done, the recipient selected will receive an email to access DocuSign and sign the report.
6. Test and activate the integration
After completing the configuration of all modules, click Run once.
Submit a form in MoreApp, so Make can test if the integration is working.
If something is wrong, you will receive a warning message. If everything is configured properly, you are ready to go!
Click the OFF button in the bottom left corner to turn it ON.
7. Result
Here is an example of how the document will look like after the DocuSign signature is added.

Want to stay up to date with our latest tutorials? Go to YouTube and hit the Subscribe button!