No MoreApp account yet? Sign up here.
This feature is available in the Branch, Tree and Forest plan. Visit our Pricing page.
Note: To make the process even easier, you can use one of our templates. Access this page and click on Get this template. The modules will be automatically added for you, and you will be guided on how to configure each of them.
1. Create a Scenario
Access Make.com and navigate to the Scenarios tab in the side menu. Click + Create a new scenario.
A new screen with a + sign appears. Click on the + button to select the app you want to connect to.
2. Select a Trigger
Now, you need to choose a Trigger. Select MoreApp Forms. The available Triggers and Actions will be visible.
For this example, we select the Trigger “Watch Submission Created” so the desired Action will take place whenever a new submission is filled in.
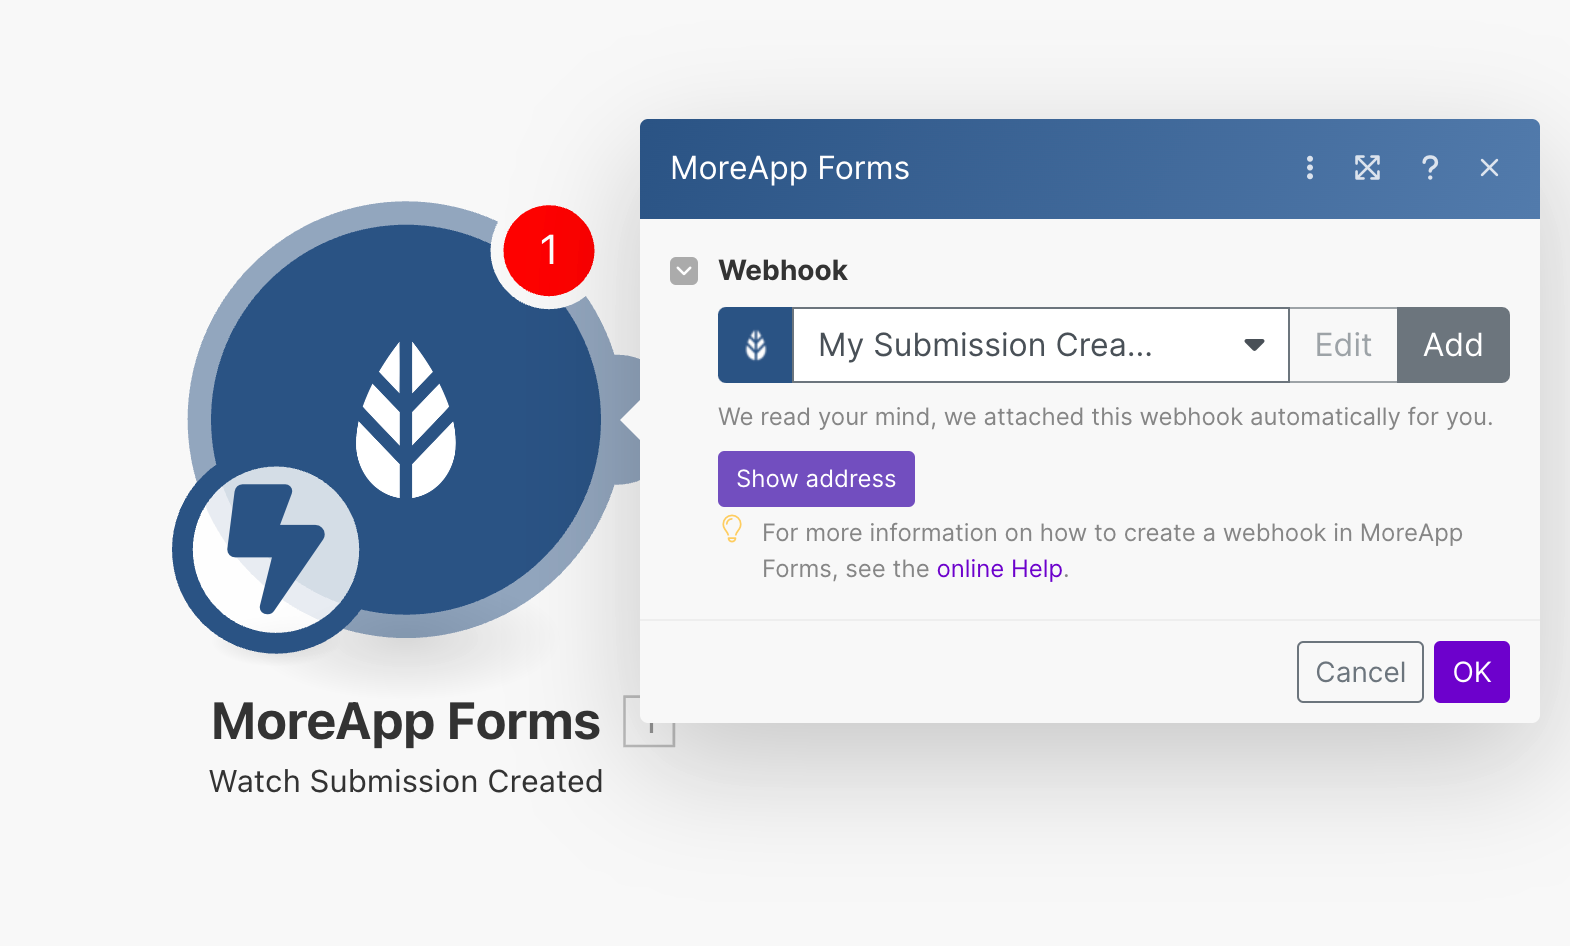
3. Connect your MoreApp account
You need to choose an existing Webhook or add a new connection. Click Add and configure the API key to establish a new connection with your MoreApp account.
4. Test the Trigger
To do a test, send a submission with any form. This step is necessary for the Webhook to work.
Then, click on Run once. If the configuration is successful, the scenario run will be completed. The MoreApp module will appear green.
Once you have successfully tested the Trigger, it’s time to configure the Action.
5. Select an Action
Click the + icon next to the MoreApp module to add an Action. In this example, we will select "Download Report" since we want to upload our PDF report to Google Drive.
Note: Word and Excel files can not be used for this action.
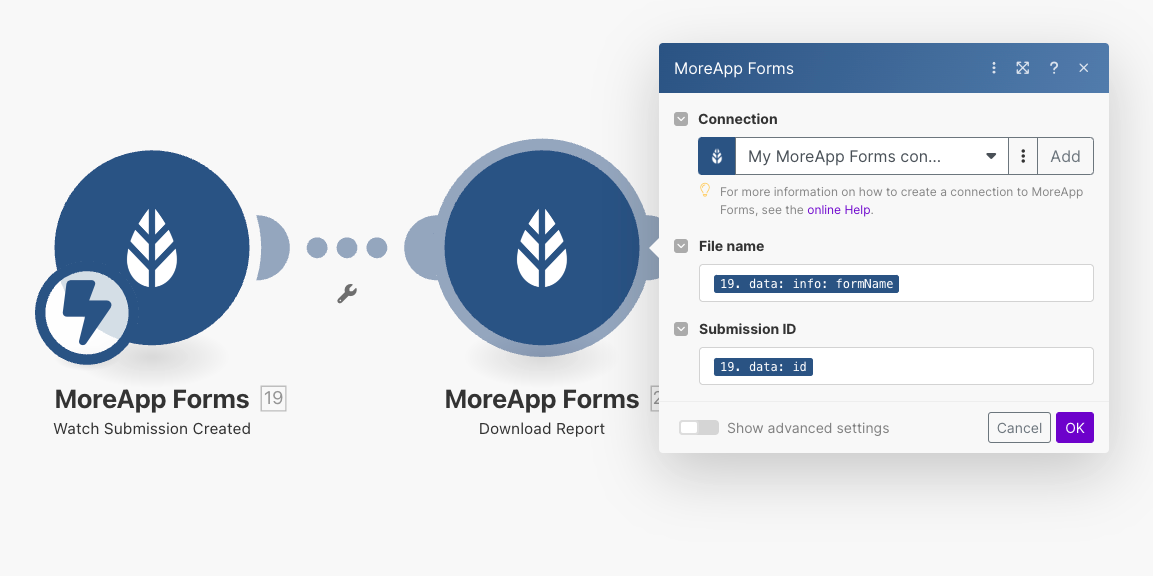
Now, set up the Connection, which is your MoreApp account. Write the File name and customise it by adding the placeholders from the list. For example, the form name.
Finally, select the Submissions ID. Click on the id field that will be displayed, under the meta section, in the placeholders list.
6. Connect to Google Drive
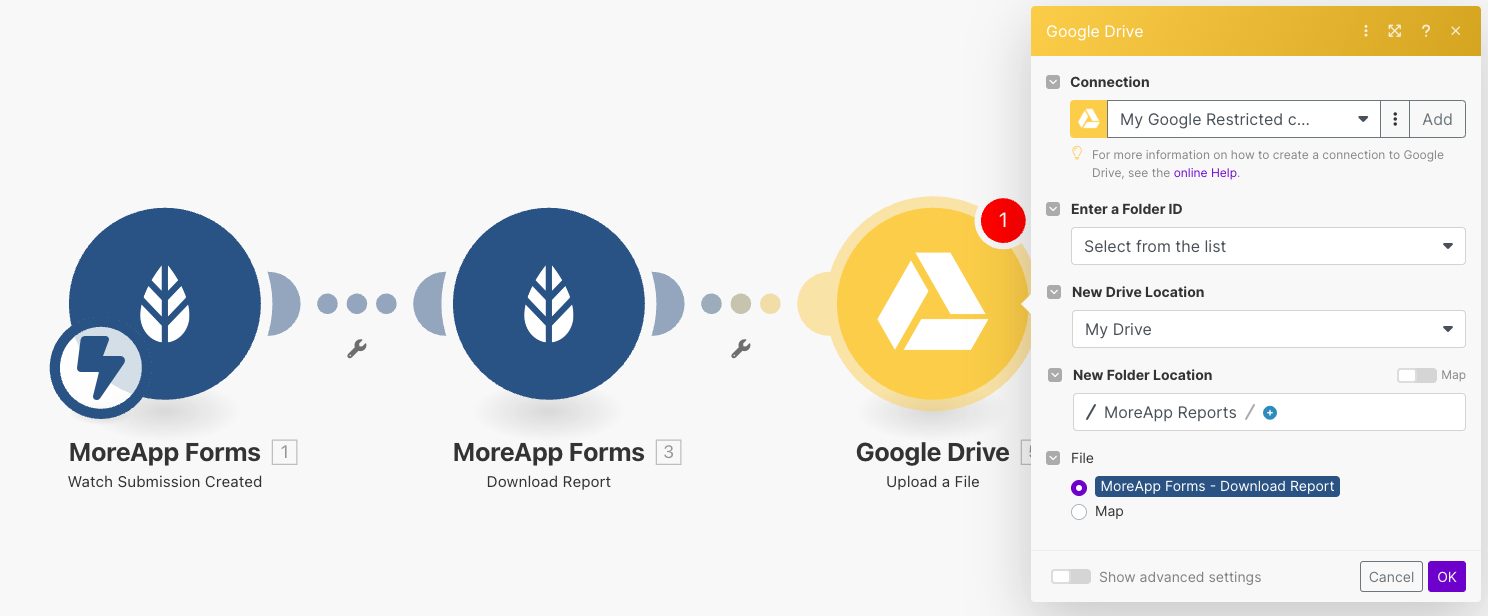
To finish the setup, click the + icon to add another module. This time, select Google Drive, and choose the Action “Upload a File”.
Select your Google Drive Connection. You can set up the next steps according to your preference. We suggest starting with "Select from the list" in the Enter a Folder ID section.
Choose the Drive Location and the Drive Folder where you want to store the report.
Under File, make sure you have MoreApp Forms - Download Report selected.
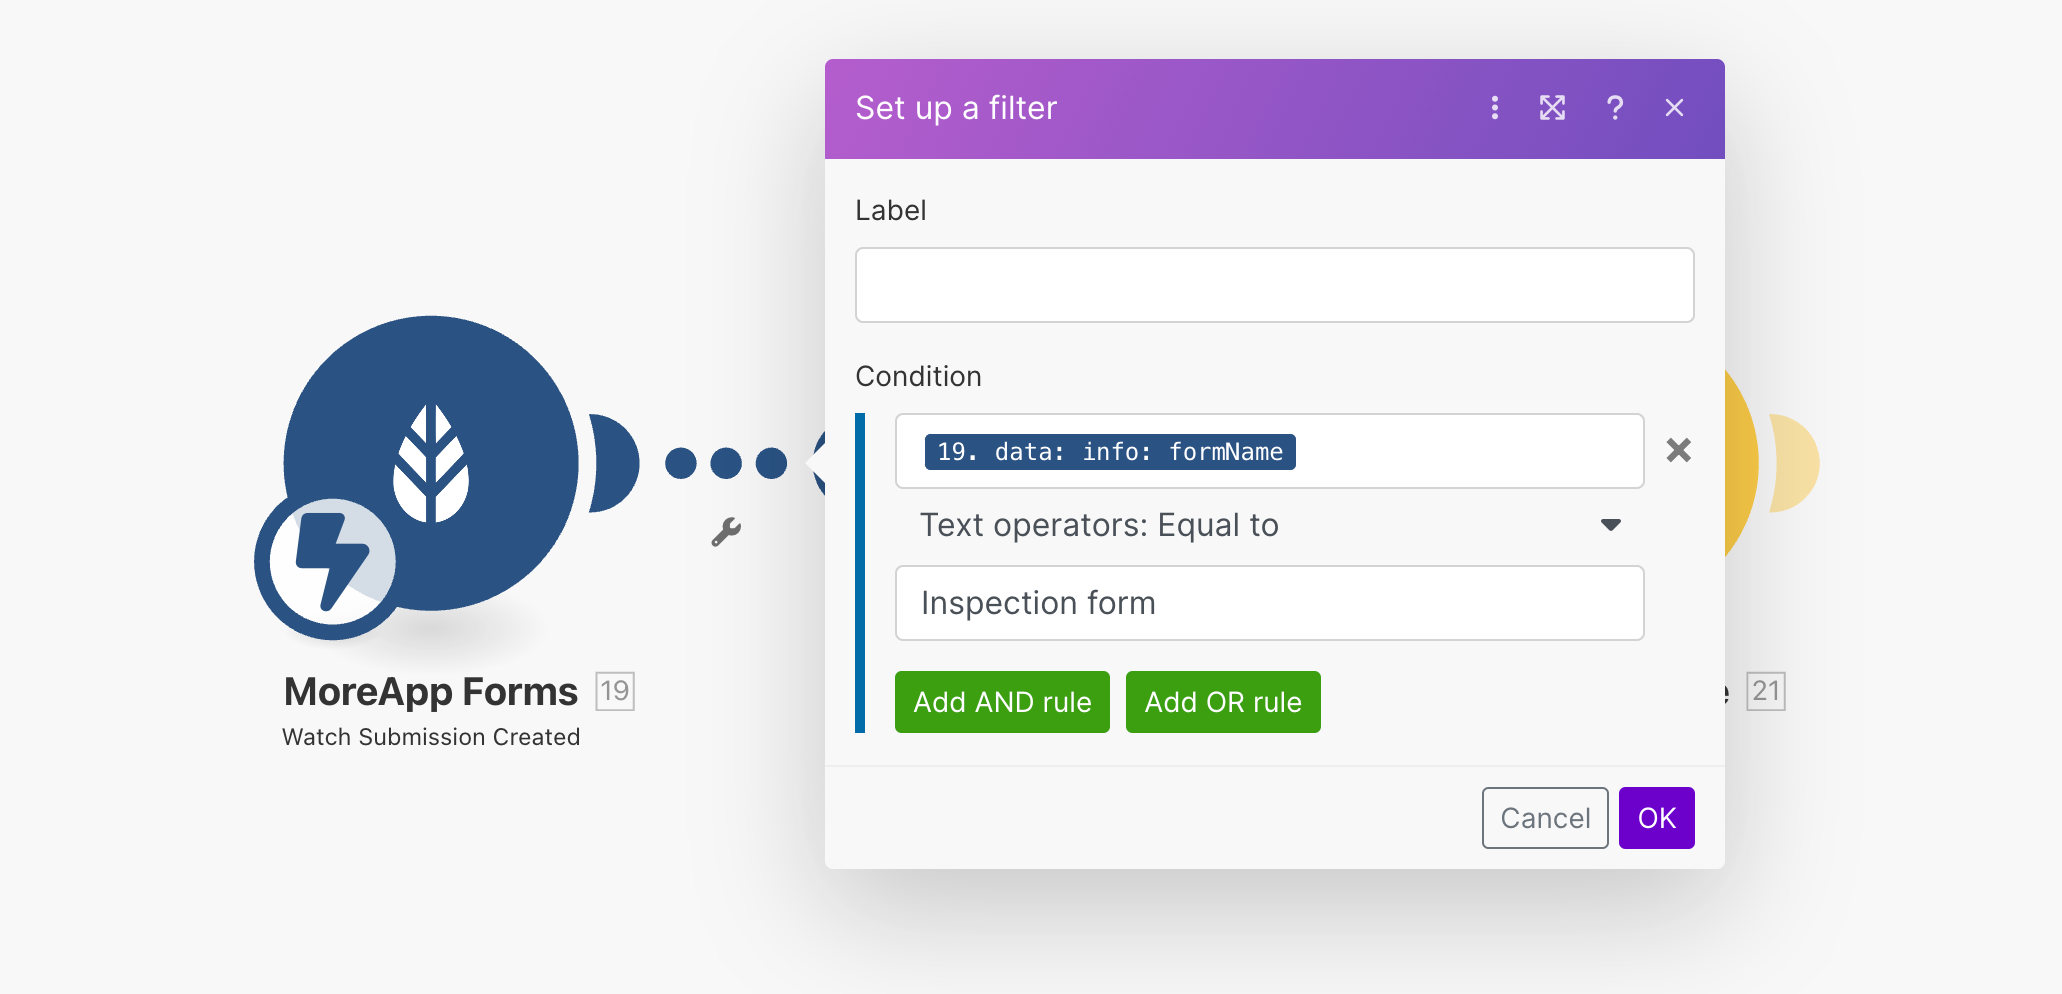
7. Filter by specific form (optional)
Add a filter when you want to store the PDF reports from specific forms.
Click between the first and second MoreApp modules to set up a filter. Choose a Condition, which can be the form name. Add the name of the specific form you want to use for this integration.
8. Test the integration
To ensure the integration is working properly, click on Run once. If the configuration is successful, the scenario run will be completed and all three modules will appear green.
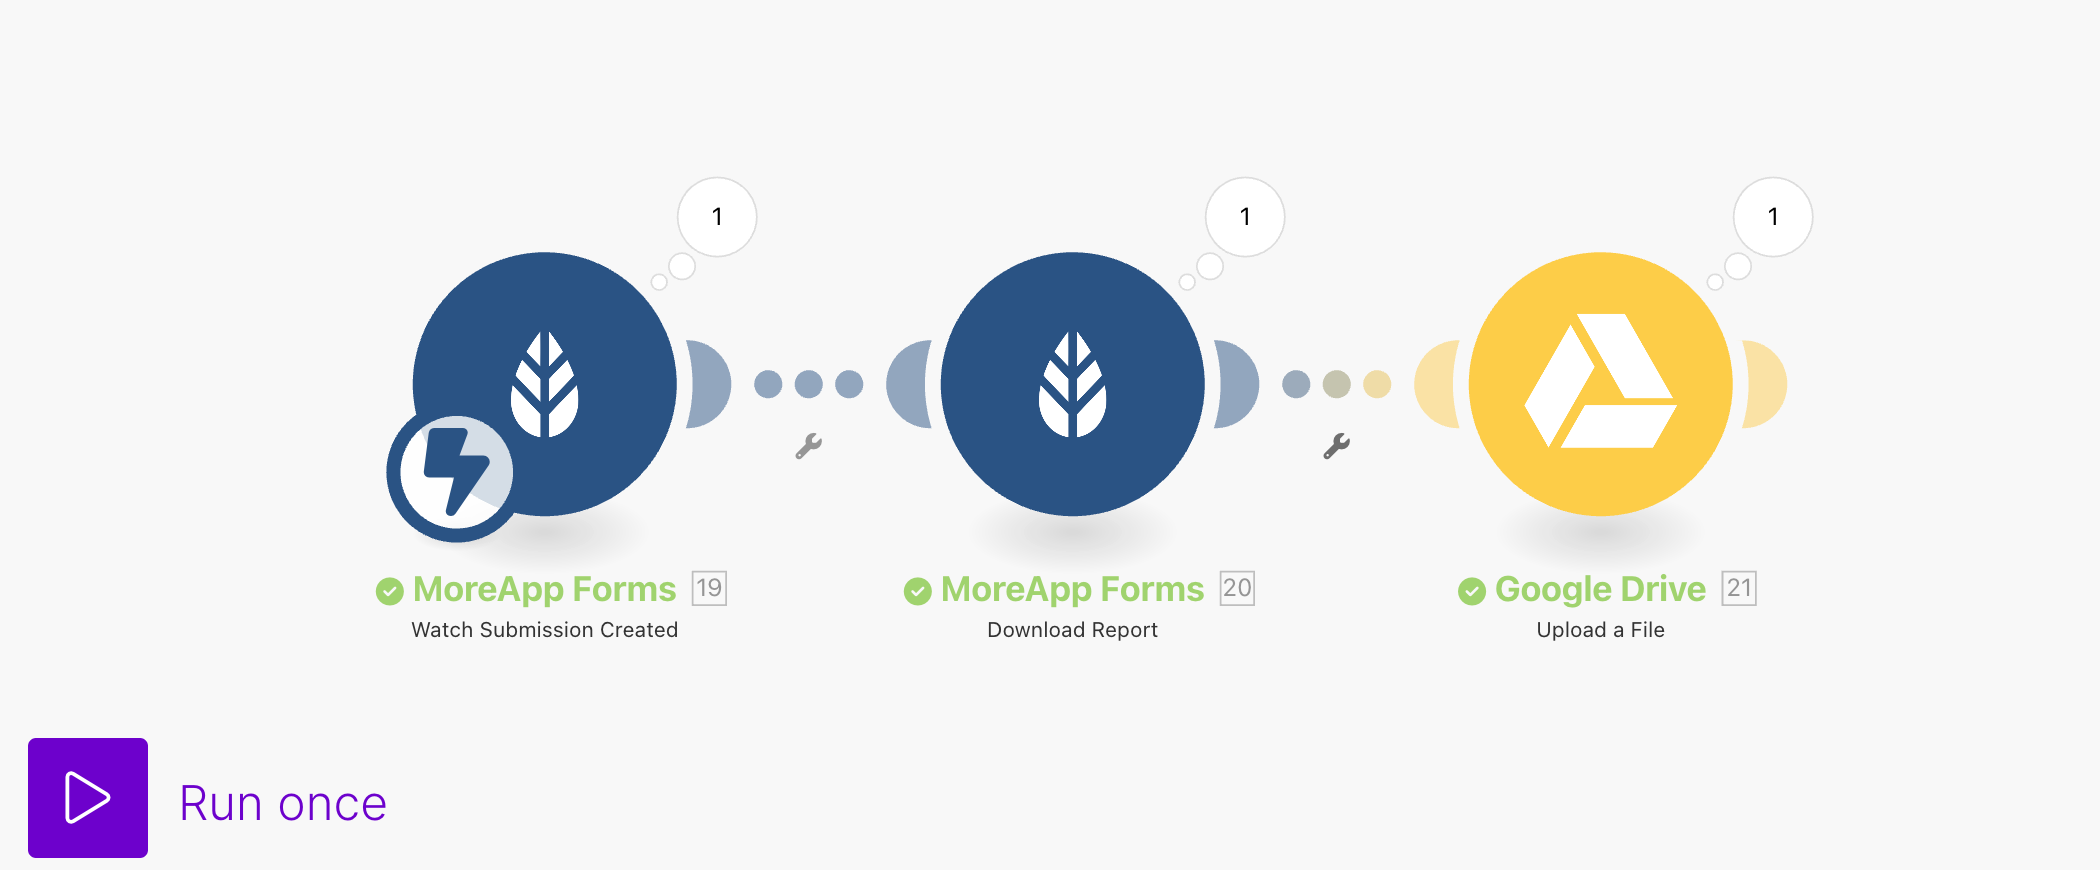
Congratulations! Your reports will now be automatically saved to your Google Drive folder.
Want to stay up to date with our latest tutorials? Go to YouTube and hit the Subscribe button!