How to Export Data to Excel | MoreApp
If you completed a form, you can export and download the data to Excel.
No MoreApp account yet? Sign up here.
1. The Submission
In order to get started exporting data, you need to log into the MoreApp Platform.
Select the form you want the data exported from under Forms. Once you selected the form go to the Submissions tab to see a summary of the data.
Set up your view in the Platform as following:
-
Drag, select and position the data to your preference with the Select Columns option.
-
Use the Search button to search for a specific submission or a group of submissions.
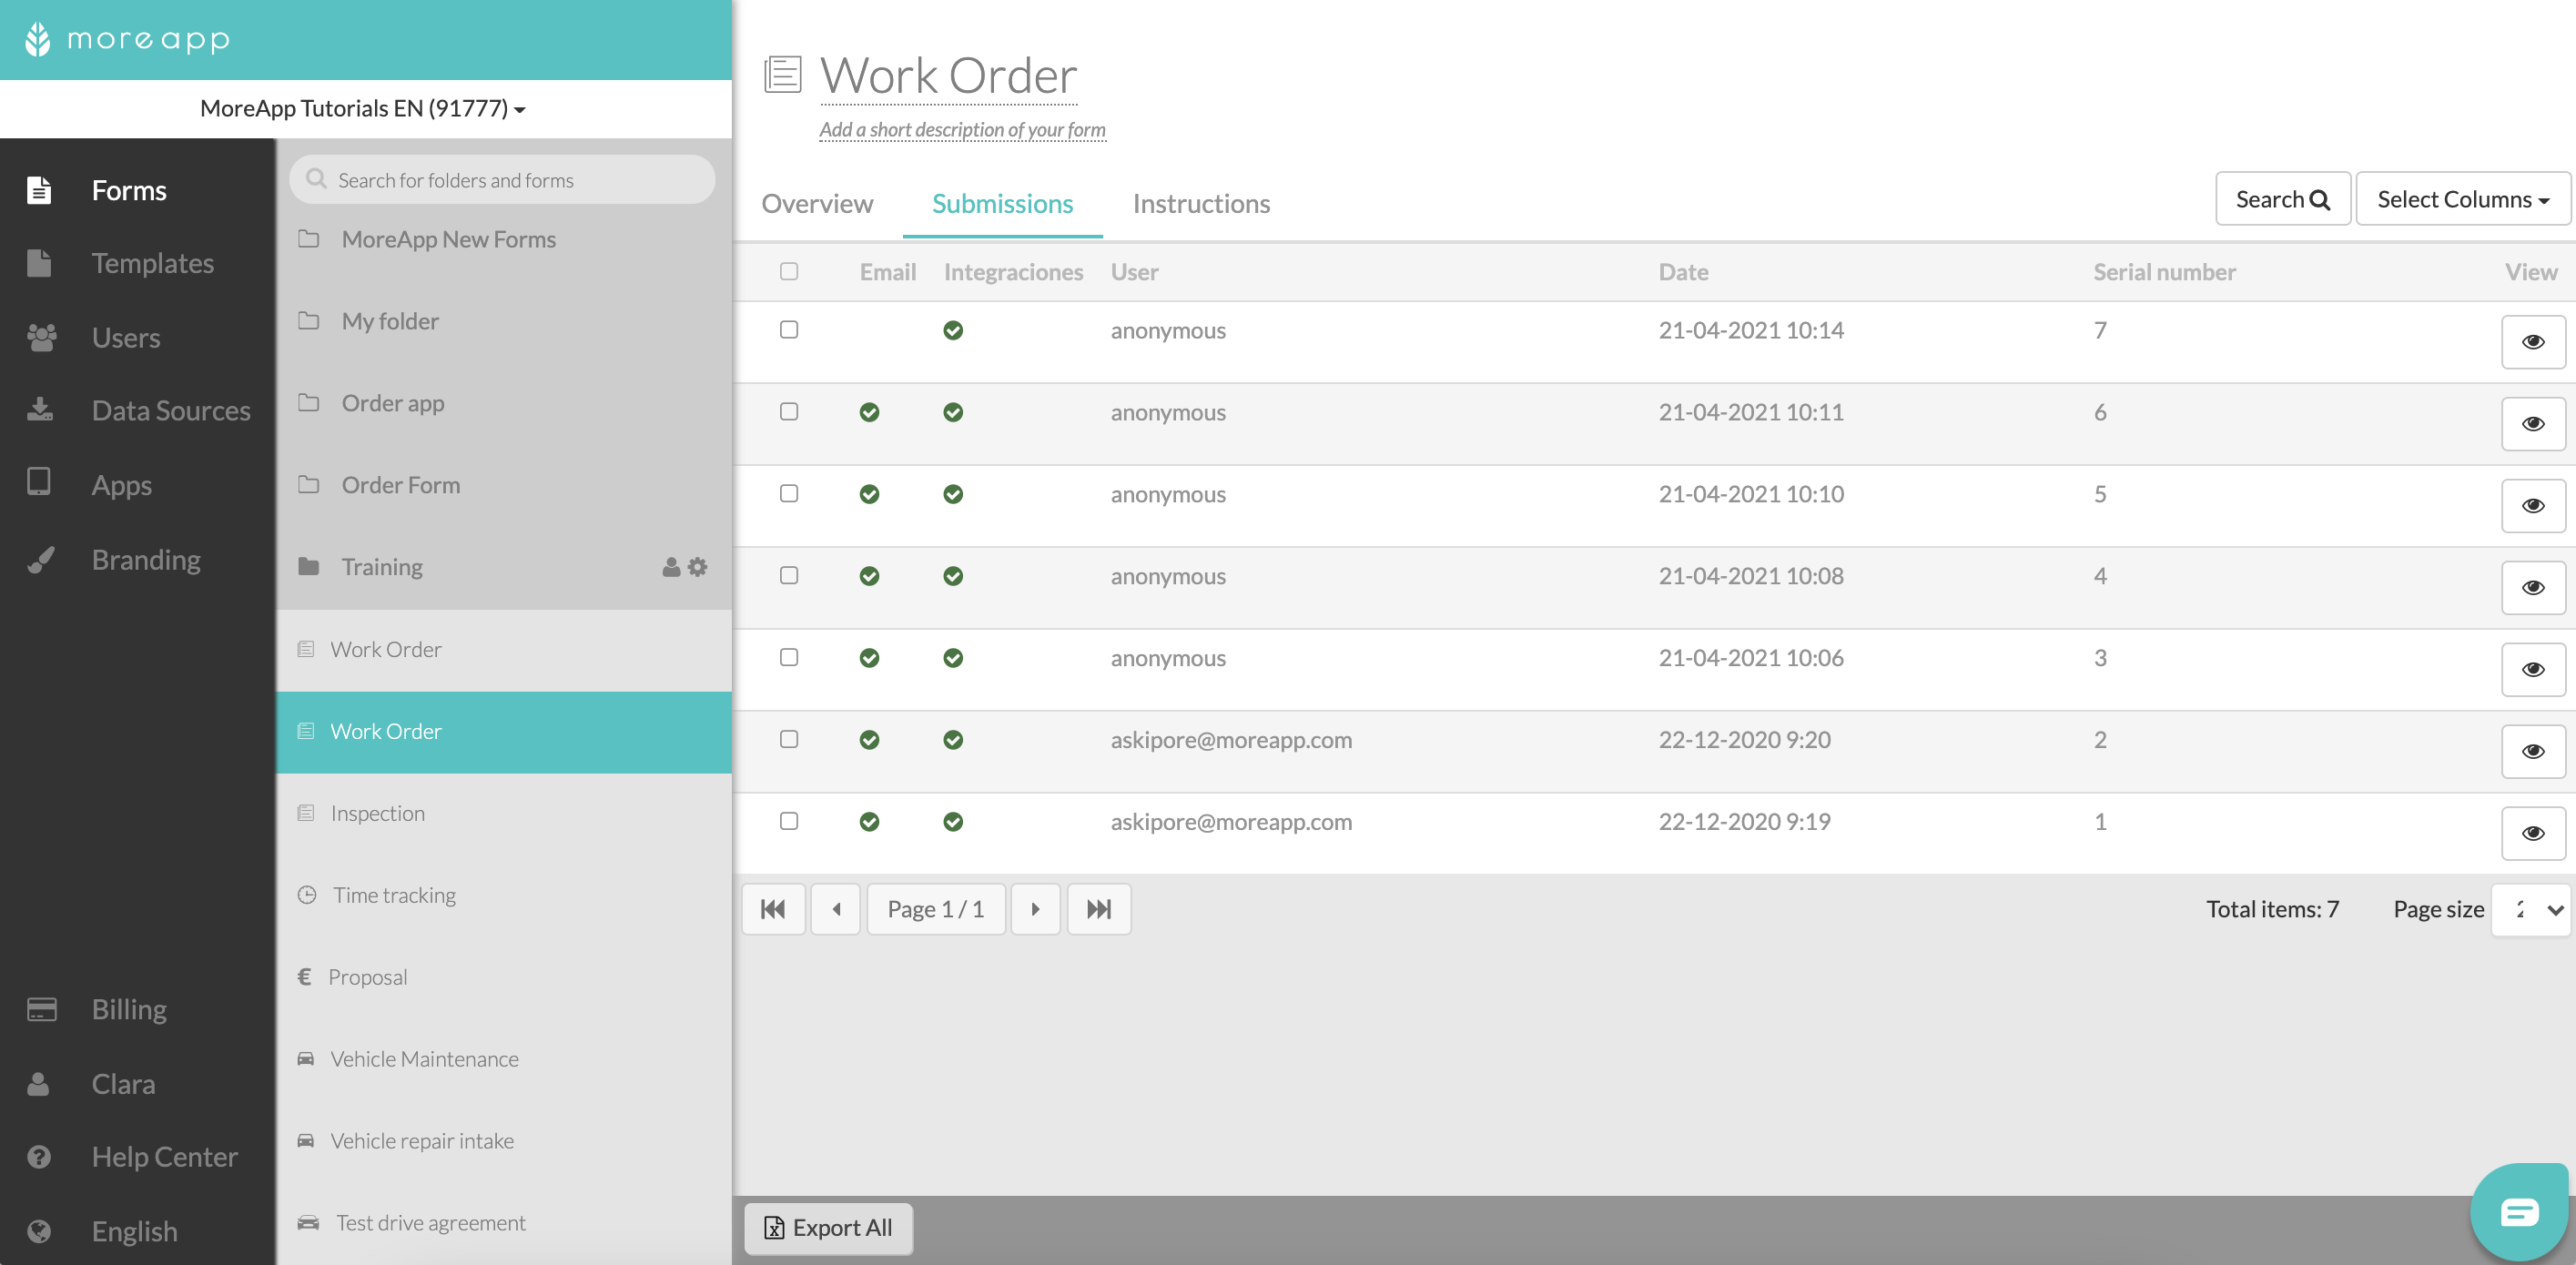
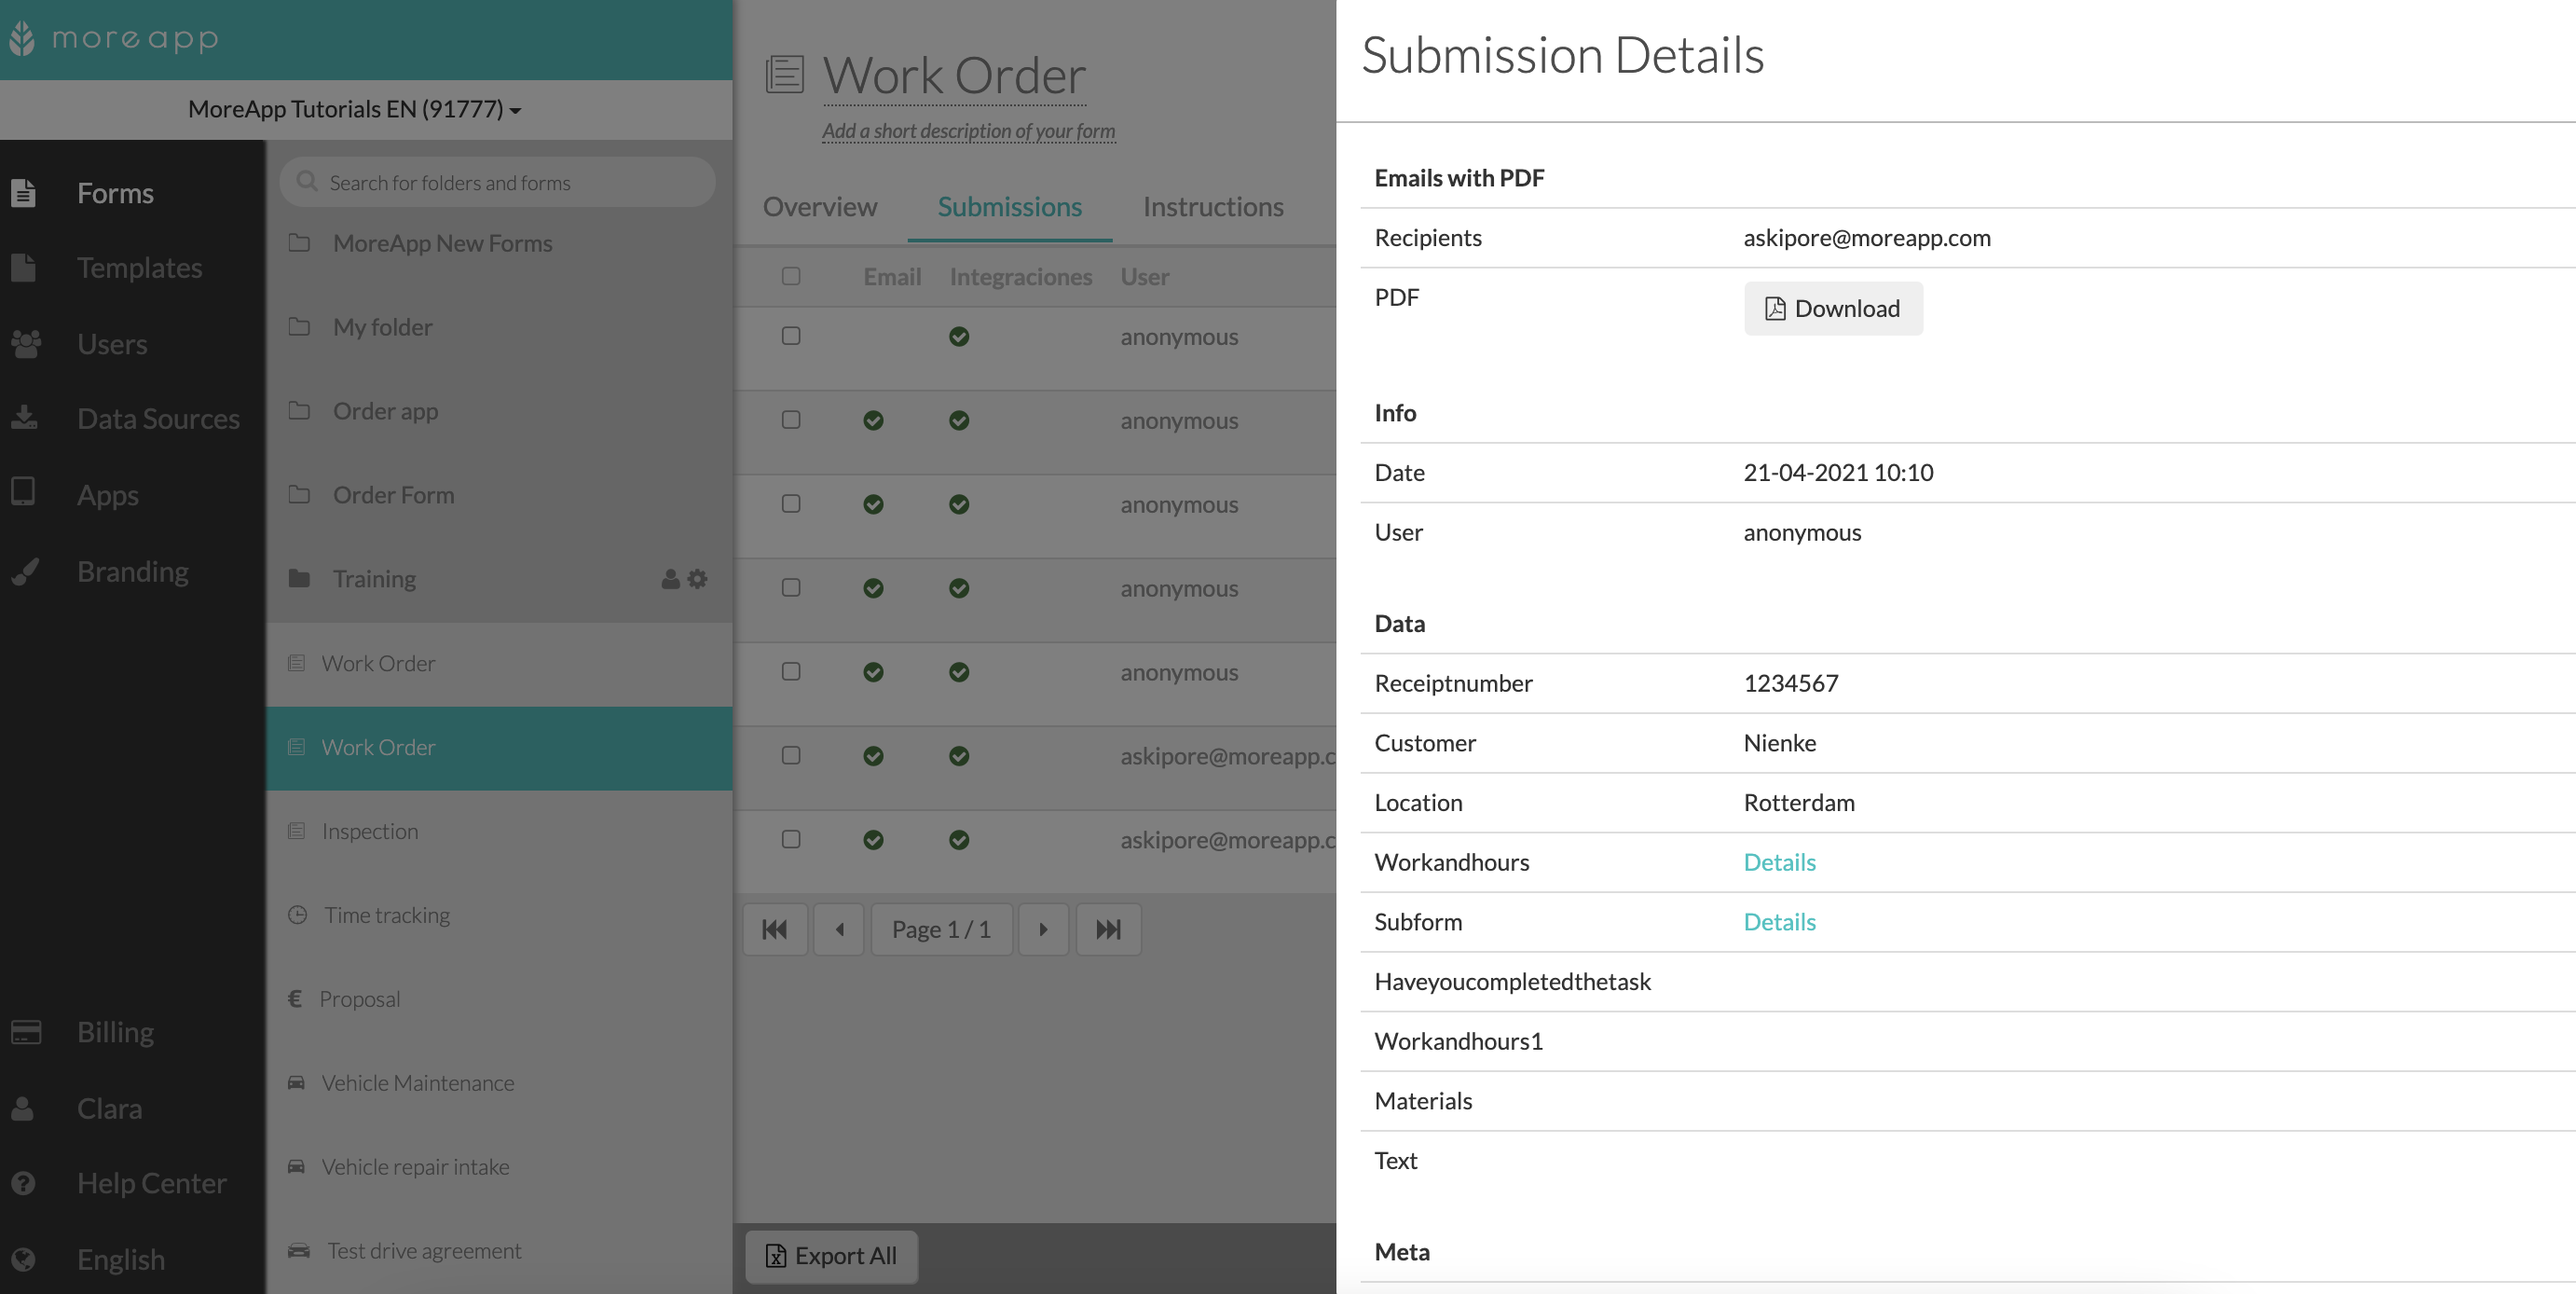
You can also organize the data alphabetically or numerically by clicking on the column name. By clicking on the eye icon, you will be able to see even more information about the submission. Read here all about the Submission Details.
2. Export Data
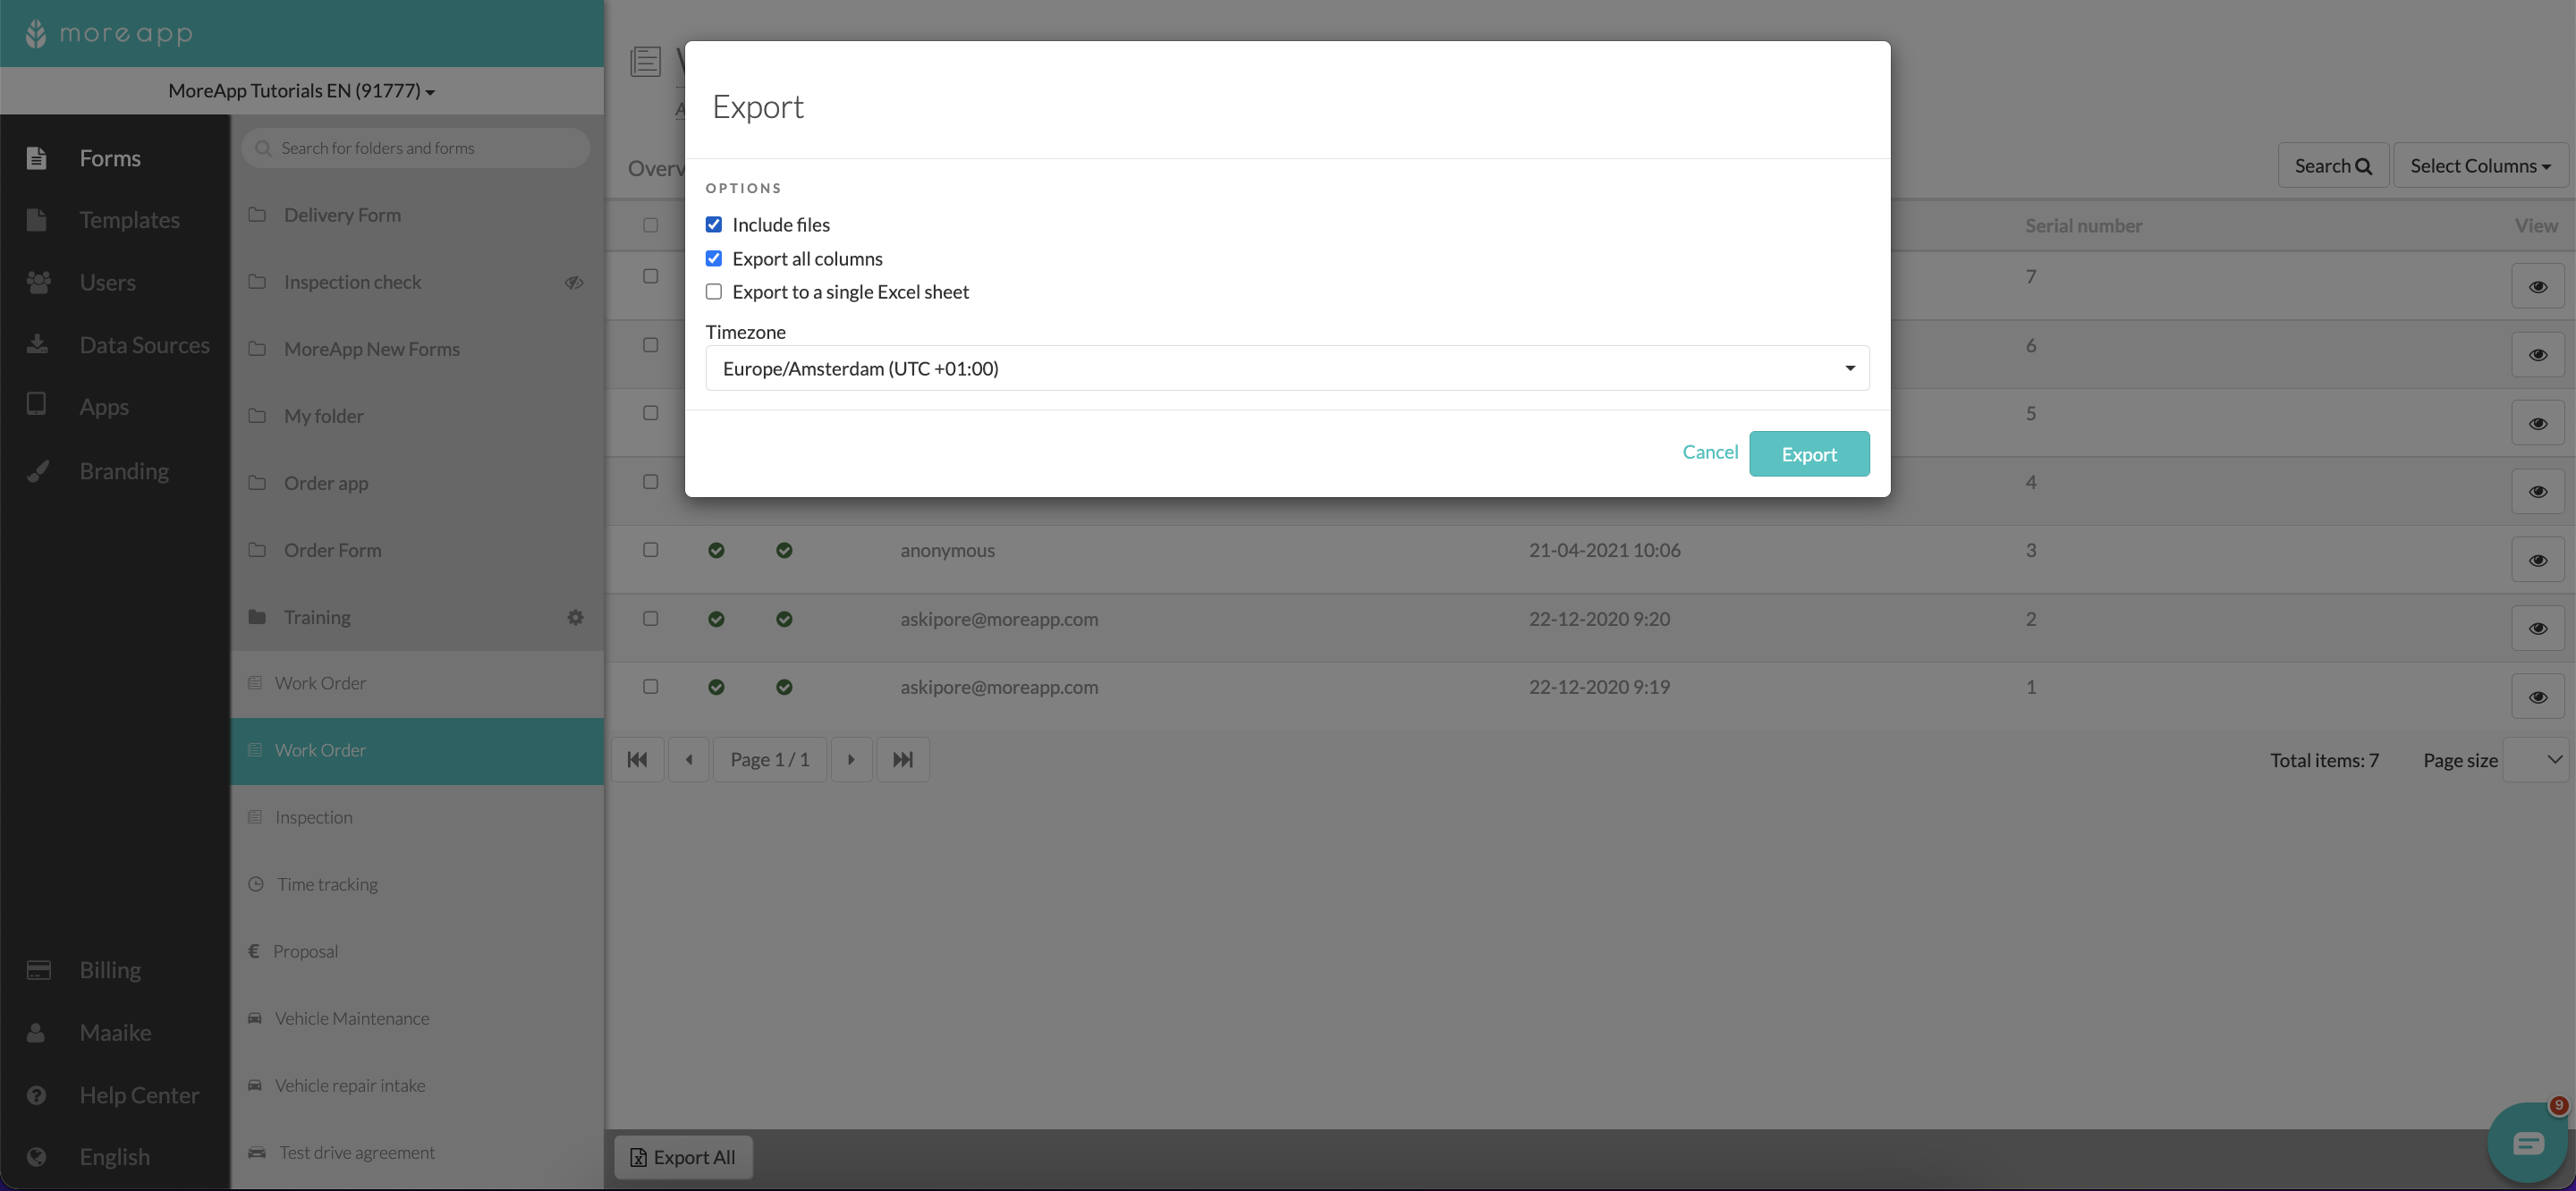
Now you can start exporting data. If you want to have all the data exported at once, click on Export All, which can be found at the bottom of the Submissions tab.
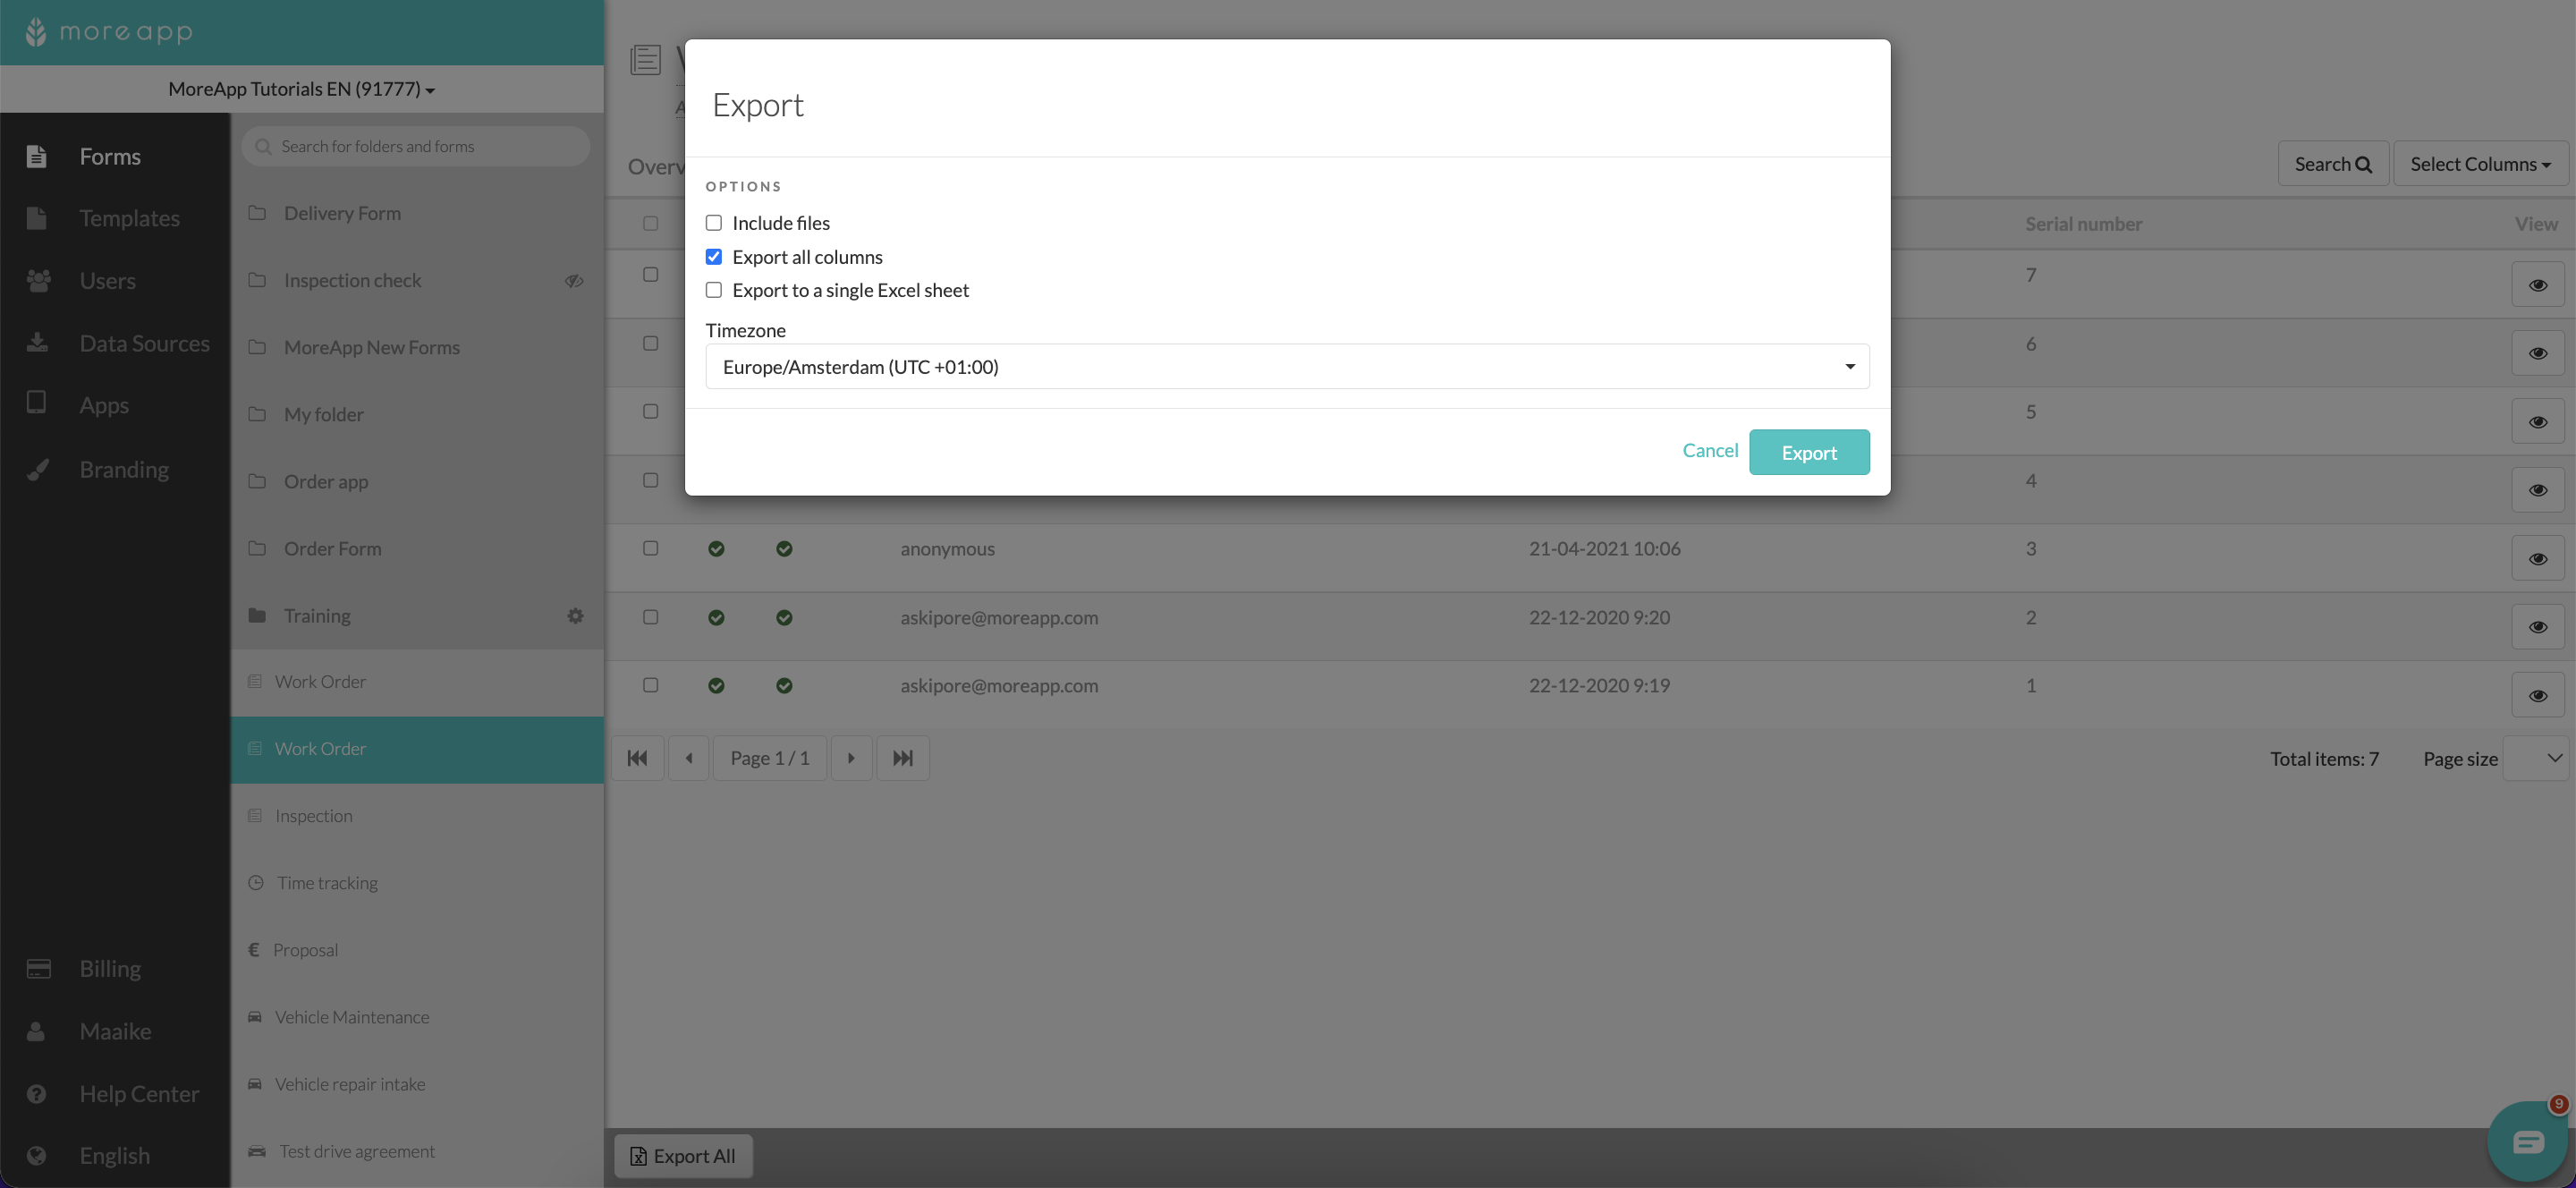
Next to that, you have the option to select Include files so all the images and files of your form will be exported too. Click on Export to start the process. You will receive an email once the export has finished.
Note: If the option ‘Include Files’ is enabled, there is an export limit of 1.000 submissions.
Also, you can deselect Export all columns if you do not want to export the data from all the fields of your form. Therefore, you will be able to choose which are the columns you would like to export. Also, you can decide the order of the columns by dragging them to the desired position.
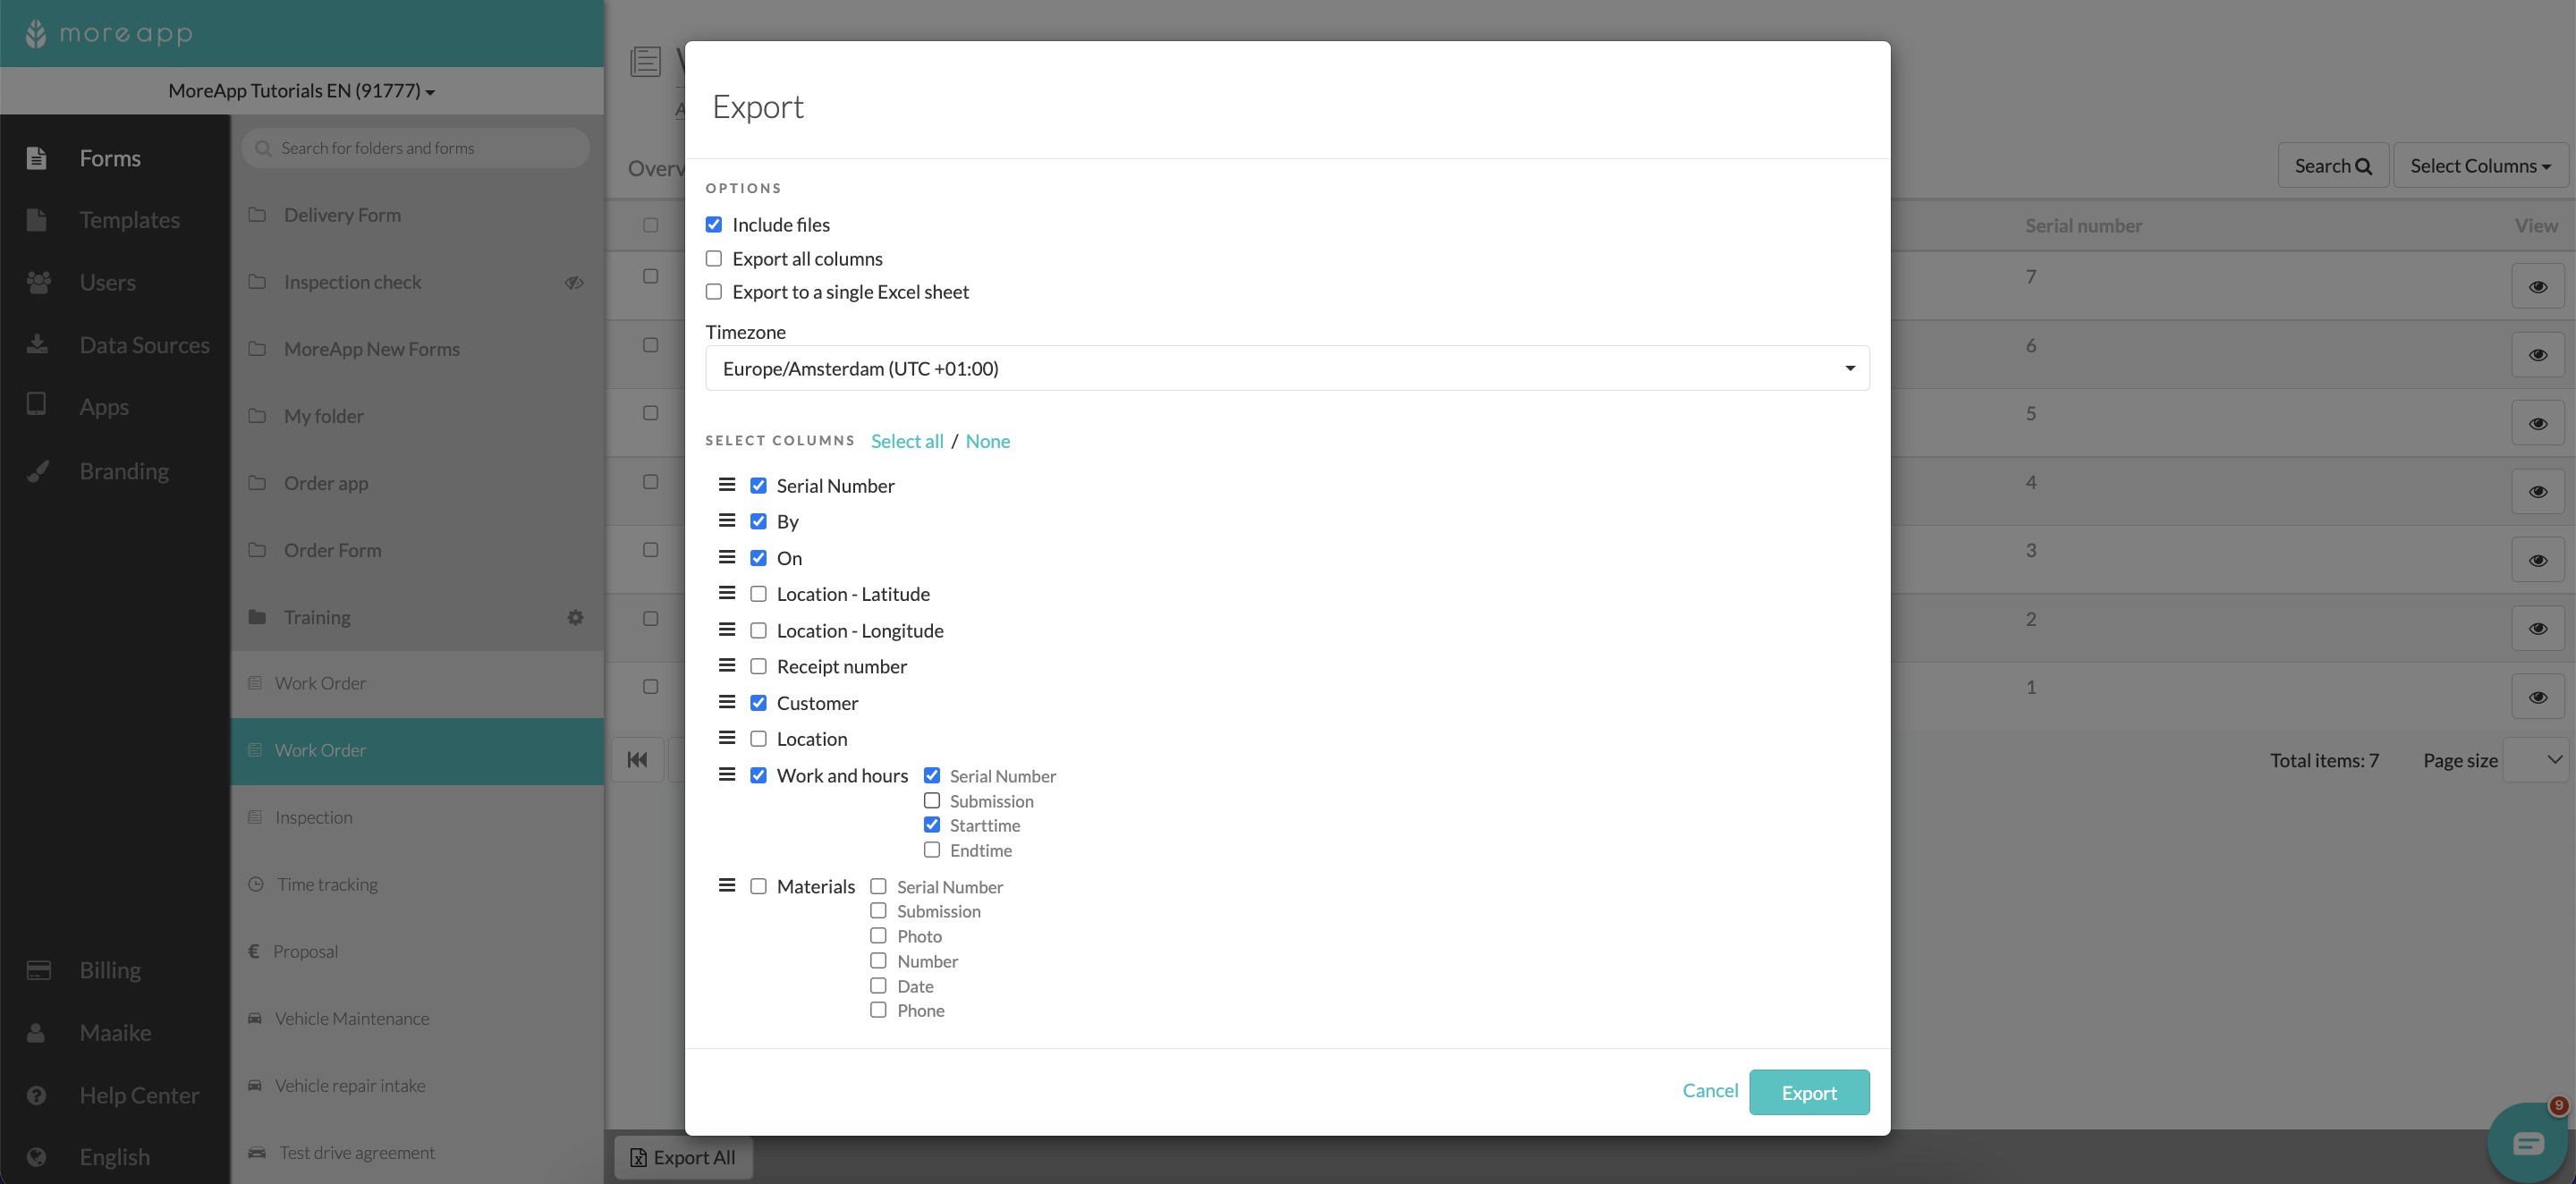
If you want to export all the details of the form in the same tab, you can select Export to a single Excel sheet. When this option is not selected, each subform information will be exported on a new sheet of the Excel file.
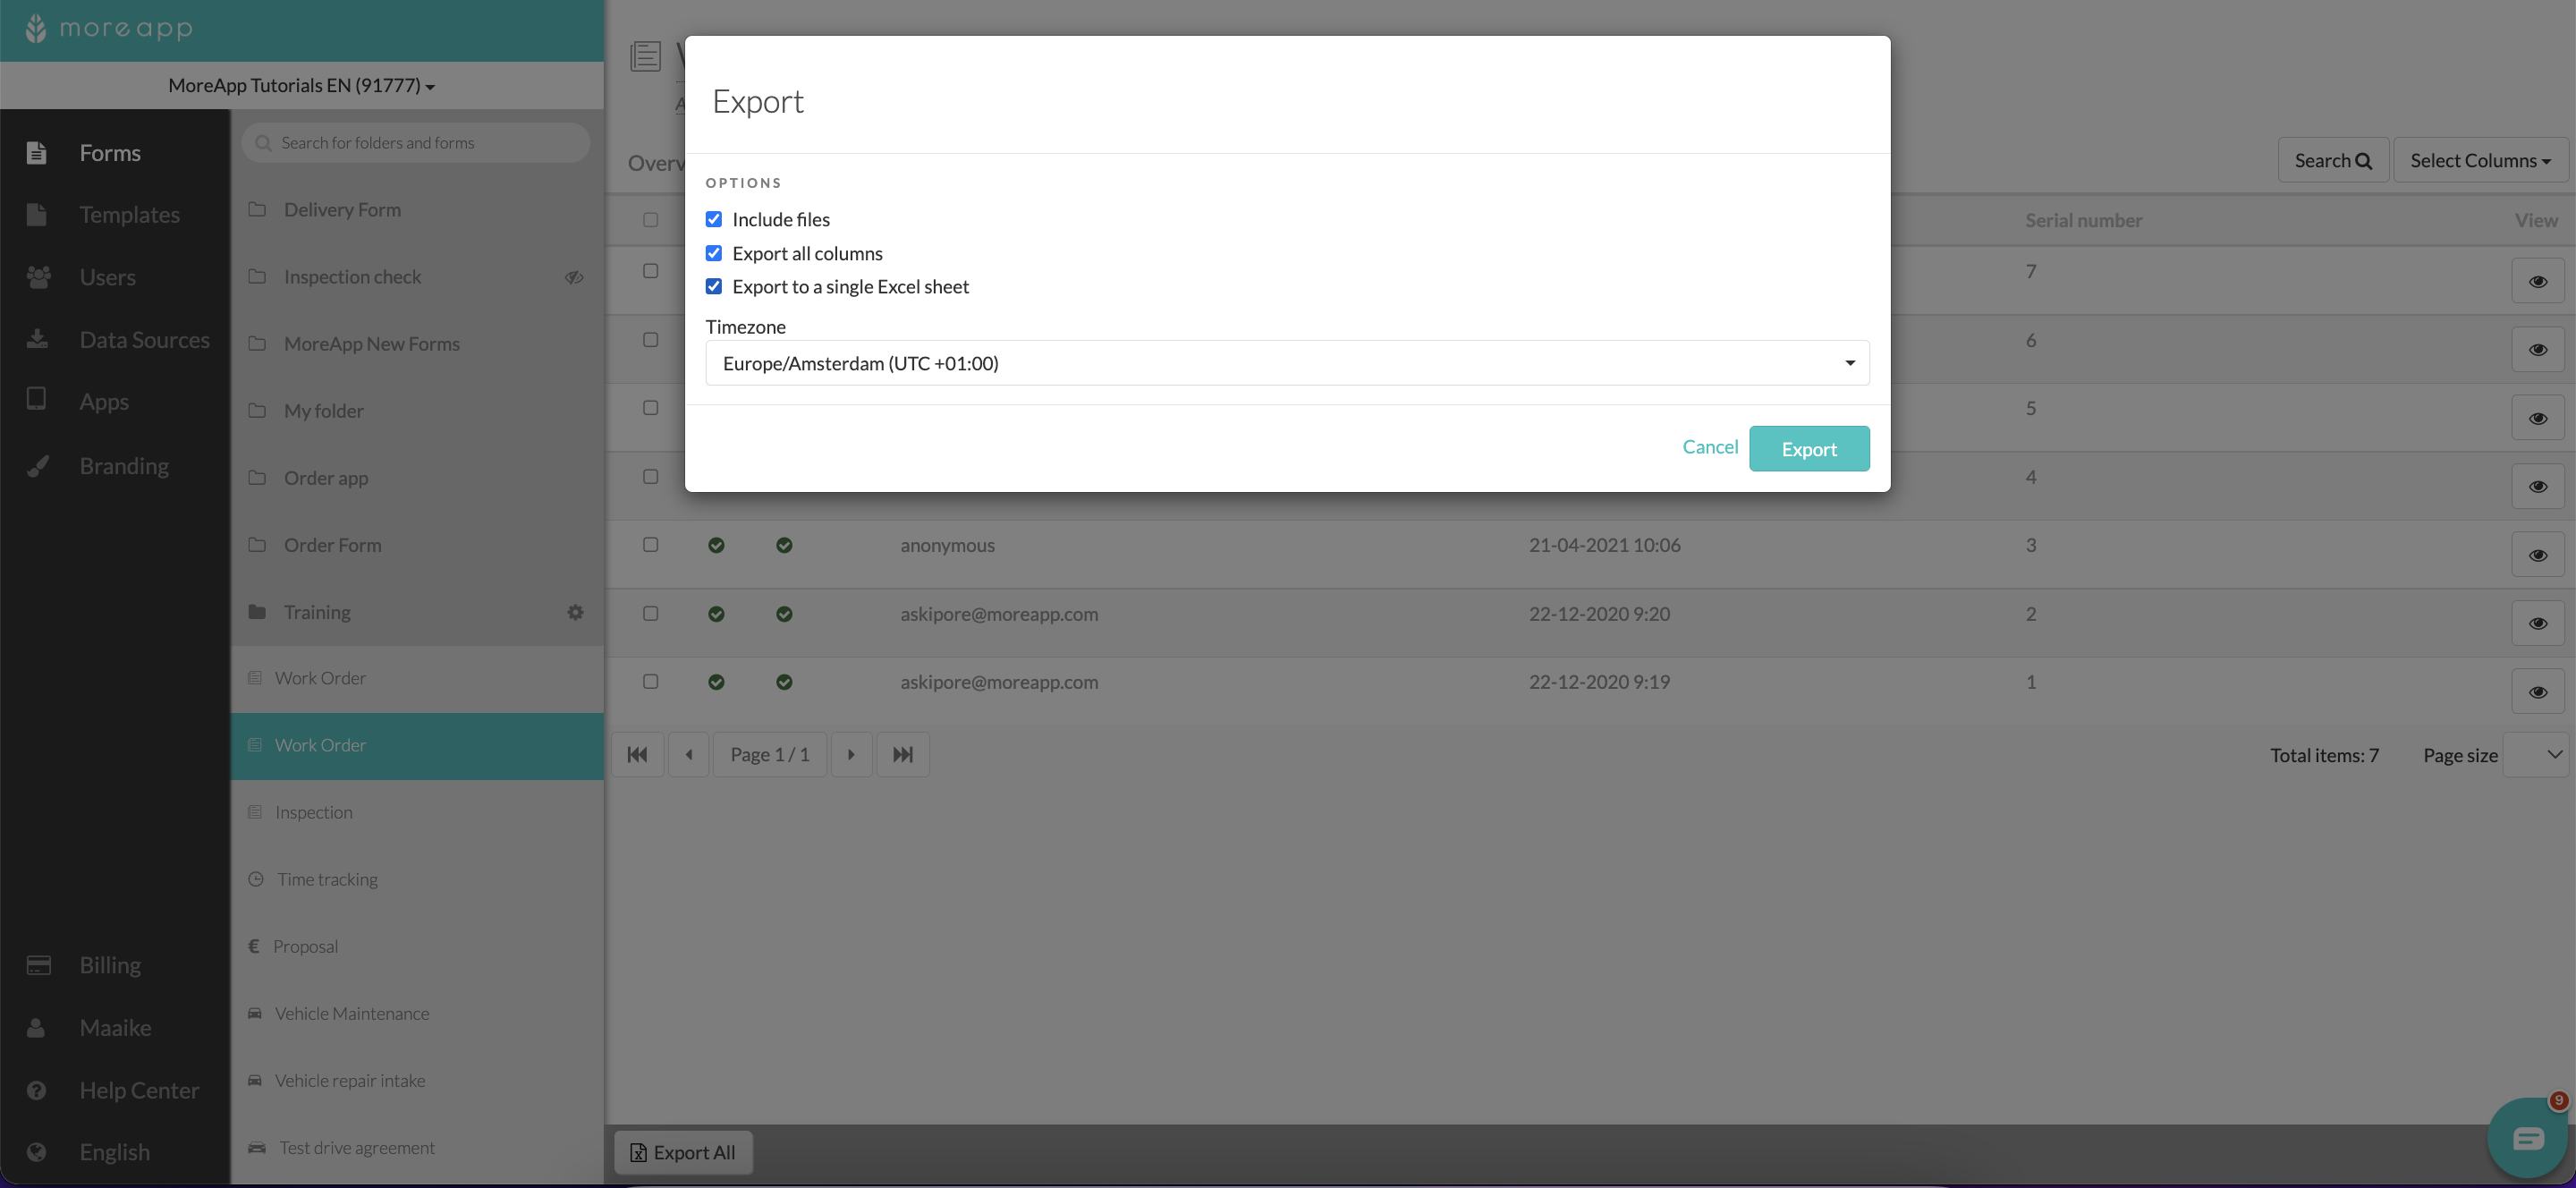
In case you do not need to export all the submissions, you can export each completed form separately or select multiple submissions by simply clicking on them. Once you've selected the submissions of your choice, click on Export Selected to receive an email with the download link.
If you want to reset your selected submissions, click on Clear selection.
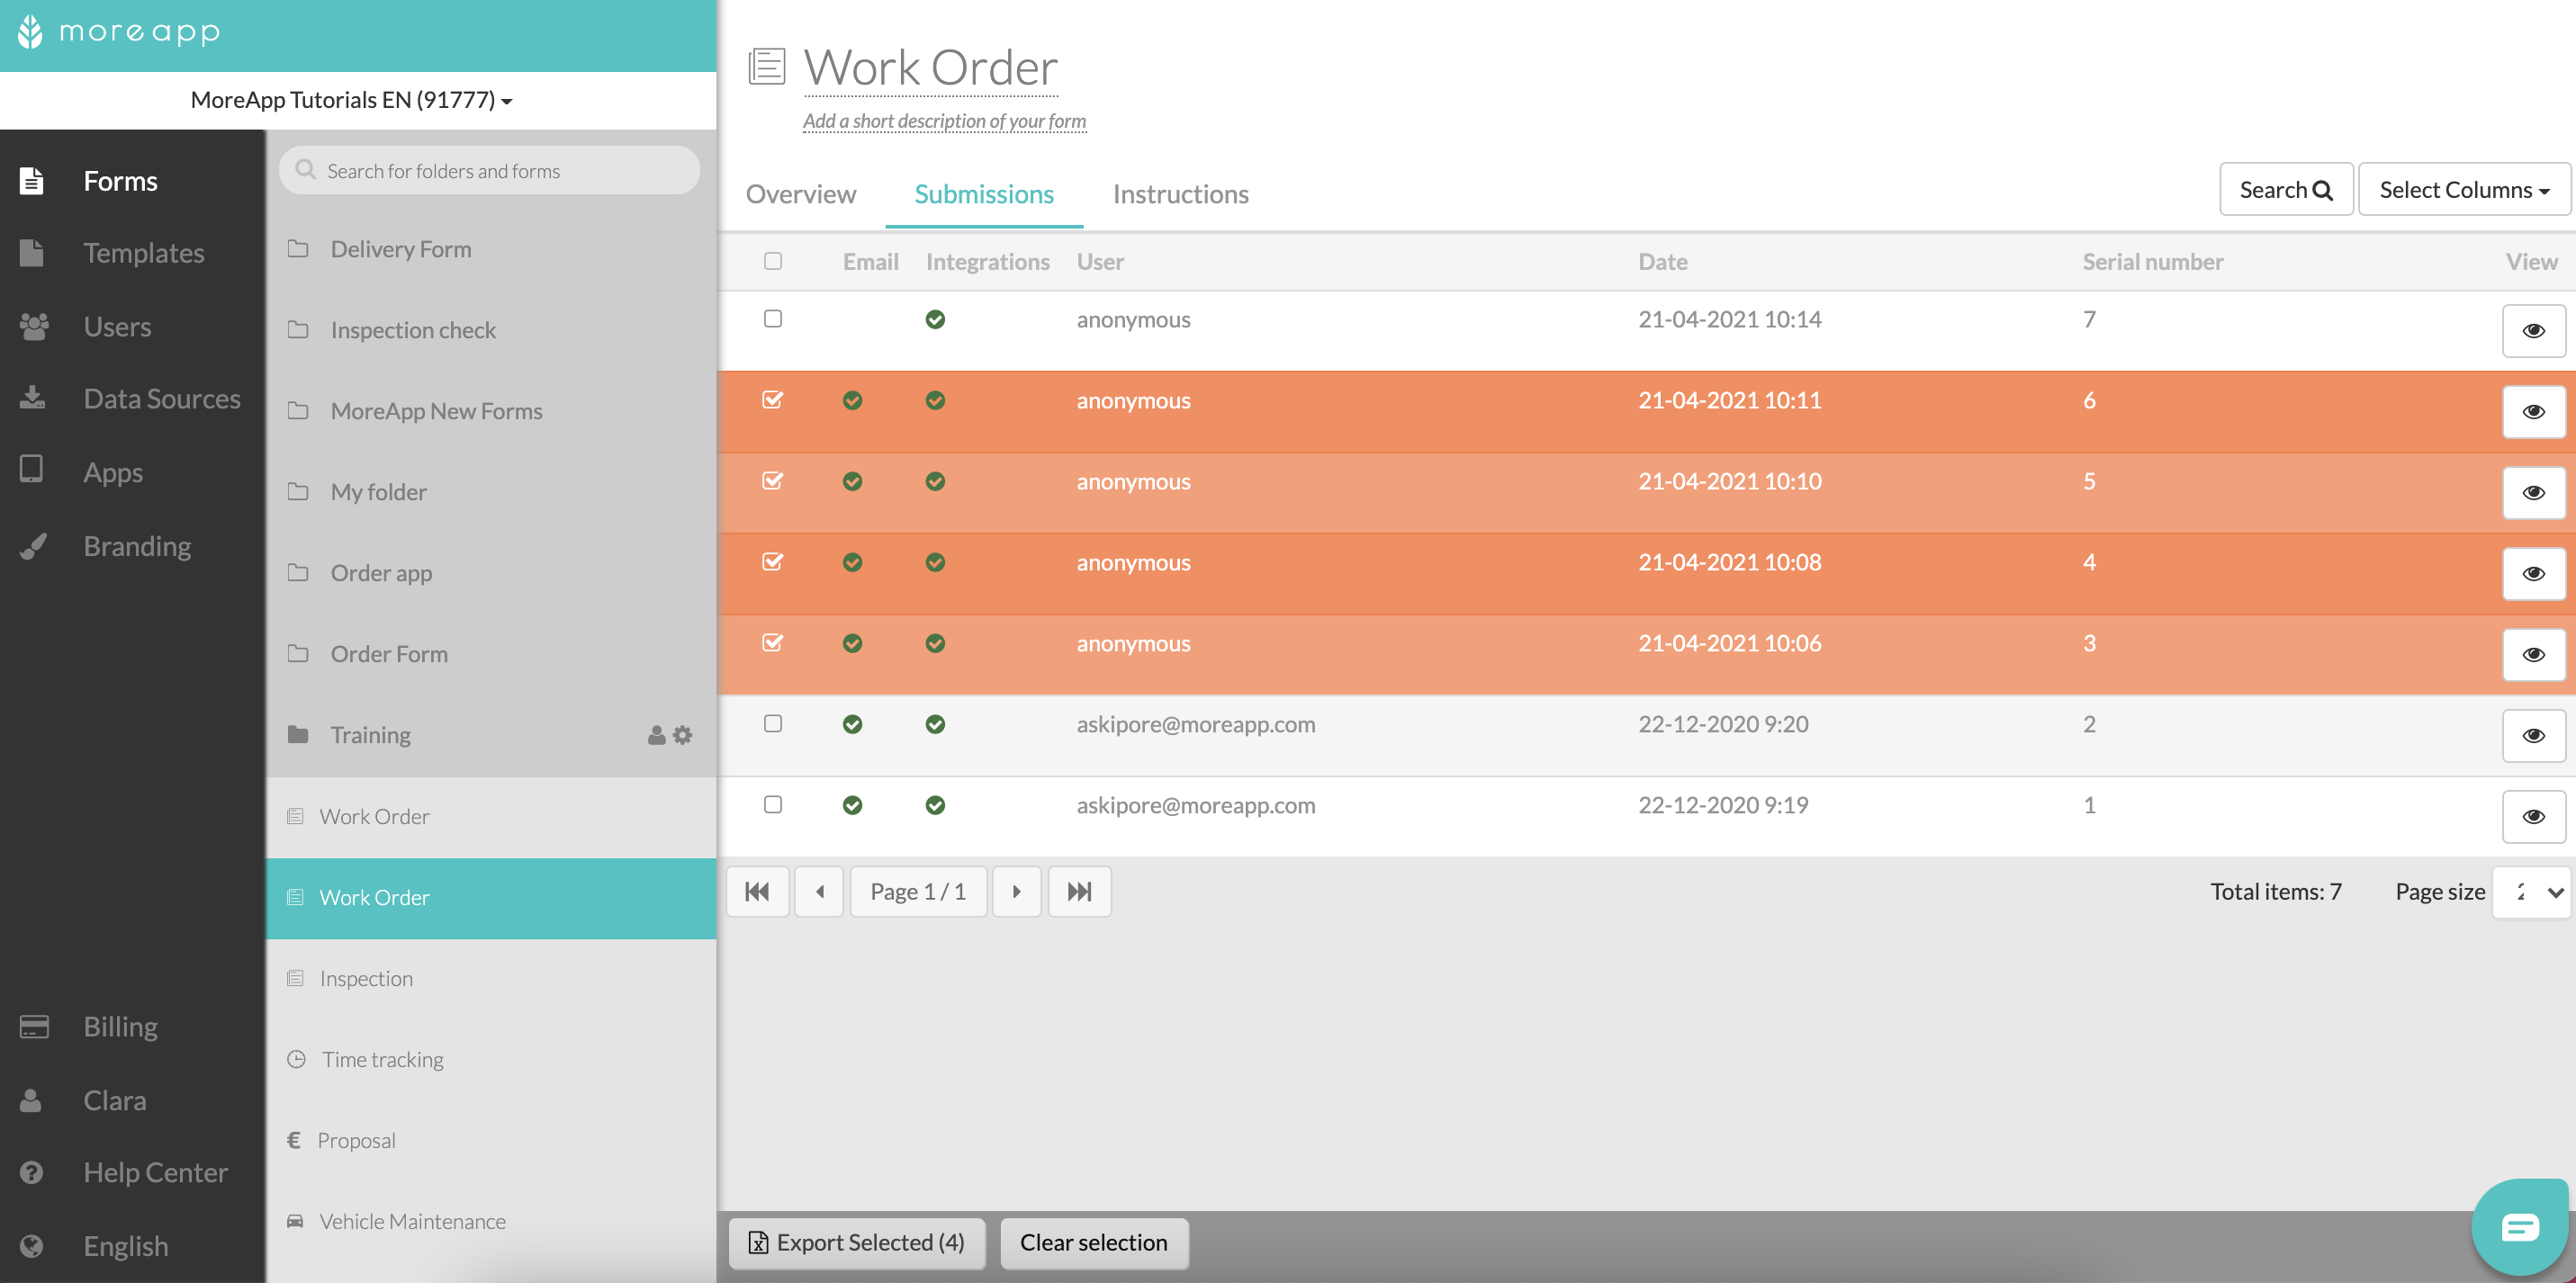
Note: You can now choose your time zone to export data to your Excel file. So all hours shown in the Excel file would be set up within your own time zone, instead of UTC+0, which is the one by default.
3. Download the data
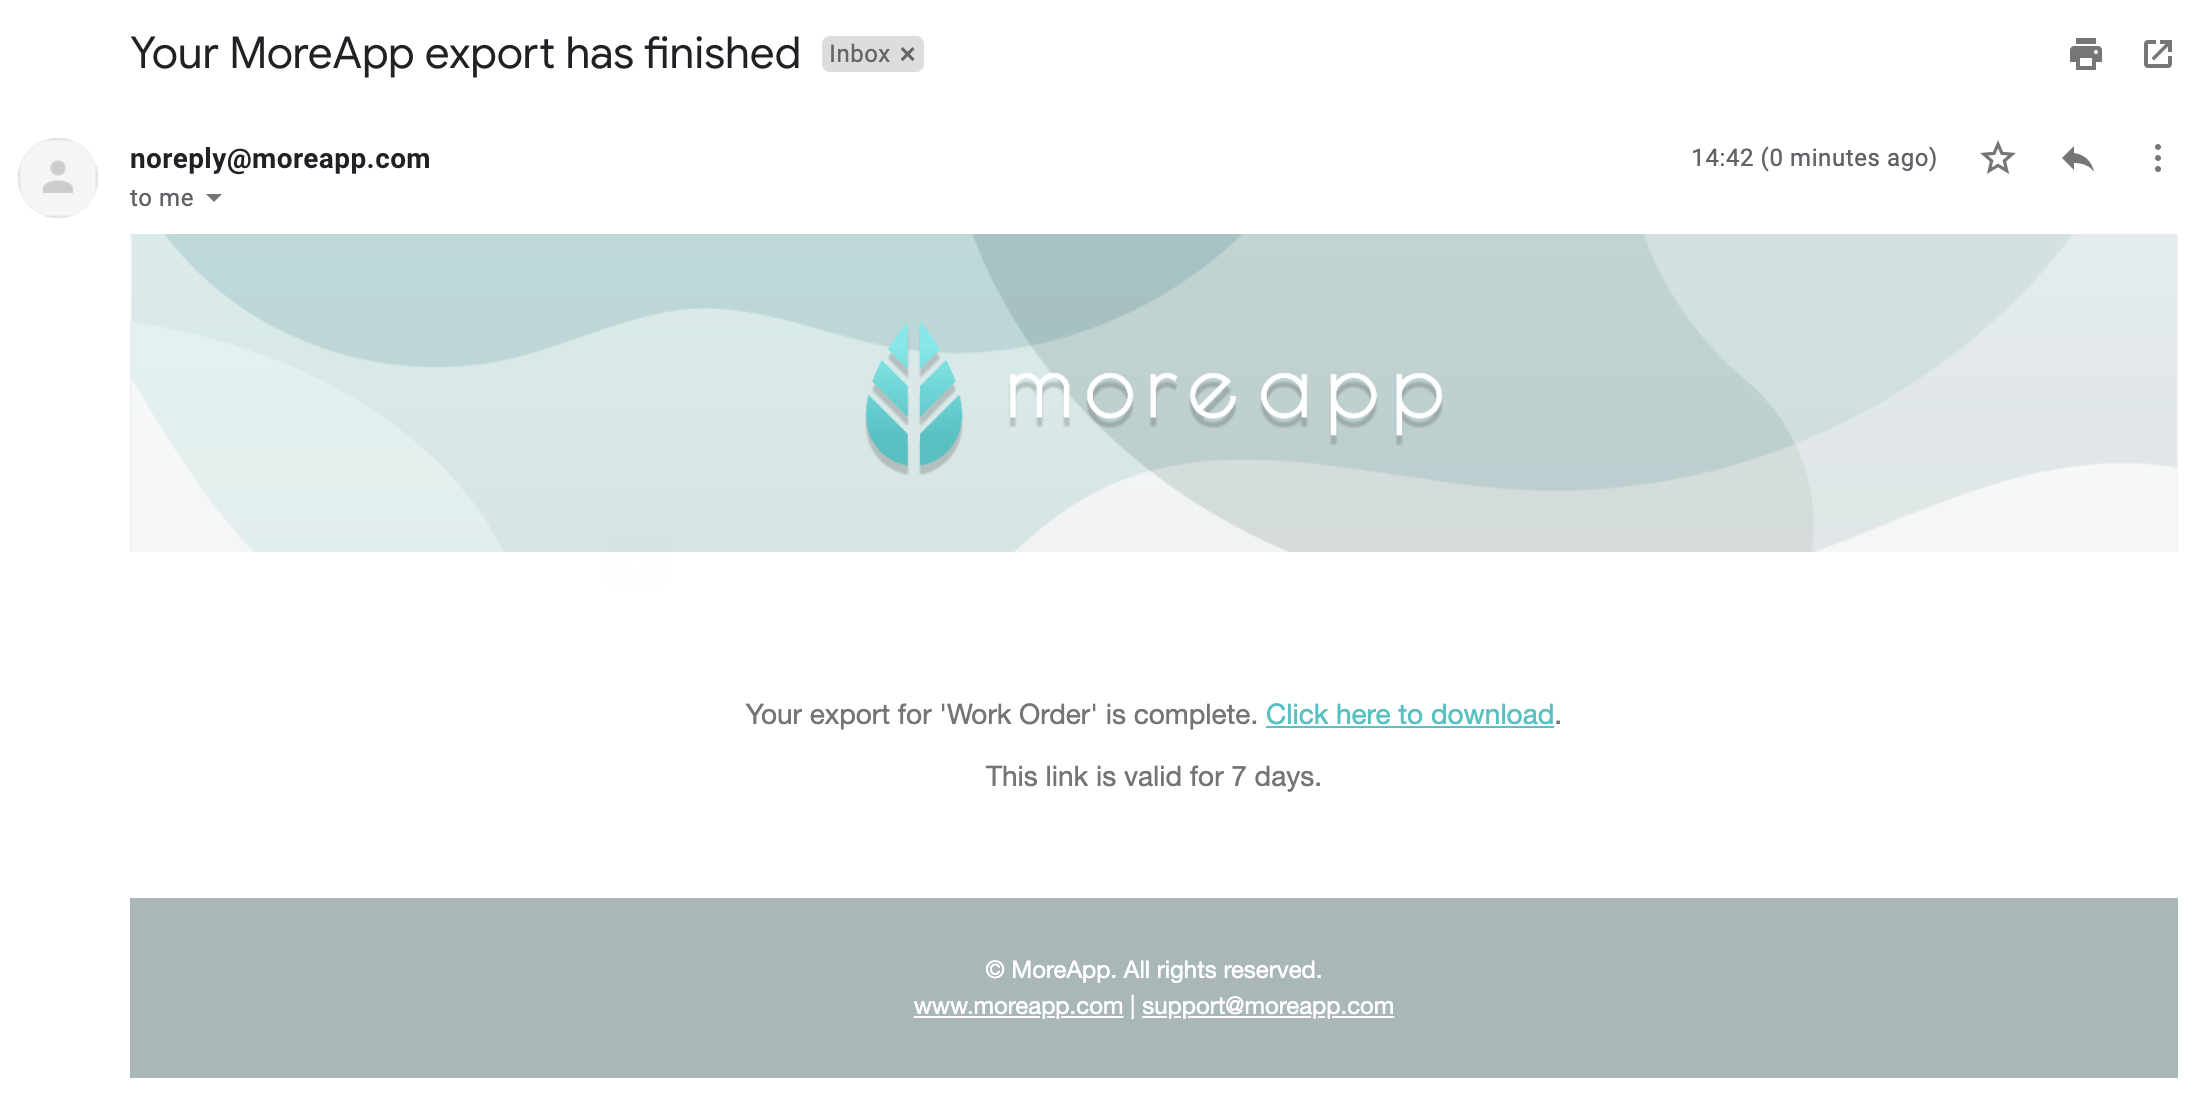
Once the export has finished, you will receive an email in your mailbox. Your export is ready to download! Click on the link to Save your file.
Note:
-
If you have not received the email in your mailbox, you may find it in your Spam folder.
-
The link stays valid for 7 days.
-
The file will be downloaded as a zip file with an Excel file and separate folders containing the files per submission.
4. Excel file
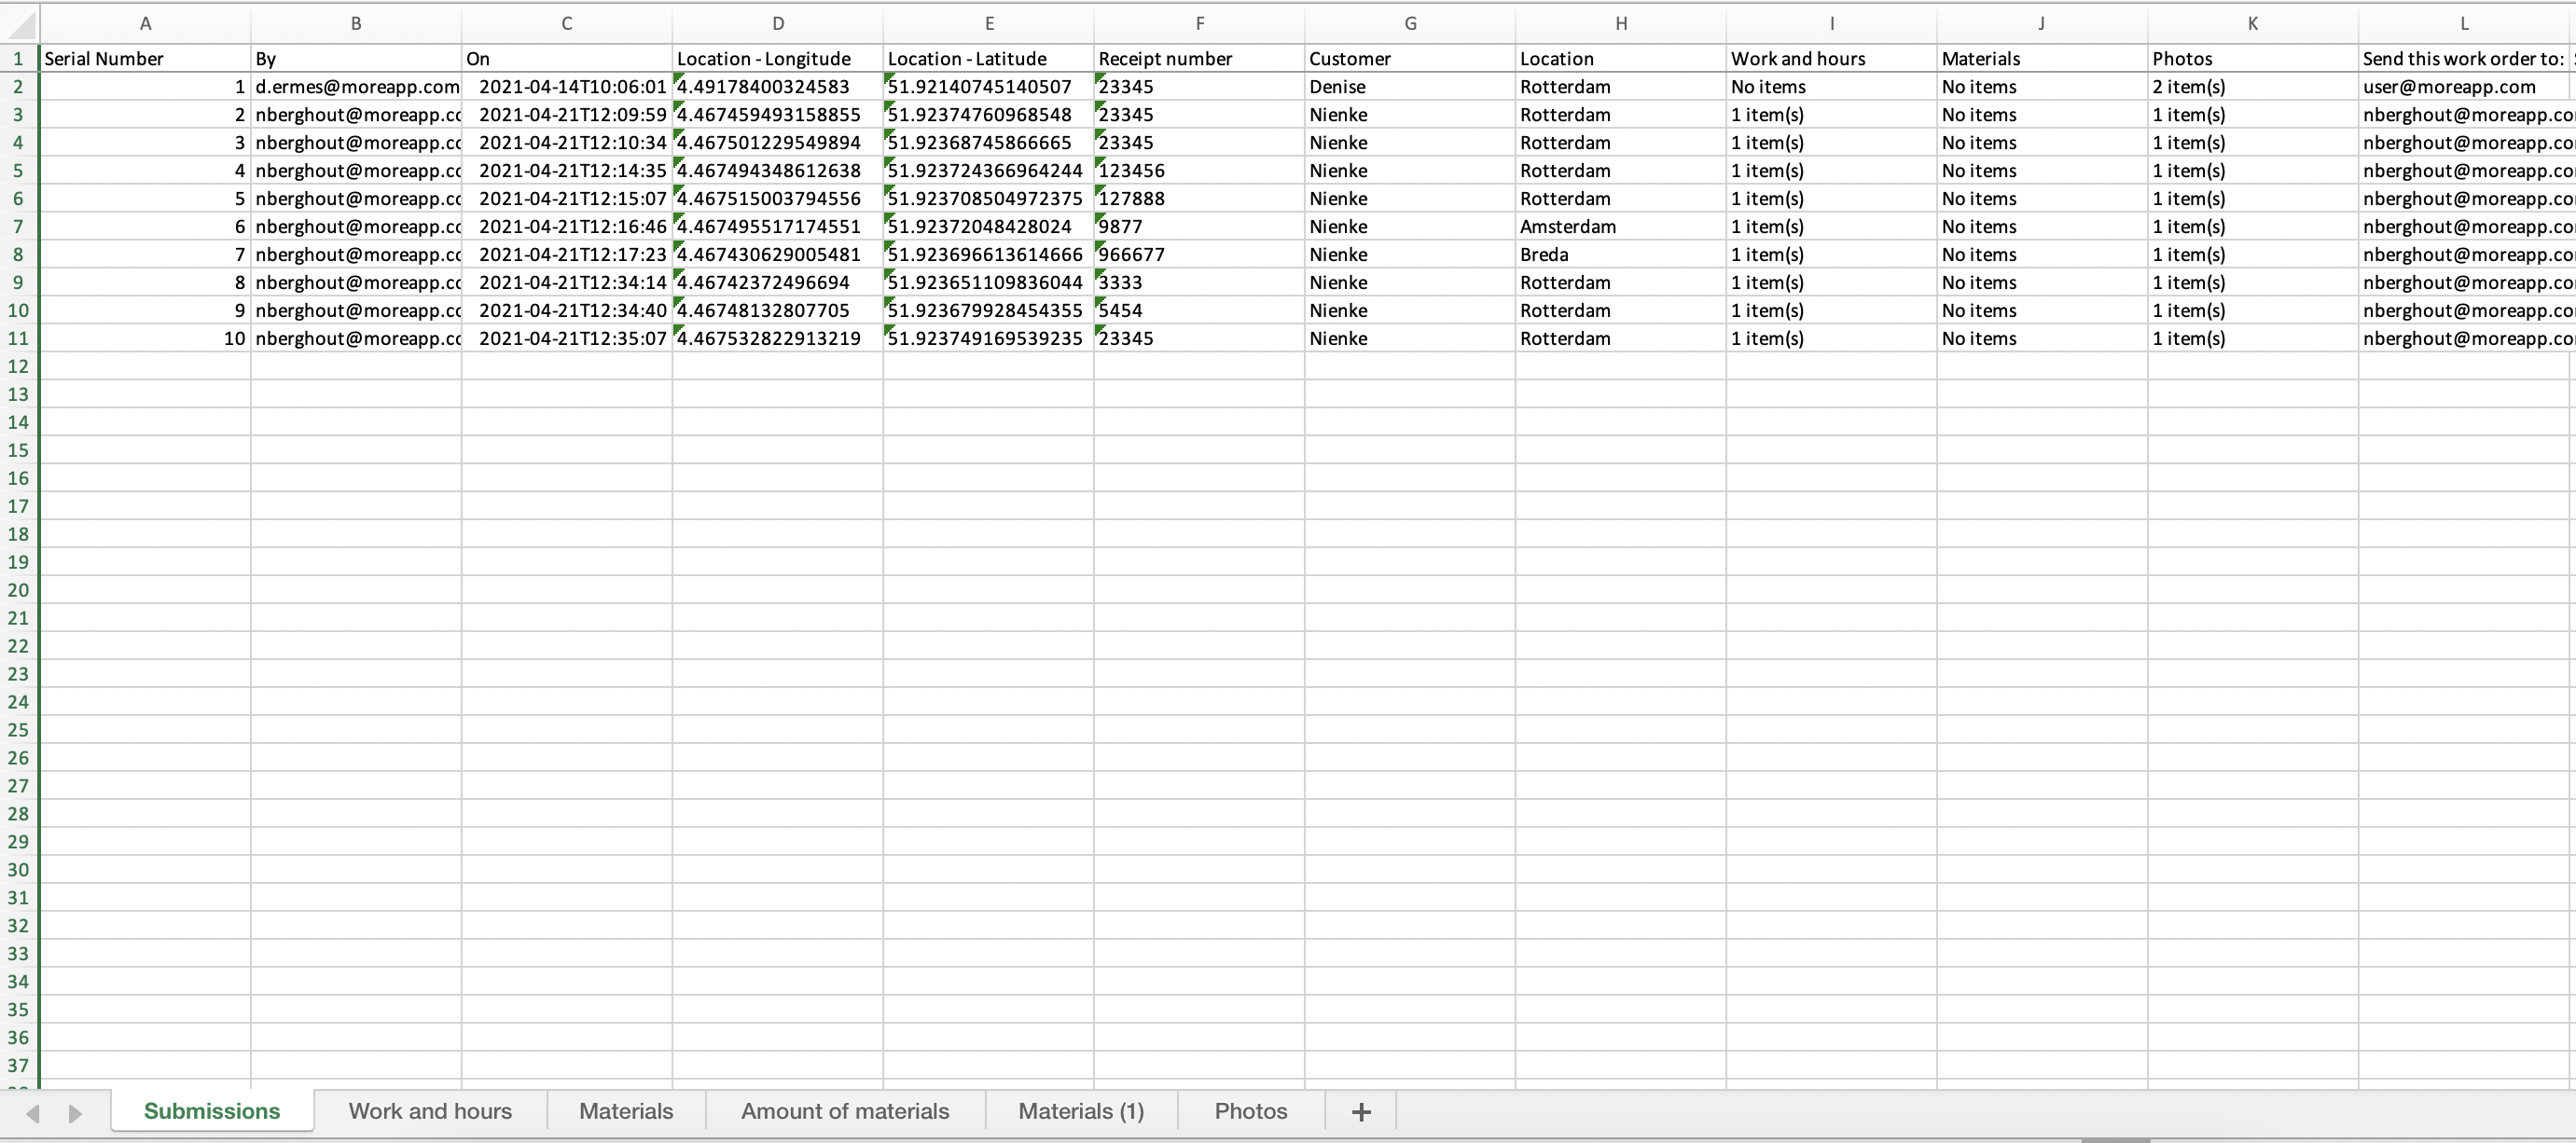
When opening the Excel file, you will find the submission data. The columns follow the order of the widgets in the form. Keep in mind that subform data is visible in separate sheets.
Note: Widgets that contain files, such as the Photo- or Signature-widgets, have a clickable link in the Excel file.
5. Removed widgets
When a widget is removed from the form, it will not be shown in the Submissions tab or the export. You can get the data back by adding the widget again anywhere in your form with the same name of the widget (Label).
6. Congratulations!
You have successfully exported your data to an Excel file!
Want to stay up to date with our latest tutorials? Go to YouTube and hit the Subscribe button!